
Quick Answer: Which Shoe Rack Fits Your Closet?
Finding the ideal shoe rack for your closet depends on three primary factors: your available depth, your wall structure, and whether you own or rent your home. In Singapore’s compact residential spaces, selecting the right storage system is crucial to keeping your entryway or bedroom organized and free of clutter.
To make an immediate decision, you can evaluate your space using this straightforward framework:
- Choose a wall-mounted shoe rack if you have a narrow closet, a shallow entryway, or unused wall space behind a door or above a laundry hamper. This option is perfect for clearing floor space and keeping your shoes off the ground, making floor cleaning effortless.
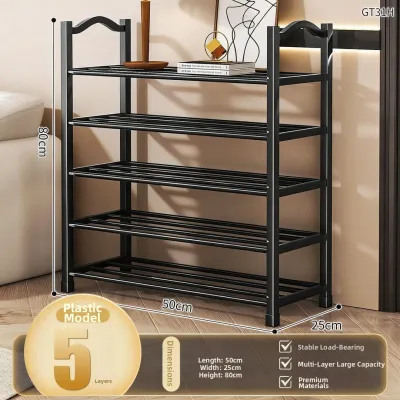
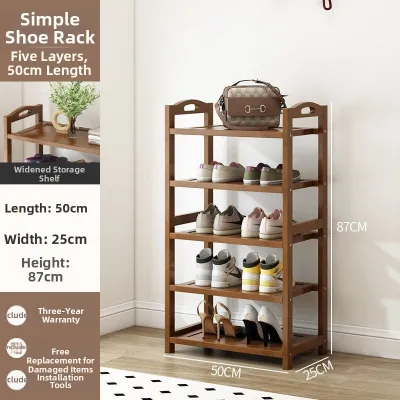
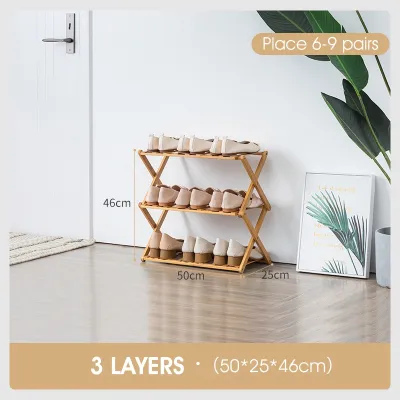
- Choose a freestanding shoe rack if you are renting your home, prefer a highly flexible layout, or have an open wardrobe system. These units require zero drilling, can be relocated easily, and are available in a wide variety of materials, from natural bamboo to powder-coated steel.
- Choose a pull-out shoe rack if you have deep built-in wardrobes, custom carpentry, or a walk-in closet where you want to keep your footwear hidden and dust-free. This system maximizes deep cabinet interiors by allowing you to slide the entire rack forward for easy access.
Ultimately, the best choice is one that matches your physical space constraints and structural limitations. Renters will naturally gravitate toward freestanding options to avoid drilling into walls, while homeowners with custom built-ins can invest in integrated sliding mechanisms for a seamless, high-end look.
Products mentioned in this guide
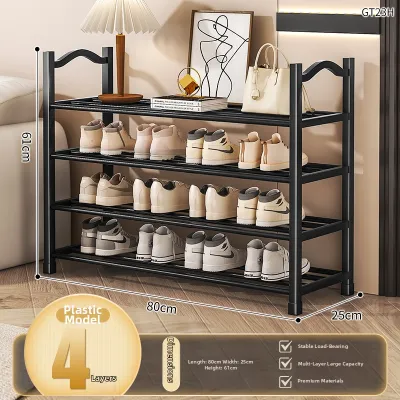
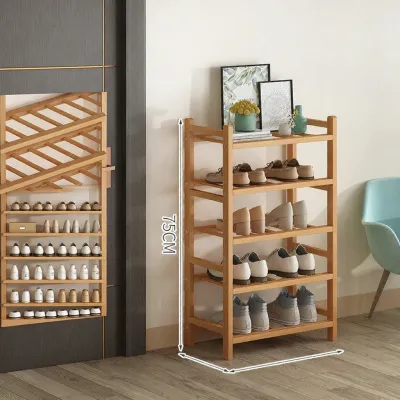
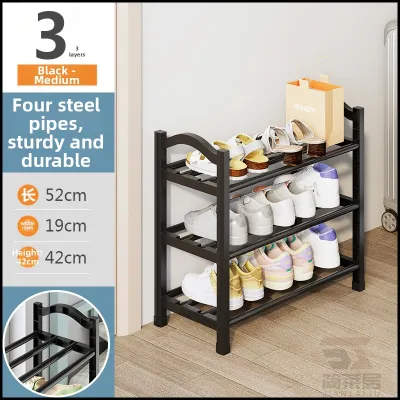
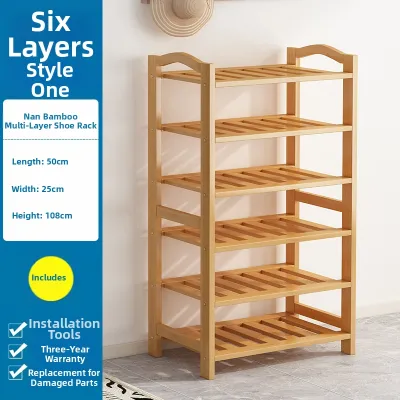

Prices are valid at publication and may change. Please refer to the product page for the latest price.
Assessing Your Closet Configuration First
Before purchasing any shoe rack, taking precise measurements of your existing closet or wardrobe space is essential to prevent costly buying mistakes. Many homeowners buy organizers based on visual appeal, only to find that the unit blocks the wardrobe doors or fails to accommodate their footwear.

Begin by measuring the key dimensions of your closet interior:
- Interior Depth: Measure from the back wall to the inside of the door frame. A standard wardrobe typically has an interior depth of 55 to 60 cm, which is ideal for pull-out systems. Shallow closets of 30 to 35 cm are better suited for flat shelves or wall-mounted brackets.
- Interior Width: Measure the clear horizontal space between the side panels or walls. Ensure you account for any protruding hinges, door frames, or sliding door tracks that could reduce the usable width.
- Interior Height: Determine the vertical distance available for shoe storage. This helps you decide how many tiers or shelves you can stack without blocking other closet features like hanging rods or drawers.
- Door Clearance: If your wardrobe has hinged doors, measure the swing path to ensure the doors can open fully without hitting the shoe storage unit. For sliding doors, identify the overlap zone where access might be partially restricted.
Next, identify any potential “dead spaces” within your closet layout. The area beneath hanging clothes, the space behind a walk-in closet door, or awkward corners are prime spots for shoe storage. However, you must check for floor obstructions such as baseboards, floor molding, or raised wardrobe bottom tracks that could prevent a freestanding rack from sitting flush against the wall.
Finally, measure your actual footwear collection. Do not rely on standard shoe size charts, as bulky sneakers, high heels, and boots have vastly different physical footprints. Measure your longest pair of shoes from heel to toe to establish the minimum shelf depth required. Likewise, measure the height of your tallest high heels or ankle boots to determine the necessary clearance between shelves. If you plan to store multiple pairs side-by-side, measure the width of three or four pairs together to calculate the ideal shelf width, ensuring you do not waste valuable horizontal space.
Wall-Mounted Shoe Racks: Maximizing Vertical and Dead Space
Wall-mounted shoe racks are excellent space-saving solutions that excel in narrow closets, shallow walk-in wardrobes, or on the unused wall space behind closet doors. By lifting your footwear off the ground, these racks free up valuable floor area, making it much easier to sweep, vacuum, or mop your closet floor. This open-air configuration also promotes excellent ventilation, which is particularly beneficial in Singapore’s humid climate, where trapped moisture in closed cabinets can lead to mold growth on leather and canvas shoes.
The advantages of wall-mounted systems are clear:
- Floor Clearance: Keeping the floor clear creates a more spacious, minimalist look and simplifies home cleaning routines.
- Vertical Customization: You can mount these racks at any height, allowing you to utilize the high-up vertical space near the ceiling or the low-down space below short-hanging garments.
- Visual Accessibility: Your shoes are displayed clearly, making it quick and easy to select a pair when dressing.
However, wall-mounted shoe racks do come with specific limitations. Once installed, their position is fixed, making it difficult to reconfigure your closet layout without leaving unsightly drill holes in your walls. Furthermore, their storage capacity and stability are strictly limited by the strength of the wall and the quality of the mounting hardware used.
To ensure a safe installation, you must identify the wall material in your closet. In Singapore, bedroom partition walls are frequently constructed from plasterboard or drywall, which cannot support heavy loads without specialized hollow-wall anchors, such as toggle bolts or spring toggles. If you are mounting the rack into a solid concrete structural wall or a brick wall—common in HDB apartments—you must use a hammer drill, masonry drill bits, and high-quality plastic wall plugs (such as Fischer plugs) to secure the screws. Always check the manufacturer’s weight ratings and avoid overloading the shelves, as a collapsing wall rack can cause significant damage to your walls and your footwear.
Freending Shoe Racks: Flexibility for Open and Modular Closets
For those who value flexibility, modularity, or are living in rental properties where drilling is strictly prohibited, the freestanding shoe rack is the most practical choice. These independent storage units can be placed inside walk-in closets, positioned at the bottom of a standard wardrobe, or lined up along an open closet system. Because they require no permanent installation, you can easily move them to another room or take them with you when you relocate.
Freestanding racks are available in several common styles, each catering to different storage needs:
- Tiered Shelving: Classic open-slat shelves made of wood, bamboo, or metal that allow air to circulate freely around your shoes.
- Stackable Cubes: Modular plastic or acrylic boxes that can be configured horizontally or vertically to fit your exact closet dimensions. These are excellent for keeping shoes dust-free while allowing you to see the contents clearly.
- Shoe Benches: Sturdy, low-profile units that combine shoe storage shelves with a comfortable seat on top, making them ideal for larger walk-in closets where you want a dedicated spot to sit and put on your footwear.
The primary benefit of a freestanding shoe rack is its sheer convenience and ease of assembly. They are generally highly affordable, widely available, and can be set up in a matter of minutes without specialized tools. However, they do consume valuable floor space, which can make a small closet feel cramped. If left unorganized, open tiered shelves can also look visually cluttered, especially if you have a large, diverse collection of footwear.
When opting for a tall, multi-tiered, or stackable freestanding unit, stability becomes a critical consideration. Lightweight plastic or thin metal frames can easily wobble or tip forward when you pull a heavy pair of shoes from the top shelf. To prevent this, place your heaviest footwear, such as work boots or leather dress shoes, on the lowest shelves to lower the unit’s center of gravity. If you are stacking modular cubes, ensure they are securely clipped together using the manufacturer’s joining pieces, and consider placing them against a solid wall or wardrobe side panel for additional lateral support.
Pull-Out Shoe Racks: Integrating with Built-In Wardrobes
Pull-out shoe racks represent the pinnacle of custom closet organization, offering a sleek, integrated look that fits seamlessly inside deep built-in wardrobes and custom carpentry. Utilizing heavy-duty drawer slides, these racks pull forward out of the cabinet, bringing your entire shoe collection into full view and easy reach. This mechanism is particularly effective for deep closets (55 cm or more) where shoes stored at the very back would otherwise be difficult to see or retrieve.
When planning a pull-out shoe rack installation, you must choose between two main hardware mounting styles:
- Side-Mount Slides: These tracks are mounted to the interior side panels of your wardrobe. They offer excellent stability and high weight capacities but require highly precise cabinet interior widths to ensure the slides operate smoothly without binding.
- Bottom-Mount Slides: These tracks are fixed to the floor of the wardrobe or an intermediate shelf. They are ideal for retrofitting into existing cabinets because they are less sensitive to minor variations in cabinet width, though they may slightly reduce the usable vertical clearance.
The advantages of pull-out systems are unmatched in terms of convenience and aesthetics. They keep your footwear neatly hidden behind closed doors, protecting your shoes from household dust and direct sunlight, which can fade colors and degrade materials over time. By sliding out, they eliminate the need to bend down or crawl into the depths of a dark closet to find a matching pair.
However, pull-out shoe racks require a significant upfront investment and meticulous planning. They are generally much more expensive than wall-mounted or freestanding alternatives and typically require professional installation or advanced DIY carpentry skills. You must ensure that the cabinet interior is perfectly square; even a few millimeters of misalignment can cause the sliding tracks to stick, squeak, or wear out prematurely. Additionally, you must allow for extra depth clearance inside the cabinet to accommodate the natural overhang of shoe toes and heels, ensuring the wardrobe doors can close fully without pressing against the retracted rack.
Comparison Matrix: Matching Rack Type to Closet Setup
To help you visualize how these three shoe rack types compare across key practical dimensions, refer to the comparison matrix below. This table evaluates each option based on its ideal closet setup, space efficiency, installation effort, and long-term flexibility.
| Rack Type | Best Closet Configuration | Space Efficiency | Installation Effort | Flexibility |
|---|---|---|---|---|
| Wall-Mounted | Shallow closets, narrow entryways, behind doors | High (clears floor space completely) | Moderate (requires drilling and wall anchors) | Low (fixed position once installed) |
| Freestanding | Walk-in closets, open wardrobes, rental spaces | Moderate (consumes floor footprint) | Low (simple assembly, no drilling) | High (easy to move or reconfigure) |
| Pull-Out | Deep built-in wardrobes, custom carpentry | High (maximizes deep cabinet interiors) | High (requires precise tracks or carpentry) | Low (custom-fitted to specific cabinet) |
When using this matrix to make your decision, cross-reference your specific closet constraints with the strengths of each rack type. For example, if you live in a rented apartment in Singapore with drywall partitions, a freestanding rack offers the perfect balance of low installation effort and high flexibility. Conversely, if you are designing a brand-new built-in wardrobe for your home, incorporating a custom pull-out system will maximize your deep cabinet space while keeping your bedroom looking clean and clutter-free.
Installation, Safety, and Weight Considerations
Regardless of the shoe rack type you select, proper installation and safety practices are vital to protect your home, your family, and your footwear collection. Overloaded or poorly secured racks can collapse, leading to damaged walls, broken shoes, and potential injuries, particularly in households with active children or curious pets.
When installing wall-mounted units, always match your mounting hardware to the specific wall material. Never use standard drywall screws directly into plasterboard; instead, use heavy-duty toggle bolts that spread the load behind the wall panel. For concrete or brick walls, ensure you drill to the correct depth and use expanding masonry plugs that grip the concrete securely. If you are unsure of your wall’s composition, consult a professional handyman or contractor before drilling.
For tall freestanding units—especially those exceeding one meter in height—using anti-tip kits or wall straps is highly recommended. These simple safety devices anchor the top of the rack to the wall, preventing it from tipping forward if someone accidentally pulls on it or tries to climb it. This is a crucial precaution for families with young children who might view a tiered rack as a climbing ladder.
Finally, always practice smart weight distribution. Place your heaviest shoes, such as leather boots, platform heels, and heavy sneakers, on the lowest shelves to lower the overall center of gravity, significantly improving the stability of freestanding units and reducing the structural strain on wall-mounted brackets. Always refer to the manufacturer’s specified weight limits and avoid stacking shoes double-thick on shelves that are not designed to support the extra weight.
Frequently Asked Questions (FAQ)
Can I install a pull-out shoe rack in an existing wardrobe?
Yes, you can retrofit a pull-out shoe rack into an existing wardrobe, but it requires careful planning and precise measurements. First, verify that your wardrobe interior has sufficient depth—typically at least 55 cm—to accommodate the sliding hardware and your shoes. You must measure the exact interior width at multiple points (front, middle, and back) to ensure the cabinet is perfectly square. If the cabinet walls are warped or out of alignment, the sliding tracks will not glide smoothly. For the best results, you may want to purchase pre-assembled pull-out drawer inserts designed for standard wardrobe sizes, or consult a professional carpenter to custom-fit the sliding mechanisms.
How much depth does a closet need for a standard shoe rack?
A standard closet needs a minimum interior depth of 30 cm to accommodate a flat, horizontal shoe rack for standard adult shoes. Most adult shoes measure between 22 and 28 cm in length, so a 30 cm shelf provides just enough clearance for the doors to close without crushing the toes or heels. If you have larger footwear, such as men’s high-top sneakers or boots, you may need a shelf depth of 35 cm or more. If your closet is extremely shallow (under 25 cm), you can opt for angled shoe shelves or wall-mounted pocket organizers, which store shoes at a downward angle to drastically reduce the required depth footprint.
Community discussion
Share your experience or ask a question. Comments are reviewed before publication.