
Choosing between a wall-mounted and a freestanding clothing rack is a pivotal decision when designing an efficient closet or bedroom layout. The ideal choice depends on your home’s structural limitations, your rental status, and how much floor space you can afford to dedicate to storage. While wall-mounted systems excel at maximizing tight floor plans by utilizing vertical space, freestanding units offer unmatched mobility and zero-damage installation. Balancing these factors ensures your wardrobe remains organized, accessible, and safe.
Evaluating Space and Layout Impact
In compact urban apartments, floor space is premium real estate. A freestanding rack requires a dedicated footprint, which can restrict walking paths or interfere with door swing areas for wardrobes and bedrooms. If you have a narrow corridor or a small bedroom, a freestanding unit might make the room feel cramped and disrupt the natural flow of movement.
Wall-mounted racks lift your storage off the ground, leaving the floor completely clear. This clearance makes it easier to clean, vacuum, or store low-profile items like shoes and storage boxes underneath. It also allows you to utilize the full height of your walls, extending storage up to the ceiling. However, you must measure your ceiling height and ensure that high shelves remain reachable without risking safety.
Products mentioned in this guide
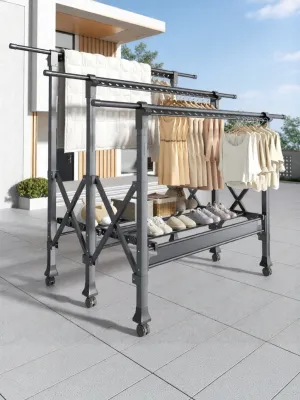
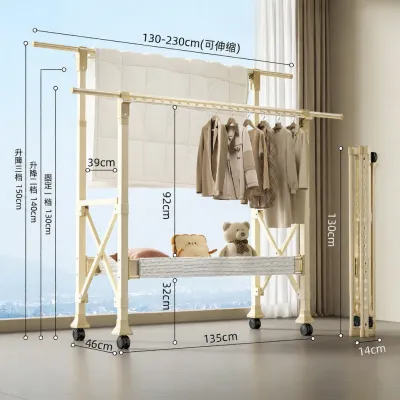
Prices are valid at publication and may change. Please refer to the product page for the latest price.
Freestanding racks, especially those with heavy metal frames or built-in drawers, can dominate a room visually. They create a distinct boundary and can make a small space feel smaller. In contrast, wall-mounted racks with open shelving tend to blend into the wall, creating a lighter, more integrated aesthetic. This open look can make a room feel larger, though it requires you to keep your hanging clothes neatly organized to avoid a cluttered appearance.
In humid tropical climates, airflow is another critical spatial factor to consider. Tightly packed clothes on a rack can trap moisture, leading to musty odors or mold growth. Wall-mounted racks, by keeping clothes elevated and away from damp floor corners, naturally promote better air circulation. Conversely, freestanding racks offer the unique advantage of being easily repositioned directly into the path of a fan or air conditioner to help keep garments fresh.
Checking Installation, Stability, and Wall Requirements
Before purchasing a wall-mounted rack, you must identify your wall type. In many modern apartments, internal partition walls are made of drywall, while structural perimeter walls are solid concrete or masonry. Mounting a heavy clothing rack directly onto drywall without locating the wooden or metal studs behind it can lead to catastrophic wall failure. Concrete walls require a rotary hammer drill and masonry wall plugs, which provide an incredibly secure hold but require significant physical effort to install.

Clothing is surprisingly heavy; a linear meter of tightly packed clothes can easily weigh 20 to 30 kilograms. Wall-mounted systems rely entirely on the shear strength of the fasteners and the structural integrity of the wall. You must verify the manufacturer’s specified weight limits and distribute the load evenly across all brackets. Overloading a single section can pull the anchors out of the wall, causing extensive damage to your home and wardrobe.
If you are renting your home, drilling multiple large holes into concrete or drywall is often a breach of the tenancy agreement. Restoring these walls to their original condition when moving out can be time-consuming and costly, potentially impacting your security deposit. Freestanding racks are the ultimate renter-friendly solution, requiring zero drilling and leaving no permanent marks on the property.
While freestanding racks avoid wall damage, they come with their own stability challenges. A narrow base combined with heavy garments hung high up can create a high center of gravity, making the unit prone to tipping. When selecting a freestanding rack, check the base width and depth to ensure it has a stable footprint. Look for models with wide bases, sturdy joints, and built-in leveling feet to compensate for uneven flooring.
Some homeowners consider floor-to-ceiling tension-mounted poles as a middle ground. While these systems do not require drilling, they still rely heavily on vertical stability and can slip if your ceiling or floor flexes under load. For absolute safety, a traditional freestanding rack with a wide, self-supporting base remains the most reliable non-permanent option.
Planning for Flexibility and Adjustability
Life transitions, room redecorating, or moving to a new home require flexible furniture. A freestanding clothing rack can be emptied, lifted, and moved to another room in minutes. If you relocate to a new apartment, you can pack the rack flat or transport it whole without worrying about compatibility with the new walls. Wall-mounted racks, however, require a tedious uninstallation process, leaving behind holes that must be patched and painted, and they may not fit the layout of your next home.
Many wall-mounted systems feature standards or tracks that allow you to adjust shelf heights, add extra hanging rods, or clip on wire baskets as your storage needs evolve. This modularity is highly beneficial if your wardrobe changes over time. Freestanding racks are generally less adjustable; while some offer height-adjustable rods or removable shelves, their overall configuration is largely fixed once assembled.
This adaptability also makes wall-mounted systems an excellent long-term investment for growing families. A system installed in a child’s room can easily transition from holding small outfits to accommodating adult-sized clothing simply by raising the hanging rods and adjusting the shelving heights. With a freestanding rack, you are more likely to need an entirely new piece of furniture as your child’s storage needs expand.
Even in consistent climates, you may still need to store heavy winter coats and travel gear between overseas trips. A modular wall-mounted system allows you to adjust shelf spacing to accommodate bulky luggage or seasonal storage boxes. With a freestanding rack, you are limited by the fixed frame, meaning bulky items must often be stored elsewhere to avoid overcrowding the main hanging rod.
Estimating Costs and Tool Requirements
Installing a wall-mounted rack requires an arsenal of tools that the average homeowner may not own. You will need a reliable power drill (or a rotary hammer drill for concrete), a spirit level to ensure straight shelves, a stud finder for drywall, a tape measure, a pencil, and safety gear like protective eyewear and a dust mask. Purchasing these tools can significantly increase the initial setup cost if you do not already have them in your toolbox.
If you are uncomfortable drilling into your walls or lack the necessary tools, hiring a professional handyman is highly recommended. Professional installation ensures the rack is mounted safely and level, but it adds an extra labor cost to your project. Additionally, you must factor in the future cost of wall repair, plastering, and paint matching if you ever decide to remove the wall-mounted system.
Freestanding racks are typically complete, self-contained units that require only basic hand tools (often included in the box) for assembly. This makes their upfront cost highly predictable. While high-end freestanding wardrobes can be expensive, basic metal garment racks are highly affordable. Wall-mounted systems can start cheap, but the cost can quickly escalate as you purchase individual components, tracks, brackets, shelves, and specialized heavy-duty wall anchors.
Material durability also plays a major role in long-term value. Cheap freestanding racks often utilize plastic connectors at the joints, which can degrade, warp, or crack over time under heavy loads or UV exposure from nearby windows. Investing in a solid steel wall-mounted system or a heavy-duty metal-jointed freestanding rack prevents the need for frequent replacements, saving you money in the long run.
Decision Framework: Which Rack Should You Choose?
Choose wall-mounted if you own your home, have solid concrete or stud-backed walls, and need to maximize every square centimeter of a compact room. This option is perfect for creating a permanent, walk-in wardrobe feel that keeps your floor space completely clear and open.
Choose freestanding if you are renting, live in a temporary space, or frequently like to rearrange your room layout. It is also the safer choice if your walls are uneven, made of fragile plaster, or if you want an instant storage solution that requires no specialized tools or professional installation.
Verify first if you are unsure about your wall construction or landlord rules. Always check the manufacturer’s weight ratings and ensure you have the correct anchors before attempting any wall installation. If you plan to store exceptionally heavy items, a heavy-duty freestanding rack with a wide base may offer greater peace of mind than a poorly anchored wall unit.
Frequently Asked Questions (FAQ)
Can I install a wall-mounted rack on a drywall partition?
Yes, but you must exercise extreme caution. Drywall alone cannot support the weight of a fully loaded clothing rack. You must locate the wooden or metal studs behind the drywall using a stud finder and secure the main mounting tracks directly into them. If the stud spacing does not align with your rack design, you must use heavy-duty hollow-wall anchors, such as toggle bolts, which are specifically rated for high shear loads. Never use standard plastic wall plugs in drywall for heavy storage. If you are unsure of the wall’s load capacity or cannot locate the studs, consult a qualified handyman to prevent structural damage.
How do I prevent a freestanding rack from tipping over?
Preventing a freestanding rack from tipping starts with smart loading. Always place your heaviest items, such as shoes, storage boxes, and heavy bags, on the bottom shelf or base of the rack to lower its center of gravity. Avoid overloading the top shelves or hanging heavy coats exclusively on one side. When assembling the rack, ensure all joints are tightly fastened and the unit sits level on the floor. If the manufacturer provides an anti-tip kit or wall tether, install it immediately—especially if you have young children or pets who might pull on the hanging garments.
Community discussion
Share your experience or ask a question. Comments are reviewed before publication.