
A thin shoe cabinet is an exceptionally practical solution for narrow entryways, corridors, and compact foyers where a standard-sized cabinet would block the walkway. However, determining how many pairs of shoes these slim organizers can actually hold is rarely as simple as reading the manufacturer’s product description. Many brands advertise maximum capacities based on small, flat footwear, leaving homeowners frustrated when their actual shoe collections do not fit.
To make an informed purchase, you must understand how the cabinet’s physical dimensions, internal mechanisms, and shelf configurations interact with your specific footwear. By analyzing these design elements and performing a few straightforward calculations, you can determine the true capacity of any slim shoe cabinet before committing to a purchase. This ensures your entryway remains organized and free of tripping hazards.
Understanding How Thin Cabinet Designs Affect Shoe Capacity
Standard shoe cabinets typically feature a depth of 30cm to 35cm, which allows most adult shoes to sit flat on horizontal shelves. In contrast, a thin shoe cabinet is specifically engineered with a shallow profile, usually ranging from 15cm to 24cm in depth. Because this depth is shorter than the length of an average adult shoe, these cabinets must employ creative internal layouts to store footwear without protruding into the room.
Products mentioned in this guide
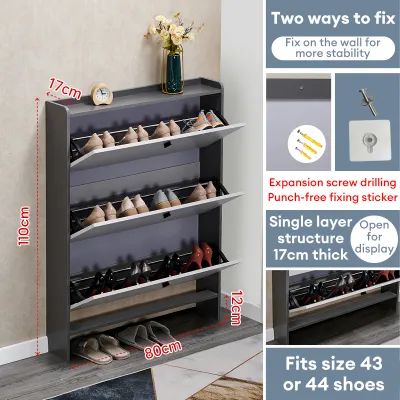
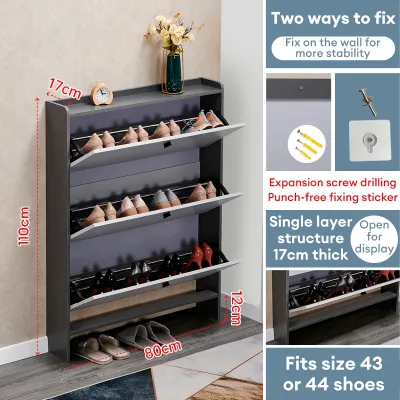
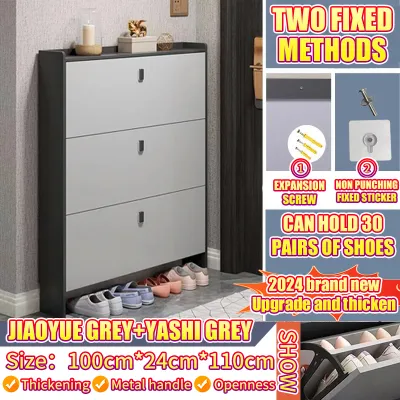
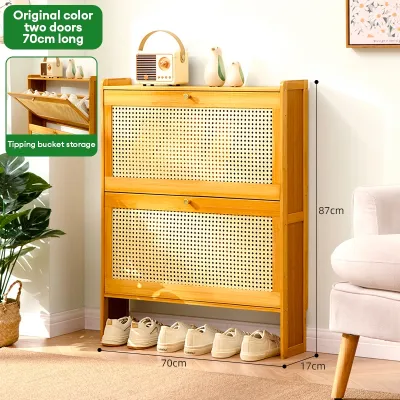
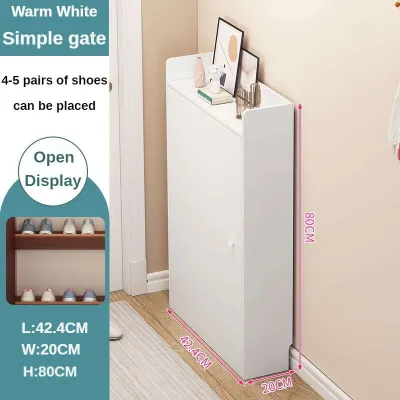
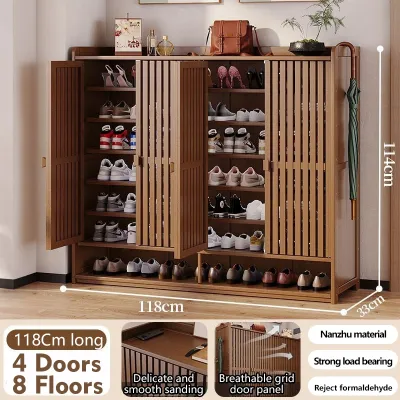
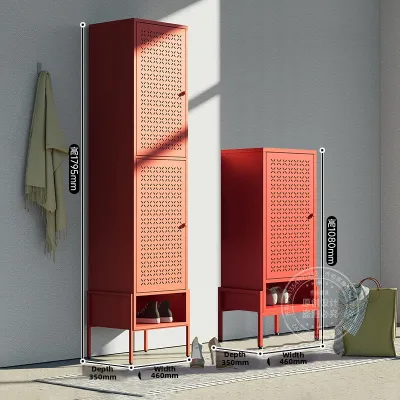
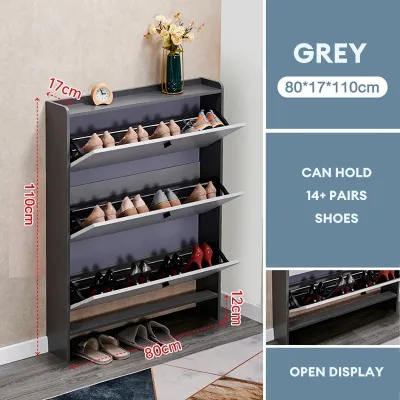
Prices are valid at publication and may change. Please refer to the product page for the latest price.
The most common design for ultra-slim profiles is the tilt-out, or tipping bucket, mechanism. In these cabinets, shoes are inserted vertically into pockets attached to a hinged door that pivots outward. When closed, the shoes stand almost completely upright, allowing the cabinet to maintain a depth of as little as 15cm. While highly space-efficient, this design strictly limits the thickness and height of the shoes you can store, as bulky soles or high heels can prevent the drawer from closing.
Another design variation uses shallow, flat shelves that are permanently slanted downward. This slant allows the shoes to sit at an angle, reducing the required depth of the cabinet to around 20cm to 24cm while keeping the shoes visible. While slanted shelves accommodate a wider variety of shoe shapes than tilt-out drawers, they still restrict the vertical clearance between shelves, meaning taller footwear may require you to adjust or remove shelves entirely.
The internal width of the cabinet is the primary factor determining how many pairs can sit side-by-side on a single tier. A cabinet with a generous width of 80cm will naturally hold more pairs per row than a compact 50cm model, but you must also consider the presence of internal dividers. Fixed vertical dividers can organize your shoes but often create dead space where a single shoe might fit, but a full pair cannot.
How to Calculate the Actual Pair Count for Your Footwear
To calculate the realistic capacity of a thin shoe cabinet, you must start by measuring your own footwear rather than relying on standard shoe sizes. Grab a tape measure and measure the widest part of the sole on your most frequently worn pairs. For instance, slim flat sandals or canvas plimsolls might only measure 8cm across, whereas chunky running shoes, wide-fit sneakers, or boot soles can easily exceed 11cm in width.

Once you have these measurements, compare them to the internal width of the cabinet’s shelves. If a cabinet has an internal shelf width of 60cm, and your average shoe width is 10cm, a single shelf can accommodate exactly six individual shoes, which equals three complete pairs. However, if your shoes average 11cm in width, those same six shoes will require 66cm of space, forcing you to either squeeze them in—potentially scuffing the material—or reduce the shelf capacity to just two pairs, leaving a 16cm empty gap.
Next, evaluate the vertical clearance of the shelves or the depth of the tilt-out pockets. Standard flat shoes and low-top sneakers require approximately 10cm of vertical clearance to slide in and out easily. If you wear high heels, platform shoes, or mid-top boots, these items can easily require 15cm to 20cm of height. In a tilt-out cabinet, a shoe that is too tall or thick will hit the back of the compartment, preventing the drawer from shutting flush.
Finally, you must apply a realistic deduction for internal hardware, hinges, and frame thickness. Tilt-out cabinets rely on plastic or metal pivot brackets mounted directly to the inner side walls of the cabinet frame. These brackets and their associated screws often protrude 2cm to 3cm into the storage compartment on both sides. This reduces the actual usable width of the drawer, meaning a shelf that appears wide enough on paper may lose enough space to eliminate one entire shoe from the row.
Space Planning and Safety Checks for Slim Shoe Storage
Successful installation of a thin shoe cabinet requires precise space planning to ensure it fits your home’s physical layout. Begin by measuring the exact width and height of the wall where you plan to place the cabinet. Do not forget to account for baseboards or skirting boards running along the bottom of the wall. Many slim cabinets are designed to sit completely flush against the wall; if your skirting board prevents this, the cabinet will tilt forward at the top, creating an unstable gap unless the unit features a built-in baseboard cutout.
You must also calculate the clearance required for the cabinet doors or tilt-out drawers to open fully. A typical tilt-out drawer extends outward by 25cm to 35cm when fully opened. Ensure that this extension does not obstruct high-traffic walkways, swing paths of nearby room doors, or access to light switches. Furthermore, leave at least 50cm of clear floor space in front of the fully opened cabinet so you can stand comfortably while selecting or putting away your shoes.
Because thin shoe cabinets have an exceptionally shallow footprint and a high center of gravity, they present a significant tipping hazard when loaded with heavy footwear. This risk increases dramatically when multiple drawers are opened simultaneously, shifting the weight forward. Therefore, wall anchoring is not optional; it is a mandatory safety step. You must secure the cabinet to the wall using appropriate anti-tip brackets and wall anchors suitable for your specific wall material, whether it is concrete, brick, or drywall.
Additionally, consider the load capacity of the cabinet shelves and hinges. While shoes may seem light individually, a fully loaded cabinet containing 12 to 18 pairs of heavy leather shoes or athletic sneakers can easily weigh over 15 kilograms. Ensure that the cabinet’s mounting hardware and wall anchors are rated to support this combined weight, especially if you are installing a wall-mounted floating model that does not rest on the floor.
Deciding If a Thin Cabinet Fits Your Household's Needs
Before purchasing a slim shoe cabinet, compare its calculated real-world capacity against the number of shoes your household actually uses on a daily basis. If a family of three requires quick access to four pairs of shoes each, you need a reliable storage solution for 12 pairs. If your calculations show that a thin cabinet will only comfortably hold 8 pairs of your specific shoe sizes, you must decide whether to buy a larger unit or implement supplementary storage.
To maximize the utility of a thin shoe cabinet, adopt a strict seasonal and functional rotation strategy. Use the slim cabinet exclusively for your most active, everyday footwear, such as work shoes, school shoes, and daily sneakers. Off-season footwear, formal shoes, and specialized sports gear should be cleaned and stored in secondary locations, such as under-bed storage boxes, bedroom closets, or a larger storage unit in a utility room.
For bulky footwear that simply cannot fit into a thin profile—such as tall riding boots, heavy winter boots, or oversized high-top sneakers—plan for alternative overflow storage. You can place a simple, open shoe tray directly beneath a floating slim cabinet to hold wet or muddy boots, or dedicate a nearby closet shelf for bulkier shoe boxes. This keeps your slim entryway cabinet organized, functional, and free from forced closures that could damage both your shoes and the cabinet hardware.
Frequently Asked Questions (FAQ)
Do tilt-out thin shoe cabinets hold fewer pairs than standard shelving?
Yes, tilt-out cabinets almost always hold fewer pairs of shoes than standard flat-shelved cabinets with the same external dimensions. The angled compartments inside a tilt-out drawer require internal dividers and pocket walls to keep the shoes upright and prevent them from sliding around. These dividers, along with the mechanical pivot hinges mounted on the sides, consume a significant amount of internal width and depth. Furthermore, because the shoes must fit within a restricted diagonal space, any shoe with a thick sole, high heel, or wide profile can prevent the drawer from closing, forcing you to leave adjacent slots empty or reserve them only for very flat footwear like slippers and sandals.
Can I store tall boots or high-top sneakers in a thin shoe cabinet?
Generally, ultra-thin shoe cabinets with a depth under 20cm cannot accommodate tall boots or high-top sneakers in an upright position. The shallow compartments are designed specifically for low-profile shoes like flats, loafers, and standard sneakers. To store high-tops or ankle boots in a slim cabinet, you will usually need to lay them flat on their sides, which immediately consumes the horizontal space of two or three regular pairs of shoes. If you must store taller footwear, look for a slim cabinet model that features adjustable or removable internal shelves, allowing you to customize the vertical clearance of at least one compartment to fit your boots.
Community discussion
Share your experience or ask a question. Comments are reviewed before publication.