
Placing a Wi-Fi router in a compact Housing & Development Board (HDB) flat often forces a compromise between freeing up valuable shelf space and maintaining optimal signal coverage. With limited square footage in modern BTO layouts, placing a bulky router on a sideboard, TV console, or dining table consumes valuable surface area that could be used for daily living. However, simply tucking the device away in a closed cabinet or behind a structural pillar can severely degrade your wireless signal, leading to frustrating dead zones in your bedrooms or kitchen.
A dedicated space-saving Wi-Fi holder offers a practical compromise by lifting the router off your main surfaces and mounting it onto walls, under desks, or along the sides of existing furniture. This approach not only declutters your living space but also allows you to position the router at an optimal height for signal propagation. To achieve the best results, you must carefully balance physical space constraints, cable routing, heat dissipation, and mounting methods to ensure your home network remains both fast and stable.
Key Selection Criteria for Compact Spaces
Before purchasing any Wi-Fi holder from an online marketplace, you must evaluate the physical dimensions of your specific router. Routers come in highly diverse shapes, ranging from compact, upright cylinders to wide, flat units with multiple external antennas. Measure the maximum width, depth, and height of your router, making sure to account for the full span of the antennas when they are fully extended or angled for optimal coverage. Compare these measurements directly against the internal clearance or platform dimensions specified by the holder manufacturer to prevent purchasing an incompatible model. Whether you are budgeting S$15 or S$50 for a holder, verifying these dimensions first prevents costly return shipping fees.
Products mentioned in this guide
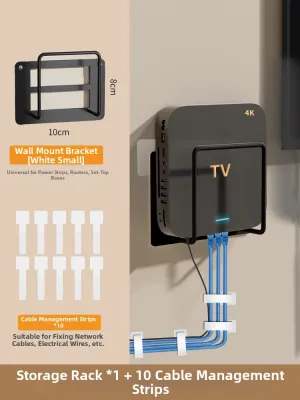
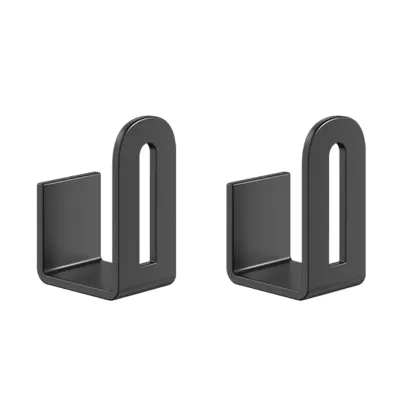
![[OKLIFE.SG]Wall-mounted WIFI storage rack/Dormitory punch-free storage rack/surveillance video storage rack](https://img.lazcdn.com/g/p/3e96e508453a8c1db1a2080fc949640d.jpg_400x400q80.jpg_.webp)
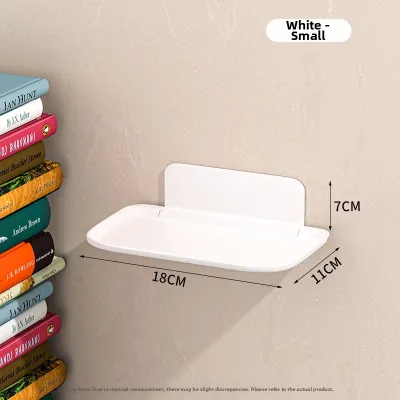
Prices are valid at publication and may change. Please refer to the product page for the latest price.
Weight capacity is another critical factor that requires careful verification. While a router might appear lightweight, the combined weight of the device, its power adapter cable, and multiple thick Ethernet cables can exert significant downward force on a holder. Check the router’s official specification sheet for its exact weight, and compare this against the maximum load capacity certified by the holder manufacturer. Relying on vague assumptions about material strength can lead to structural failure, potentially damaging both your network equipment and your walls.
The structural composition of your mounting surface dictates which fixing methods are safe and viable. In Singapore, HDB flats feature a mix of structural concrete walls, precast internal partition walls, and hollow drywall in newer developments. Drilling into tough concrete walls—such as those surrounding the household shelter—requires a heavy-duty hammer drill and specialized masonry wall plugs to ensure a secure hold. Conversely, mounting on hollow drywall requires specialized toggle bolts or hollow-wall anchors, as standard screws will quickly pull out under load. If you are mounting the holder directly onto wooden furniture, verify the thickness and structural integrity of the wood panel to ensure it can support the screws without splitting.
Adequate ventilation is essential for maintaining the performance and lifespan of your networking hardware. Routers generate a continuous amount of heat during operation, relying on passive cooling through ventilation grilles located on the top, bottom, or sides of the chassis. When selecting a holder, ensure that its design does not block these grilles or trap hot air around the device. Look for holders with open-frame structures, perforated platforms, or built-in spacers that maintain a clear gap between the router and the mounting surface, allowing air to circulate freely.
Types of Space-Saving Wi-Fi Holders
Selecting the right mounting style depends on your aesthetic preferences, whether you own or rent your HDB flat, and the specific layout of your furniture. Space-saving holders generally fall into three primary categories based on how they attach to your living environment: adhesive or clip-on models, under-desk brackets, and wall-mounted enclosures or pegboards. Each category offers distinct advantages in terms of installation ease and space efficiency, but they also come with specific physical limitations that you must consider.

To choose the most suitable option, you should map out your flat’s layout and identify where your fiber termination point (FTP) and modem are located. Because the router must connect directly to the modem via an Ethernet cable, your holder must be positioned within reach of these connection points unless you plan to run long, visible cables along your baseboards. Matching the holder type to your existing wall conditions and furniture layout ensures a clean installation that maximizes both floor space and network performance.
Adhesive and Clip-On Mounts
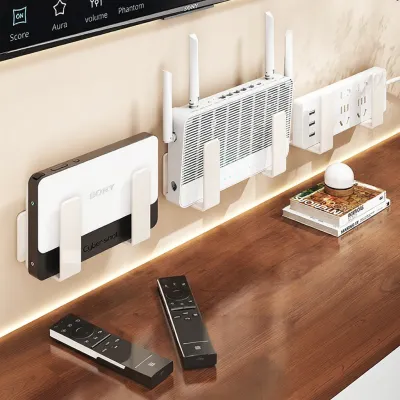
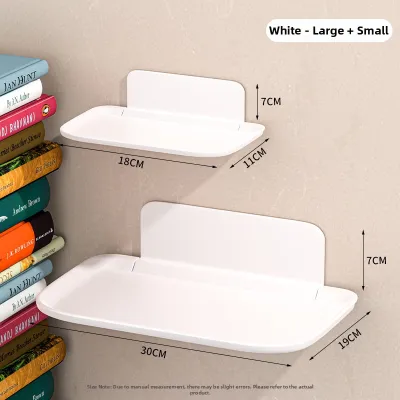
Adhesive and clip-on mounts are highly popular among renters and homeowners who want to avoid drilling holes into their walls. These holders typically rely on high-strength double-sided adhesive tapes or mechanical tension clips that grip the edges of desks, shelves, or monitor stands. By utilizing these vertical surfaces, you can suspend your router along the side of a bookshelf or the edge of a study desk, keeping it completely off your working area.
However, adhesive mounts require strict adherence to surface compatibility guidelines to prevent accidental drops. These adhesives bond exceptionally well to smooth, non-porous surfaces such as glass, metal, sealed wood, and acrylic panels. You should avoid applying them directly to painted HDB concrete walls or textured wallpapers, as the weight of the router can cause the paint or paper to peel away from the underlying structure over time.
Furthermore, you must respect the strict weight limits specified by the adhesive manufacturer and follow the proper installation protocol. After cleaning the surface thoroughly, apply the adhesive and press the mount firmly in place, then allow the adhesive to cure for the fully recommended duration—often 24 hours—before placing the router onto the holder. Skipping this curing period is a primary cause of adhesive failure, which can result in your router falling and suffering internal damage.
Under-Desk and Shelf Brackets
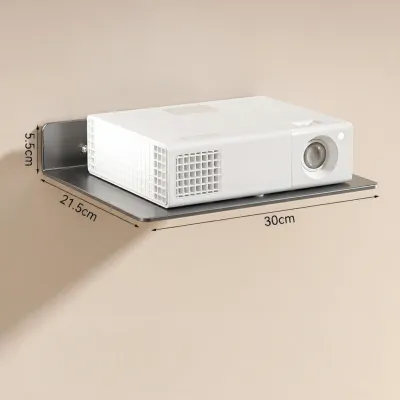
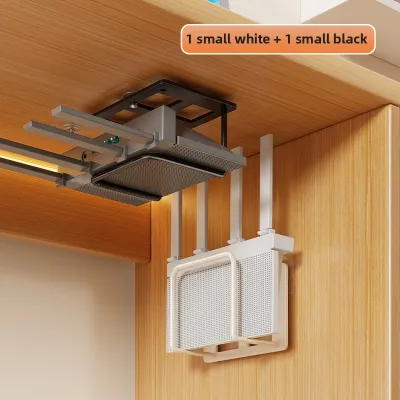
Under-desk and shelf brackets are designed to utilize the unused horizontal space directly beneath your furniture. These brackets are typically secured using small wood screws or adjustable mechanical clamps, allowing you to tuck your router neatly under a study desk, dining table, or TV console shelf. This hidden placement keeps your living area looking clean and minimalist while keeping the router easily accessible whenever you need to perform a manual reboot or plug in a temporary Ethernet cable.
When opting for a clamp-on bracket, measure the thickness of your tabletop or shelf to ensure the clamp can open wide enough to secure a firm grip. For screw-mounted models, carefully check the length of the included screws against the thickness of your furniture panel. Using screws that are too long can puncture through the top surface of your desk, permanently ruining your furniture’s finish.
Additionally, you must verify that the under-desk mounting position does not trap excessive heat. The underside of a wooden desk can act as a heat trap if there is insufficient clearance between the top of the router and the bottom of the desk. Ensure the bracket holds the router at a distance that allows warm air to escape horizontally, and avoid placing the setup near other heat-producing electronics, such as computer towers or power strips.
Wall-Mounted Enclosures and Pegboards
For a highly customizable and organized setup, wall-mounted enclosures and pegboards offer an excellent way to combine router storage with comprehensive cable management. Perforated metal or plastic pegboards allow you to mount your router, modem, and power adapter side-by-side using adjustable hooks, straps, or custom brackets. This open-grid design provides exceptional airflow around all your devices while giving you the flexibility to rearrange your components as your hardware needs change.
Installing these vertical systems on concrete HDB walls requires proper preparation and the correct hardware. You must use a masonry drill bit to create precise holes, insert high-quality wall plugs, and secure the pegboard or enclosure firmly with screws. If you encounter a structural column or a household shelter wall, be prepared for a more challenging drilling process, and ensure you do not drill deeper than necessary to avoid damaging any embedded utility conduits.
If you prefer a fully enclosed wall box to hide unsightly cables and flashing lights, you must select a model with extensive ventilation cutouts. Enclosed boxes should feature a mesh pattern or multiple wide slots on both the top and bottom panels to facilitate natural convective cooling. Without these openings, the heat generated by your router and power supply can build up rapidly inside the enclosure, leading to thermal throttling, intermittent connection drops, or premature hardware failure.
Installation and Signal Optimization Checklist
A successful installation requires systematic preparation to ensure the holder remains secure and your wireless network operates at peak efficiency. Begin by thoroughly cleaning the chosen mounting area with isopropyl alcohol to remove any dust, grease, or oil, then allow the surface to dry completely. This step is crucial for both adhesive bonds and ensuring that drill templates do not slip during marking.
Once the holder is physically mounted, implement a structured cable management plan to prevent physical strain on your router’s ports. Use hook-and-loop fasteners or cable clips to secure the power cord and Ethernet cables, leaving a small amount of slack near the connection points. Avoid bending fiber optic cables or thick Ethernet cords at sharp angles, as this can damage the internal glass fibers or copper wires, leading to severe signal degradation or complete connection loss.
After securing the router in its new holder, perform a comprehensive signal strength test across your entire HDB flat. Walk through key areas—such as the master bedroom, study, and kitchen—and use a free Wi-Fi analyzer application on your smartphone to check the signal level (measured in dBm). If you notice a significant drop in performance compared to the previous location, check if the holder’s physical structure or nearby metallic objects are obstructing the signal path, and adjust the router’s antennas accordingly.
Always be prepared to halt the installation process if you encounter any immediate warning signs. Stop drilling immediately if the wall material crumbles excessively, as this indicates a weak substrate that cannot safely support wall plugs. If an adhesive mount shows signs of peeling or lifting shortly after installation, remove the router immediately to prevent a fall. Finally, monitor the router’s temperature during the first few hours of operation in its new holder; if the chassis feels excessively hot to the touch, relocate the device to a spot with better airflow.
Frequently Asked Questions (FAQ)
Can I mount a Wi-Fi holder on a hollow drywall partition?
Yes, you can mount a Wi-Fi holder on a hollow drywall partition, but you must use specialized hardware rather than standard wood screws or concrete wall plugs. Drywall partitions, commonly found in newer HDB flats to separate bedrooms or study areas, cannot support concentrated loads without proper reinforcement. Purchase high-quality hollow-wall anchors or toggle bolts that expand behind the drywall panel to distribute the weight over a larger surface area. Always consult the holder’s installation manual to verify the recommended hole size for these anchors, and stop immediately if the drywall feels soft, damp, or unstable during drilling.
Does the material of the Wi-Fi holder affect signal strength?
The material of your Wi-Fi holder can have a noticeable impact on your wireless network’s performance. Solid metal enclosures act as electromagnetic shields, which can severely block or reflect radio waves if the router is completely enclosed. If you choose a metal holder, ensure it features an open-frame design, a wire mesh structure, or strategic cutouts that allow the signal to pass through unimpeded. On the other hand, holders made of high-quality plastics, acrylics, or natural wood are electromagnetically transparent and will not interfere with your Wi-Fi signal, making them highly suitable choices for compact flats.
How do I safely remove an adhesive Wi-Fi mount without peeling paint?
Removing a strong adhesive mount without damaging your wall paint requires patience and the application of gentle heat. Use a household hair dryer set to a medium heat level to warm the adhesive backing for a few minutes, which softens the glue and makes it pliable. Next, take a length of thin wire, dental floss, or strong sewing thread and gently slide it behind the mount, using a sawing motion to slice through the softened adhesive layer. Once the mount is detached, clean away any remaining sticky residue using a mild, surface-safe solvent or a specialized adhesive remover, testing a small, hidden area of the wall first to ensure it does not discolor the paint.
Community discussion
Share your experience or ask a question. Comments are reviewed before publication.