
Fitting a kitchen mid island into a compact Singaporean home requires a delicate balance between functional workspace and comfortable movement. In a typical HDB BTO, resale flat, or compact condominium, space is at a premium, meaning every millimeter counts. To ensure your kitchen remains highly functional, the absolute minimum walkway clearance you should maintain around all sides of an island is 900mm, with 1000mm to 1200mm being the ideal range for multi-user spaces. For the island itself, a medium-sized or “mid” island should generally measure between 1200mm and 1500mm in length, and 600mm to 800mm in depth. This setup provides sufficient surface area for meal preparation or casual dining while preserving the essential flow of your household.
Minimum Kitchen Dimensions and Kitchen Mid Island Sizing
To successfully integrate a kitchen mid island, your kitchen must first meet specific baseline dimensions. As a general rule of thumb, a fully enclosed or U-shaped kitchen needs a minimum width of at least 3.6 meters to accommodate a central island alongside standard 600mm-deep perimeter countertops on both sides, while leaving adequate walkways. For open-plan or single-wall kitchen layouts common in modern HDB BTO flats, the requirements are more flexible, but you still need a dedicated floor area of at least 9 to 12 square meters to prevent the space from feeling cramped.
When selecting or custom-building a kitchen mid island, proportional sizing, structural stability, and anchoring methods are critical to maintaining safety and physical harmony. For compact Singaporean homes, a highly functional mid-sized island typically spans 1200mm to 1500mm in length. This size provides ample space for a double-basin sink or a modest food preparation zone without dominating the room. The depth should ideally be kept between 600mm and 800mm; anything deeper makes it difficult to reach across the counter, while anything shallower compromises stability and usable workspace.
Products mentioned in this guide
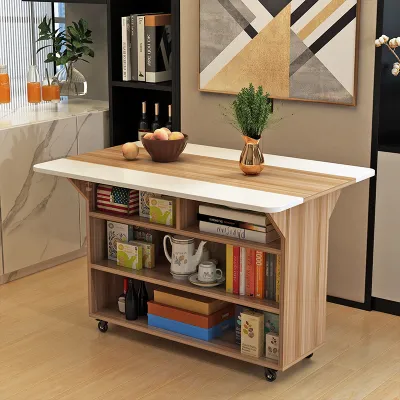
![[CozyNest ] Mid island kitchen dining table integrated small unit with drawers for storage cooking dining cabinet marble movable island table](https://img.lazcdn.com/g/p/e942507b437bbc7fd4a31e5b880ebf14.jpg_400x400q80.jpg_.webp)
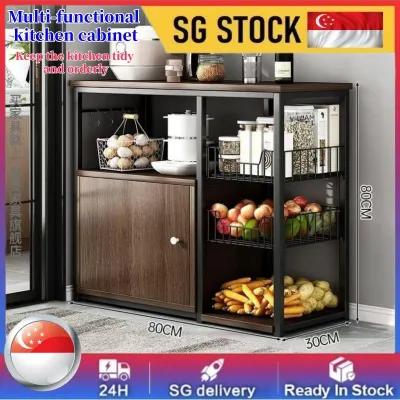

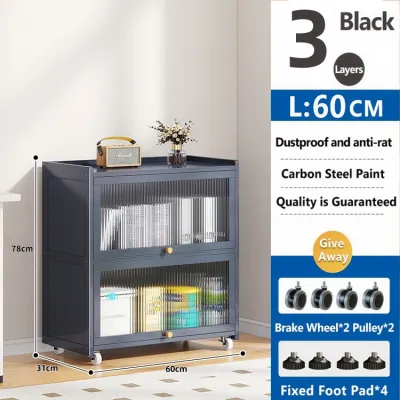
Prices are valid at publication and may change. Please refer to the product page for the latest price.
While choosing materials like quartz or solid wood, remember that a material name alone does not guarantee scratch or moisture resistance; always check the manufacturer’s care instructions, joint sealing, and protective finishes to ensure they suit a busy cooking environment. Prioritize a streamlined design, perhaps with open shelving or thin profile countertops, to maintain an airy aesthetic. Before purchasing a pre-fabricated island, verify the finished dimensions against your home’s doorway and lift access clearances to avoid delivery failures, and ensure the assembly conditions match your floor’s load capacity.
Before committing to any design, always check your specific floor plan dimensions rather than relying solely on generic showroom displays. Showrooms are designed with open ceilings and artificial boundaries that make furniture and cabinetry look smaller than they will appear in your actual home. Obtain your official HDB or condo floor plan, note the exact wall-to-wall measurements, and use those figures as your design foundation.
Essential Walkway Clearances for Safe Traffic Flow
Achieving comfortable traffic flow around your kitchen mid island depends entirely on establishing precise walkway clearances. In a single-cook household where one person handles the majority of the food preparation, a minimum clearance of 900mm is acceptable. This distance allows an individual to move freely, turn around, and access cabinets without feeling restricted. However, if your kitchen is a high-traffic zone or a multi-cook space where family members frequently assist, you should aim for a clearance of 1050mm to 1200mm to prevent constant bumping and bottlenecking.

Beyond simple walking space, you must account for the physical footprint of fully open cabinet doors, deep pull-out drawers, and major appliances. A standard dishwasher door, when fully lowered, extends approximately 600mm to 650mm from the cabinet face. If your walkway is only 900mm wide, a lowered dishwasher door leaves a mere 250mm of clearance, making it nearly impossible to walk past. Similarly, deep pan drawers, built-in ovens, and French-door refrigerators require significant clearance to operate safely and comfortably. Always verify these appliance dimensions against your layout plans before finalizing the island’s placement.
It is also useful to differentiate between main traffic aisles and work aisles. A main traffic aisle is a pathway used to traverse the kitchen to reach other areas of the home, such as the service yard or living room, and should ideally be wider—around 1050mm to 1200mm. A work aisle, which is the active prep zone between the island and the main stove or sink, can function well at 900mm to 1000mm if space is exceptionally tight, provided appliance doors do not clash.
These recommendations are rooted in standard ergonomic design guidelines, which prioritize human movement and physical safety. While a 900mm clearance serves as a reliable baseline for compact homes, always evaluate your household’s specific mobility needs. For instance, if you share your home with elderly family members who use walking aids, or if you plan to move large items through the kitchen regularly, expanding your walkways to at least 1000mm or 1100mm is a necessary adjustment.
Step-by-Step Guide to Measuring Your Kitchen Layout
Measuring a compact kitchen for a kitchen mid island requires absolute precision, as even a minor calculation error can lead to blocked walkways or unusable cabinets. Begin by identifying and mapping all fixed structural and utility obstacles. In Singaporean apartments, these often include structural columns, concrete pillars, plumbing stacks, gas pipes, and existing electrical outlets. Because these elements cannot be relocated without significant expense or structural risk, your island must be positioned to clear them entirely.
Next, account for elements that project beyond the flat surface of your walls. Door swings for the service yard, window sills, low-hanging ventilation hoods, and thick skirting boards can all reduce your usable floor space by several centimeters. Measure the swing arc of every door and ensure it does not collide with the proposed island. Additionally, check that the island’s height does not block low-opening windows or interfere with light switches and power sockets.
To visualize the layout in real life, mock up the proposed island footprint directly on your kitchen floor. You can use painter’s tape or flattened cardboard boxes cut to the exact dimensions of the kitchen mid island. Leave this mockup in place for a few days, walking around it as you cook, clean, and use your appliances. This physical test is incredibly effective for identifying tight corners, awkward pathways, and potential clearance issues before committing to a permanent installation.
Finally, remember to measure your kitchen dimensions at multiple heights. Walls in older resale HDB flats and even some new developments are rarely perfectly plumb. Measure the distance between walls at floor level, countertop height (around 900mm), and eye level (around 1500mm). Use the smallest measurement obtained as your guide to ensure your custom island fits perfectly without scraping against uneven walls.
Space-Saving Alternatives for Tight Kitchen Floor Plans
If your measurements reveal that a fixed kitchen mid island will compromise your walkways, several highly functional design alternatives can deliver similar benefits without the cramped footprint. One of the most popular options for compact layouts is a kitchen peninsula. Unlike a standalone island, a peninsula is anchored to a wall or existing perimeter cabinetry on one end. This design eliminates the need for a walkway on that side, instantly saving 900mm or more of floor space while still providing a generous prep surface and casual dining area.
For ultimate flexibility, consider a movable kitchen cart or a butcher block trolley. These freestanding units offer valuable extra countertop space and storage drawers but can be easily rolled against a wall or tucked into a corner when not in use. When choosing a mobile cart, ensure it features high-quality, lockable caster wheels to guarantee stability during heavy food preparation, and verify that its finished dimensions fit comfortably within your designated storage niche.
Another innovative solution is the integration of fold-down or pull-out extension countertops within your existing cabinetry. These mechanisms remain completely hidden behind a standard drawer front or flush against a wall until needed. When you require extra prep space, you simply pull out or flip up the extension, locking it securely in place, and then fold it away once your cooking is complete.
Whichever alternative you choose, it is vital to select a solution that respects your primary cooking zones and appliance clearances. The goal is to enhance your kitchen’s usability, not to replace one bottleneck with another. Ensure that even when a cart is moved or an extension is deployed, you can still easily access your refrigerator, sink, and cooktop without obstruction.
Common Sizing and Clearance Mistakes to Avoid
One of the most frequent mistakes in planning a kitchen mid island is failing to account for the fully extended depth of appliance doors and drawers. Homeowners often measure their walkways based on the closed dimensions of their cabinets and appliances, only to find that opening the oven or dishwasher completely blocks the passage or collides with the island’s base. Always consult the manufacturer’s spec sheets to find the depth of appliances with their doors fully open, and ensure your walkways accommodate these measurements.
Another common pitfall is building an island that is too deep. While a deep island offers a large unbroken surface, any depth exceeding 800mm in a compact kitchen can make it incredibly difficult to reach the center for cleaning, wiping down, or preparing food. It also wastes valuable floor space that could otherwise be allocated to wider, more comfortable walkways. Keep the depth proportional to your reach and the overall room size.
Ignoring the classic kitchen work triangle—the path between the sink, stove, and refrigerator—is another error that leads to daily frustration. A poorly placed kitchen mid island can act as a physical barrier directly in the middle of this triangle, forcing you to walk around it constantly just to rinse a vegetable or grab an ingredient. Ensure your island facilitates, rather than hinders, the natural flow of your cooking process.
Finally, avoid the temptation to sacrifice essential storage or perimeter appliance space just to force an island into an undersized kitchen. An island should add value to your home, not compromise the core functionality of your primary workspace. If fitting an island means reducing your main countertop run to an unusable size or eliminating a tall pantry unit, it is wiser to opt for a peninsula or a mobile cart that preserves your kitchen’s overall storage capacity.
Frequently Asked Questions (FAQ)
What is the standard height for a kitchen island?
The standard height for a kitchen island designed for food preparation is 900mm, which aligns perfectly with standard perimeter countertops to create a seamless, cohesive look and an ergonomic working height. If you plan to incorporate seating, a standard dining-height overhang should also sit at 900mm, paired with counter stools that have a seat height of approximately 600mm to 650mm. For an elevated bar-style setup, the island height can be raised to 1050mm, which requires bar stools with a seat height of 750mm to 800mm, though this higher profile can sometimes visually crowd a compact kitchen.
Do I need approval to install a fixed kitchen island in an HDB flat?
If you are installing a completely freestanding kitchen mid island that does not involve any structural, electrical, or plumbing alterations, you generally do not need formal approval from the Housing & Development Board (HDB). However, if your design requires hacking the floor tiles to route new plumbing lines, relocating gas pipes, or running new electrical conduits through the floor or walls, you must obtain the necessary permits and comply with HDB renovation guidelines. Always consult a qualified, HDB-registered renovation contractor to assess your specific layout, verify building constraints, and manage the permit application process safely.
Community discussion
Share your experience or ask a question. Comments are reviewed before publication.