
A portable shoe rack is a highly convenient solution for managing footwear overflow, especially in space-conscious homes like Singapore apartments. However, the advertised capacity of these units rarely matches the reality of a diverse shoe collection. While a box might promise storage for 20 pairs, this estimate is typically based on small, low-profile shoes placed side-by-side without any breathing room. To find a rack that truly fits your needs, you must look past the marketing numbers and calculate capacity based on your actual footwear footprint and available floor space.
Assess Your True Shoe Collection Footprint
Different shoe types occupy vastly different amounts of physical space. Lightweight flats, sandals, and standard canvas sneakers have a minimal footprint and can easily sit close together. In contrast, high-volume footwear such as chunky running shoes, high heels, and ankle boots require significantly more vertical and horizontal clearance.
When planning your storage, it is essential to account for the entire household collection, including guest slippers and seasonal items. In humid tropical climates, leaving shoes crammed together can trap moisture, leading to mold growth and material degradation. Factoring in a buffer for future purchases ensures your new rack will not be immediately overwhelmed.
Products mentioned in this guide
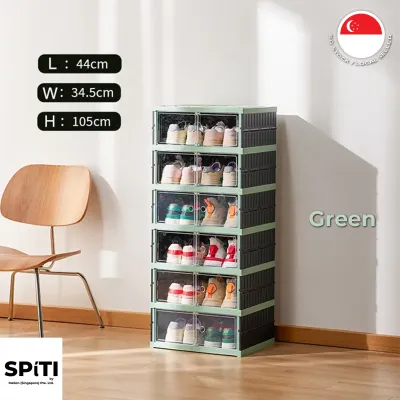
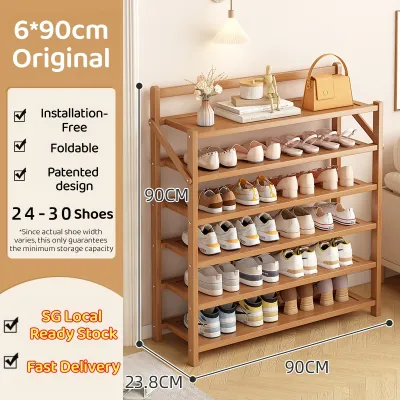
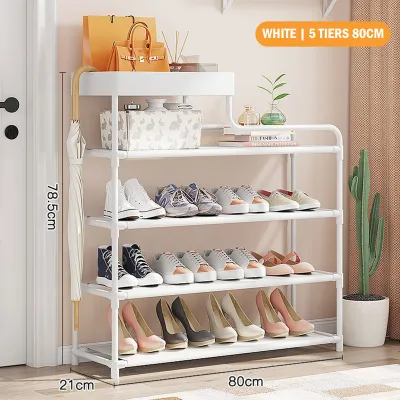
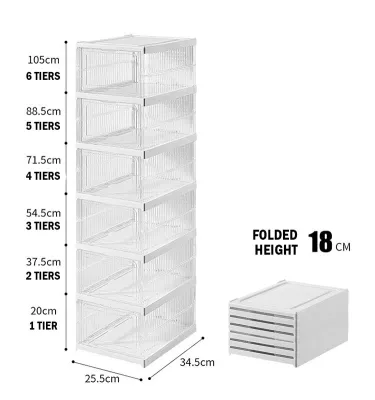
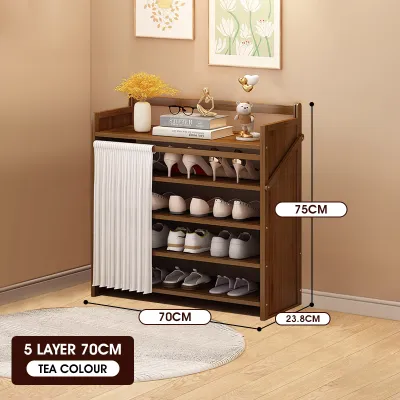
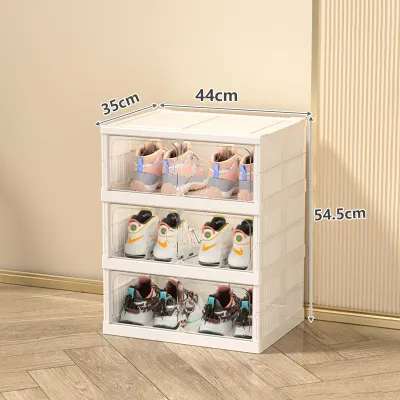
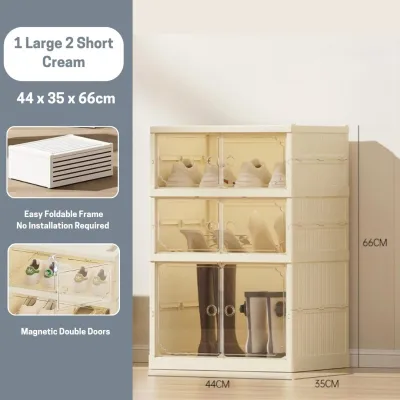
Prices are valid at publication and may change. Please refer to the product page for the latest price.
To establish your baseline dimension requirements, gather your largest, widest, and tallest pairs of shoes. Use a measuring tape to record the height of your tallest boots or heels, as well as the width of your widest sneakers or dress shoes. These physical measurements will serve as your guide when evaluating shelf heights and depths, preventing the frustration of shoes that overhang or must be forced into tight slots.
Decode Manufacturer Capacity Claims
Manufacturer capacity ratings are almost always best-case scenarios calculated using uniform, narrow footwear. To understand the actual usable capacity of a portable shoe rack, you must examine the physical specifications of the shelves. Pay close attention to the depth of the shelves; if a rack is too shallow, larger shoes or high-tops may stick out, obstructing walkways or causing the rack to sit unevenly.

Side-frame designs can also reduce usable space. Many portable racks feature vertical support bars or fabric covers that wrap around the edges, effectively cutting off a few centimeters of usable width on each end. If a shelf is advertised as 80 centimeters wide, you might only have 75 centimeters of clear, unobstructed space to line up your shoes.
Weight capacity is another critical factor that is often overlooked. Lightweight plastic or thin metal tube racks can easily buckle or sag under the weight of multiple pairs of heavy leather boots or thick-soled sneakers. Check the manufacturer’s specified load capacity per shelf before purchasing. Additionally, look for models with adjustable or removable shelves; being able to remove a single tier to accommodate taller boots is far more efficient than forcing tall shoes to bend or lie flat.
Measure Floor Space and Safety Clearances
Before committing to a specific portable shoe rack, you must carefully measure the designated installation area. Do not rely on visual estimates. Measure the exact floor width and depth, making sure to account for baseboards, electrical outlets, and light switches that might prevent the rack from sitting flush against the wall.
In compact living environments, such as Singapore HDB flats or condominiums, entryways and hallways are often narrow. You must verify that the depth of the shoe rack allows for safe, comfortable navigation. Ensure that front doors, bedroom doors, or nearby cabinet doors can swing fully open without striking the rack. Leaving a clearance gap also promotes healthy air circulation, which is vital for keeping shoes dry and odor-free.
If you are considering a tall, multi-tier, or stackable portable unit, vertical clearance is just as important as floor space. Measure the height from the floor to any overhanging features, such as wall-mounted distribution boards, mirrors, or decorative shelving. Ensure there is enough overhead space to easily retrieve shoes from the top tier without hitting your hands or the ceiling.
Match Capacity to Space: Configuration Strategies
Maximizing your shoe storage requires matching the right rack configuration to your specific floor plan. Freestanding tiered racks are excellent for wide, open walls where you can utilize horizontal space. However, if your floor space is highly restricted, modular stackable units allow you to build upward, taking advantage of vertical space that would otherwise go unused.
For flexible space management, rolling or foldable designs offer significant advantages. A portable rack on lockable caster wheels can be easily rolled into a closet or utility room when guests arrive, or moved aside for thorough floor cleaning. Foldable fabric or plastic designs are ideal for temporary storage needs, such as hosting gatherings where extra guest slippers must be neatly organized.
Sometimes, forcing a single, massive shoe rack into a tight entryway is counterproductive. A more practical strategy is to split your storage. Place a small, low-profile portable rack near the main entrance for daily-use shoes and guest slippers, and store the remainder of your collection in a larger closet organizer or bedroom wardrobe system. This keeps your entryway clear and welcoming while maintaining an organized home.
Frequently Asked Questions (FAQ)
Can I stack two portable shoe racks to double capacity?
Stacking portable shoe racks is a practical way to save floor space, but it must be done with caution. You should only stack units that are explicitly designed by the manufacturer to be modular or stackable. These models typically feature dedicated interlocking joints, dowels, or clips that secure the top unit to the bottom one.
Never attempt to stack standard, non-integrated racks, as they lack the necessary connection points to remain stable. When stacking approved units, always place the heaviest shoes on the bottom tiers to keep the center of gravity low, reducing the risk of the entire structure tipping over.
How do I prevent a fully loaded portable rack from tipping over?
To ensure the stability of a fully loaded portable shoe rack, strategic weight distribution is essential. Always store your heaviest footwear, such as work boots, leather dress shoes, and thick-soled sneakers, on the lowest shelves. Lighter items like sandals, slippers, and canvas flats should be placed on the upper tiers.
If your floor is slightly uneven, look for portable racks equipped with adjustable leveling feet to stabilize the frame. For taller units or households where the rack might be bumped, consult the manufacturer’s instructions regarding wall-anchoring hardware. Many lightweight racks include strap or bracket options to secure the frame safely to the wall.
Community discussion
Share your experience or ask a question. Comments are reviewed before publication.