
Fitting a private workspace into a Singapore public housing flat requires a careful balance of floor space, structural limits, and accessibility. A typical HDB spare room or living room corner can comfortably accommodate a compact 1-person meeting room pod (often called a phone booth) or a small 2-person pod. However, larger 4-person or 6-person commercial pods are rarely practical for residential use due to their massive physical footprints, heavy floor loads, and restrictive delivery requirements. To determine if a pod will fit your home, you must evaluate your available floor area, ceiling clearance, and the logistical path from the estate’s loading bay to your spare room.
Measuring Your HDB Spare Room or Corner
Before purchasing a meeting room pod, you must establish the absolute maximum footprint your space can support. Start by measuring the clear floor area of your target room or corner using a digital laser measure or a standard tape measure. Do not rely on the flat’s floor plan alone, as actual dimensions can vary slightly, and built-in features will reduce your usable space. Take note of skirting boards, which typically protrude 1.5 to 2 centimetres from the wall, preventing the pod from sitting completely flush. You must also account for structural columns, electrical distribution boards, and the thick, non-hackable walls of an adjacent household shelter.
Next, map out the swing radius of all nearby doors, windows, and wardrobe panels. A meeting room pod is a rigid, solid structure; if placed too close to an entryway, it can block a bedroom door from opening fully or obstruct access to window handles. Ensure there is a clear path for daily movement around the room. As a general rule, maintain a clearance corridor of at least 60 to 90 centimetres between the pod’s exterior walls and any existing furniture, such as a bed, wardrobe, or study desk. This ensures the room remains functional and does not feel overly cramped or inaccessible.
Products mentioned in this guide
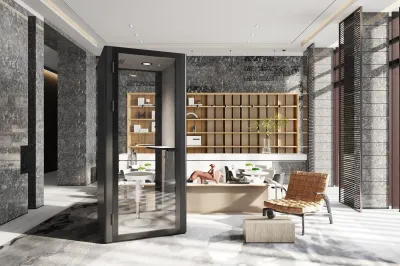
Prices are valid at publication and may change. Please refer to the product page for the latest price.
Matching Pod Sizes to Your Measured Layout
Once you have your precise room dimensions, you can compare them against standard meeting room pod sizes. For a dedicated corner in a living room or a shared study, a 1-person pod is usually the most viable option. These compact booths typically feature a footprint of approximately 1 metre by 1 metre. They provide just enough space for a single high-backed stool, a small built-in desk, and a laptop. If you have a larger corner or a dedicated spare room, a 2-person pod—typically measuring around 1.2 to 1.5 metres in width and depth—can fit comfortably while still leaving room for other household activities.

If you are considering a larger 4-person pod for a full spare room, proceed with caution. These units often require a footprint of at least 2 metres by 1.5 metres. In a standard HDB bedroom, which typically measures around 3 metres by 3 metres, a 4-person pod will dominate the entire space, leaving very little perimeter room for assembly, cleaning, or walking. Furthermore, you must verify the weight of the pod against residential floor loading limits. HDB flats are generally designed to support a structural floor load of 150 kilograms per square metre. While a lightweight 1-person pod easily complies with this limit, larger commercial-grade pods can be exceptionally heavy, especially those featuring double-glazed acoustic glass and steel frames. Always check the manufacturer’s specification sheet for the total weight and weight distribution across the pod’s feet.
Ceiling height is another critical constraint that is easily overlooked. Standard HDB ceiling heights hover around 2.6 metres, but this can be lower in units with false ceilings, decorative light coves, or low-hanging structural beams. Most commercial meeting pods stand between 2.1 and 2.3 metres tall. However, manufacturers almost always specify a mandatory top clearance of 10 to 20 centimetres above the pod. This space is necessary for the active ventilation fans to exhaust warm air and to allow installers to safely assemble the roof panels. Always measure from your floor to the lowest point of your ceiling, accounting for any light fixtures or ceiling fans in the immediate vicinity.
Checking Delivery Routes and Installation Clearances
A meeting room pod cannot benefit your home office if it cannot physically reach your spare room. Because these structures are delivered in large, heavy flat-packs, you must carefully trace the entire delivery route. Start at the estate’s loading bay and measure the height and width of the passenger lift doors, as well as the internal depth of the lift cabin. If the lift is too small to accommodate long structural columns or large glass panels, the delivery team may have to carry the components up the stairs, which can incur steep manual handling fees or even make delivery impossible.
Once inside your flat, measure the narrowest points of your main door, the hallway, and the doorway of the spare room. The installation team needs sufficient clearance to maneuver long panels around tight corners. Additionally, you must plan for operational clearances around the pod itself. Most manufacturers require a minimum gap of 5 to 10 centimetres between the pod’s exterior walls and the room’s walls. This gap prevents heat buildup, allows the integrated ventilation system to draw in fresh air, and prevents the pod from vibrating against your walls during use.
Finally, locate your existing power sockets before finalizing the pod’s position. Meeting pods require a standard power connection to run their internal LED lighting, ventilation fans, and charging ports. If the nearest socket is on the opposite side of the room, you will have to run extension cords across the floor, creating a permanent tripping hazard. Plan your layout so the pod’s power inlet sits close to an existing wall outlet, or consult a licensed electrician to install a new socket safely.
Space-Saving Acoustic Alternatives for Tight Corners
If your measurements reveal that a fully enclosed meeting room pod is too large, heavy, or difficult to install, several space-saving acoustic alternatives can provide privacy without dominating your room. Freestanding acoustic dividers or privacy screens are highly effective for open-corner workstations. These panels are lightweight, easy to move, and can be configured to block visual distractions while absorbing ambient sound. They do not require a permanent floor footprint and can be tucked away when not in use.
Another practical option is a desk-mounted acoustic hood or a modular privacy shield. These compact accessories attach directly to your existing study desk, creating a semi-enclosed cocoon around your monitor and laptop. While they do not offer the total sound isolation of a sealed pod, they significantly reduce high-frequency noise and prevent your voice from echoing throughout the flat during video calls. This is an excellent, cost-effective solution for hybrid workers who only need temporary privacy.
To further improve sound dampening in a multi-purpose spare room, focus on soft furnishings and wall-mounted acoustic treatments. Adding a thick, high-pile rug under your desk, hanging heavy blackout curtains over windows, and installing felt or foam acoustic panels on the walls can dramatically reduce echo. These simple additions absorb sound waves within the room, making your voice sound clearer on calls and preventing sound from traveling easily to adjacent rooms, all without sacrificing valuable floor space.
Frequently Asked Questions (FAQ)
Do I need a permit to install a meeting pod in an HDB flat?
Freestanding, plug-and-play meeting pods are generally classified as furniture rather than permanent fixtures, meaning they do not require a formal HDB renovation permit. However, you must ensure the installation does not involve structural alterations, such as drilling deep into structural walls or columns, or modifying the flat’s core electrical wiring. If you plan to run new electrical lines or if you are concerned about the weight of a larger pod, it is highly recommended to consult a licensed contractor or check the latest guidelines from the local housing authority before proceeding.
How do I manage ventilation in a small enclosed pod?
To maintain a comfortable environment inside a compact, sealed pod, you must rely on its built-in active ventilation system. Ensure that the intake and exhaust vents on the exterior of the pod are completely unobstructed by walls, curtains, or nearby furniture. Because Singapore’s tropical climate can cause small enclosed spaces to warm up rapidly, it is best to place the pod in a room that is already cooled by air conditioning. Additionally, make it a habit to take regular breaks—stepping out of the pod every 45 to 60 minutes—and leave the pod door wide open when it is not in use to allow the internal air to fully circulate and reset.
Community discussion
Share your experience or ask a question. Comments are reviewed before publication.