
Quick Answer: Which Island Table Configuration Is Right for You?
Selecting the ideal island cabinet with an integrated dining area depends on your available floor clearance, primary kitchen activities, and household size. There is no single configuration that serves every home perfectly; instead, your choice must align with your kitchen’s physical boundaries and daily routines.
For standard layouts where casual dining and quick breakfasts are the priority, a simple breakfast bar overhang offers an efficient solution without consuming extra floor space. If you are working with a compact kitchen where traffic paths must remain unobstructed, a drop-leaf or extendable extension provides dining space on demand and folds away when not in use. For spacious, open-concept homes that prioritize formal dining and entertaining, a waterfall edge or a flush integrated dining table serves as a striking visual anchor that can accommodate larger groups. By identifying your spatial limits and dining habits first, you can select a layout that enhances both culinary workflow and social interaction.
Types of Island Cabinets: Choosing an Island Cabinet for Table Use
Integrating a dining surface directly into an island cabinet for table functionality is an excellent way to consolidate prep space and seating. Modern kitchen designs offer several distinct configurations, each altering the room’s traffic flow, seating capacity, and structural requirements. Selecting the right type involves assessing how the unit will be anchored, the load capacity of the extended surfaces, and how the design impacts your daily movement. When planning these installations, it is critical to verify the manufacturer’s load-bearing limits and structural requirements rather than assuming any material can support heavy weight without additional bracing.
Products mentioned in this guide

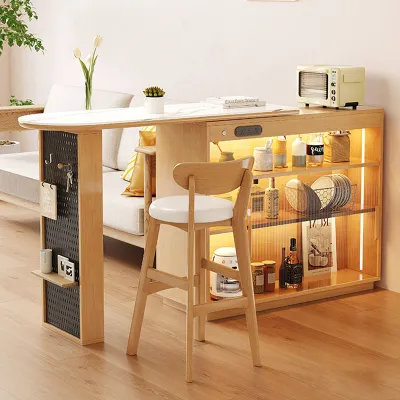
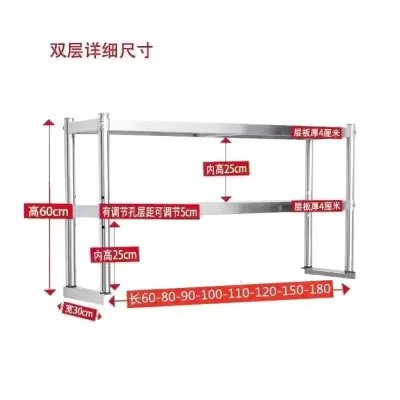
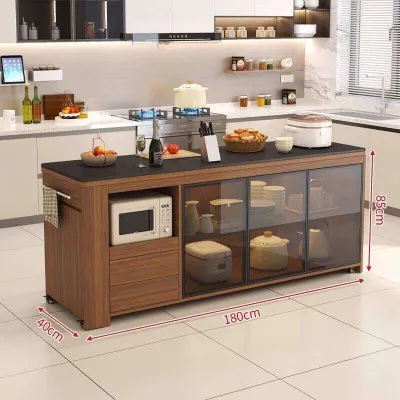

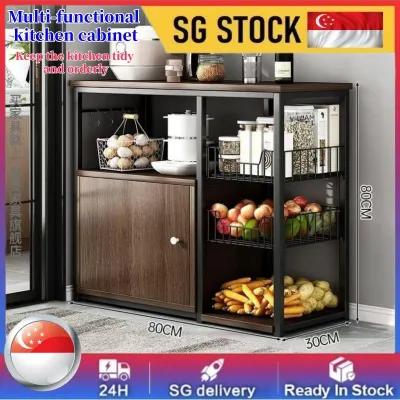
Prices are valid at publication and may change. Please refer to the product page for the latest price.

Breakfast Bar Overhang
The breakfast bar overhang is the most common configuration for an island cabinet for table use, featuring a countertop that extends past the base cabinets. Typically, this design utilizes a 10-to-15-inch cantilever supported by structural corbels, hidden steel brackets, or reinforced cabinetry panels. This setup is highly suited for quick meals, homework sessions, or casual conversations while cooking. However, the knee-space requirement directly impacts the storage capacity of the island. To accommodate comfortable seating, the base cabinets underneath the overhang must either be shallow or eliminated entirely, reducing the available drawer and shelf space. Homeowners must balance the desire for deep storage cabinets with the physical clearance needed for legs and bar stools.
Drop-Leaf and Extendable Extensions
For kitchens where floor space is at a premium, drop-leaf and slide-out extendable tables offer a highly flexible alternative. These islands feature a hinged countertop section that can be raised and locked into place when dining, and folded down flat against the cabinet side when prep work is finished. This mechanism keeps primary walkways clear during heavy cooking periods. When choosing an extendable or drop-leaf system, it is vital to check the hardware specifications. High-quality, heavy-duty steel brackets or swing-out wooden support gates are necessary to ensure stability. Users should verify the maximum weight capacity of the hinge mechanism before placing heavy serving dishes or leaning on the extended leaf, as lower-grade hardware can sag or fail under pressure.
Waterfall Edge and Flush Integrated Tables
Waterfall edge designs feature a continuous run of countertop material—such as engineered quartz, sintered stone, or natural granite—that cascades vertically down the side of the island to the floor. When combined with a flush integrated table, this configuration creates a seamless, high-end aesthetic. The dining table is typically built into the island’s footprint, either matching the counter height or stepping down slightly to standard dining table height. Because these designs often involve massive slabs of heavy stone or solid wood, precise structural support is non-negotiable. The underlying cabinetry must be structurally reinforced to bear the dead load of the vertical panels, and the floor must be level to prevent stress fractures in the countertop joints.
Two-Tier and Multi-Level Designs
Two-tier islands separate the food preparation zone from the dining area by utilizing two distinct surface heights. Typically, the prep area remains at standard counter height (around 36 inches), while the dining section is raised to bar height (around 42 inches) or lowered to standard table height (around 30 inches). This physical separation is highly effective at hiding dirty dishes, prep clutter, and cooking splatters from guests seated at the table. However, multi-level designs can interrupt the expansive visual flow of an open kitchen. They also require careful ergonomic planning, as transferring hot dishes between a high prep counter and a lower dining tier requires a secure grip and clear line of sight to prevent accidental spills.
How to Match the Island Layout to Your Kitchen Shape
The physical shape of your kitchen is the ultimate deciding factor when choosing an island cabinet for table configuration. Even the most beautiful island design will become a daily frustration if it blocks appliance doors, restricts walkways, or disrupts the natural movement between key work zones. To ensure a successful installation, you must prioritize clearance and traffic flow over aesthetic desires, measuring the space with all appliance doors and cabinet drawers fully open.
Galley and Compact Kitchens
In narrow galley kitchens, installing a permanent, fixed island with a seating overhang is rarely feasible. These spaces require a strict aisle clearance of 36 to 48 inches on both sides of the island to allow two people to pass comfortably and to ensure oven, dishwasher, and refrigerator doors can open fully. Attempting to squeeze a standard island into a tight galley layout often results in a cramped, unusable corridor. For these compact environments, a narrow, mobile island cart with a fold-down drop-leaf table is the most practical choice. This allows you to roll the island into the center of the room for prep and dining, and then wheel it against a wall to restore clear passage when the meal is over.
L-Shaped and U-Shaped Kitchens
L-shaped and U-shaped kitchens often feature a generous central floor area that is ideal for a fixed island cabinet for table integration. In these layouts, the island should be positioned to complement, rather than obstruct, the classic kitchen work triangle—the path between the sink, stove, and refrigerator. A standard breakfast bar overhang works exceptionally well here, as it utilizes the open center of the room without encroaching on the perimeter workspaces. When planning the island’s placement, verify that the seated guests’ chairs or stools will not back into main traffic paths or block access to corner cabinets and low-level appliances.
Open-Concept and Large Spaces
Large, open-concept living and dining areas offer the greatest design freedom, allowing for expansive, multi-level islands or long, flush-integrated dining tables. In these environments, the island serves as a vital zoning tool, physically separating the culinary workspace from the living room while maintaining a visual connection. Because space is not a constraint, the integrated table area can be expanded to seat six or more people comfortably. However, large spans of countertop material require careful structural planning. If the table section extends significantly without cabinet support underneath, you must verify the material’s maximum unsupported span limits with your fabricator and install internal steel support beams or heavy-duty post legs to prevent sagging or cracking over time.
Practical Considerations for Singapore Homes
Designing an island cabinet for table setup in Singapore requires careful attention to local housing constraints, building regulations, and environmental factors. In high-density housing such as Housing & Development Board (HDB) flats and private condominiums, kitchen footprints are typically compact and highly structured. Before purchasing or custom-building an island, homeowners must measure doorway and lift access dimensions. Large, pre-assembled island units or single-piece stone countertops may not fit into standard HDB passenger lifts or through narrow entryways, requiring expensive manual carrying up stairwells or complex on-site assembly.
Additionally, HDB renovation guidelines impose strict rules regarding structural modifications and floor loading limits. If your design involves anchoring a heavy stone island to the floor, or rerouting gas, water, or electrical lines to the island, you must obtain proper building approvals and hire a licensed contractor to perform a professional structural assessment. Floating or cantilevered designs must be carefully engineered so they do not exceed allowable floor weight capacities, especially in older estates.
Singapore’s tropical climate, characterized by high humidity and consistent warmth, also demands careful material selection. Wood-based drop-leaf mechanisms, hinges, and wooden table extensions are susceptible to moisture absorption, which can lead to warping, misalignment, or stiff mechanical joints over time. Homeowners should verify that all hardware is rust-resistant and that wood components are properly sealed with moisture-resistant finishes. Similarly, if you choose porous natural stone or engineered surfaces for your integrated table, check the manufacturer’s care instructions regarding thermal expansion and stain resistance, as local cooking styles involving heavy spices and hot woks can easily damage unprotected surfaces.
Decision Framework: Choose Your Island Configuration
To help you finalize your kitchen layout, the following comparison table outlines the spatial requirements, ideal use cases, and primary limitations of each integrated island table configuration.
| Configuration | Space Requirement | Best For | Key Limitation |
|---|---|---|---|
| Breakfast Bar Overhang | Medium (requires 36" clearance around stools) | Casual dining, quick breakfasts, and social cooking | Reduces cabinet storage depth beneath the counter |
| Drop-Leaf / Extendable | Low (folds down to preserve walkway space) | Compact kitchens, HDB flats, and flexible layouts | Lower weight capacity; requires high-quality hardware |
| Waterfall / Flush Integrated | High (requires large, open floor area) | Modern open-concept homes and formal dining | High structural weight; expensive installation and support |
| Two-Tier / Multi-Level | Medium to High (requires vertical planning) | Hiding kitchen prep clutter from seated guests | Interrupts flat workspace; potential safety hazard for hot items |
Use the following conditional framework to guide your final decision:
- Choose a Breakfast Bar Overhang if you have at least 36 inches of clearance behind the seating area, want a permanent dining spot, and do not mind sacrificing some base cabinet depth for knee room.
- Choose a Drop-Leaf or Extendable Extension if your kitchen is narrow or compact, and you need a dining surface that can be tucked away to keep walkways clear during food preparation.
- Choose a Waterfall Edge or Flush Integrated Table if you have an open-concept layout, want the island to serve as your primary dining table, and have verified that your floor and cabinetry can support the weight of heavy stone slabs.
- Choose a Two-Tier Design if you frequently entertain while cooking and want a physical barrier to block the view of dirty prep zones from your guests.
- Verify first if your building guidelines allow floor anchoring or utility rerouting, and check that your building's lift and doorways can accommodate the dimensions of your chosen countertop slabs.
Frequently Asked Questions (FAQ)
How much overhang is needed for comfortable seating without knee brackets?
For comfortable seating, the standard industry recommendation is a 10-to-12-inch overhang for counter-height islands (36 inches high) and up to 15 inches for bar-height islands (42 inches high). Any overhang that exceeds 12 inches typically requires structural corbels, metal brackets, or leg supports to prevent the countertop from tipping, sagging, or cracking under pressure. Always verify the specific support requirements with your countertop fabricator, as heavier materials like granite or engineered quartz have lower self-supporting limits than wood or laminate.
Can I add a table overhang to an existing kitchen island?
Retrofitting a table overhang onto an existing island depends entirely on the structural integrity of the base cabinets and the type of countertop material currently installed. You must consult a professional carpenter or countertop specialist to assess whether the existing base cabinet has a stable center of gravity to prevent tipping once cantilevered weight is added. In many cases, adding an overhang requires replacing the entire countertop slab to ensure a seamless piece, along with installing new, securely anchored steel brackets to support the extended dining area.
Community discussion
Share your experience or ask a question. Comments are reviewed before publication.