
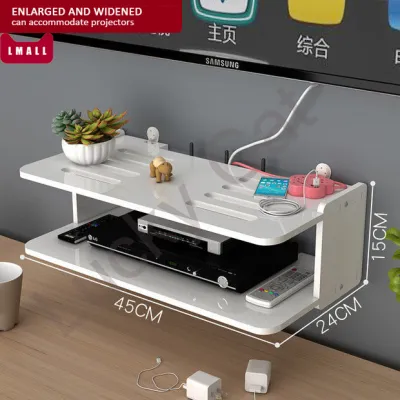
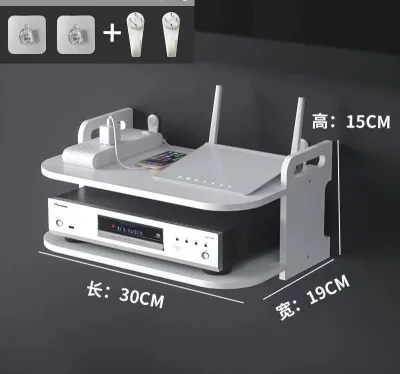
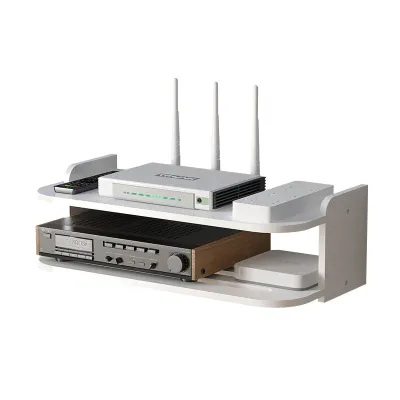
For a typical small HDB flat, the ideal modem router rack has a depth of 15 cm to 25 cm, a width of 30 cm to 45 cm, and a height of 15 cm to 30 cm (for single-tier shelves) or 35 cm to 50 cm (for two-tier units). This compact footprint comfortably accommodates a standard optical network terminal (ONT), a home router, and their associated power bricks while maintaining a low profile that does not obstruct narrow hallways or living room walkways. Selecting the right dimensions is crucial to balancing network performance, cable safety, and spatial harmony in your home.
Navigating Space Constraints in Small HDB Flats
Modern HDB flat layouts, such as 2-room Flexi, 3-room, and 4-room BTO units, feature highly optimized floor plans where every square centimeter counts. Walkways are designed to be compact, often measuring just 90 cm to 110 cm in width. In these narrow corridors, any furniture or fixture that protrudes too far becomes a physical hazard. The home’s networking hub—consisting of the Optical Network Terminal (ONT) provided by NetLink Trust and the wireless router provided by your Internet Service Provider (ISP)—is typically anchored near the main entrance or utility closet where the fiber patch panel is installed. Placing these devices on a bulky console table or a floor-standing shelf is rarely viable because it eats into valuable floor space and disrupts the visual flow of the entryway.
Therefore, finding a modem router rack with the exact right dimensions is not just an aesthetic choice, but a functional necessity to maintain clear pathways and protect delicate fiber optic infrastructure. Bulky, floor-standing server racks are impractical for small flats, making space-saving, low-profile wall-mounted or floating form factors essential to keep walkways clear and maintain a tidy living environment.
Products mentioned in this guide
![[OKLIFE.SG]Wall-mounted WIFI storage rack/Dormitory punch-free storage rack/surveillance video storage rack](https://img.lazcdn.com/g/p/3e96e508453a8c1db1a2080fc949640d.jpg_400x400q80.jpg_.webp)
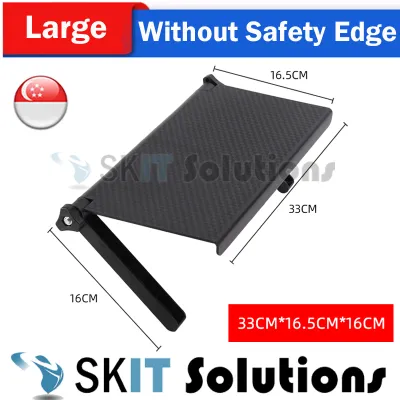
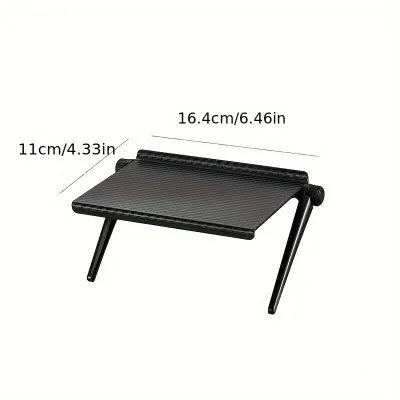
Prices are valid at publication and may change. Please refer to the product page for the latest price.
Ideal Modem Router Rack Dimensions by Placement Zone
Selecting the perfect dimensions for your modem router rack depends heavily on where you decide to install it within your flat. Different zones have distinct spatial limitations and structural requirements that dictate the ideal length, width, and depth of the shelf.

Wall-Mounted and Over-DB-Box Racks
This is the most common setup in Singapore. The rack is mounted directly adjacent to or over the DB box to conceal cables. For wall-mounted racks in narrow corridors, the depth must be kept to a minimum. A depth of 12 cm to 18 cm is ideal for basic setups (e.g., a slim modem and a flat router). If you have a high-performance gaming router with large external antennas, you will need a depth of 20 cm to 25 cm to prevent the antennas from pressing against the wall or protruding dangerously into the walkway.
Width should be around 35 cm to 50 cm to allow side-by-side placement of the ONT and router, which prevents heat transfer between stacked devices. Single-tier wall shelves should have at least 15 cm to 20 cm of vertical clearance. If using a box-style cover rack that hides the entire setup, look for a height of 25 cm to 40 cm to accommodate vertical antennas.
Crucially, check your wall materials before installation. Most HDB structural walls are made of reinforced concrete, which requires a rotary hammer drill and masonry bits to install plastic wall plugs. If mounting on a partition wall (drywall), which is common in newer BTO bedroom partitions, you must use specialized toggle bolts or hollow-wall anchors, and keep the rack weight under 5 kg to prevent structural damage.
Corner, Under-Desk, and Floating Shelf Racks
Sometimes, the FTP is located in the living room or study, allowing for different placement options. Corner racks are an exceptional space-saving solution for small HDB flats. They utilize the “dead space” where two walls meet—areas that are rarely used for main furniture pieces. A tiered corner rack with a radius of 25 cm to 30 cm fits seamlessly into these corners. By stacking your networking devices vertically across two or three tiers, you minimize the horizontal footprint to a mere fraction of a standard shelf.
Under-desk mounting is another highly effective strategy, particularly for those who work from home and want to keep their desks clutter-free. An under-desk modem router rack typically features a hanging design that clamps or screws to the underside of the desktop. For these racks, a depth of 20 cm to 25 cm and a width of 30 cm to 40 cm is ideal. However, vertical clearance is the most critical dimension here. The rack should not extend more than 12 cm to 15 cm below the desktop surface to prevent knee bumps.
If you prefer a floating shelf in the living area, a sleek, minimalist design with dimensions of 45 cm in width and 22 cm in depth is highly recommended, providing sufficient space to accommodate most modern routers without their rubber feet slipping off the edge.
Accounting for Heat Dissipation and Cable Clearances
The physical dimensions of your router are only half the story. You must account for “invisible” space requirements: heat dissipation and cable management. Modems and routers run 24/7 and generate significant heat. If confined to a tight, unventilated box, they will suffer from thermal throttling, leading to dropped connections and shortened hardware lifespans. To prevent this, ensure there is a minimum of 5 cm of clear air space on all sides of each device. Choose racks with open-grid, slatted, or heavily perforated designs. Fully enclosed wooden or plastic boxes without ventilation slots should be avoided entirely.
Cable clearances are equally important and often overlooked. A standard fiber optic patch cable—the yellow or white cable connecting your FTP to the ONT—is made of a thin glass core. If this cable is bent at a sharp 90-degree angle to fit inside a shallow rack, the glass core can fracture, or the light signal can escape, causing a complete loss of internet connection. NetLink Trust recommends a minimum bend radius of 30 mm for fiber cables. This means you must leave at least 5 cm to 6 cm of empty space behind your ONT specifically for the cable to curve gently.
Similarly, the ethernet cables (Cat6 or Cat6a) that connect your ONT to the router have thick copper wires and rigid RJ45 plastic connectors. These connectors stick out straight from the back of the device by about 3.5 cm. Consequently, a router with a physical depth of 16 cm actually requires a rack with a minimum depth of 22 cm to 24 cm once you account for connector protrusion and safe cable bending.
How to Measure Your Space for a Perfect Fit
To avoid the frustration of purchasing a rack that is too large or doesn’t align with your ports, follow this systematic measurement process:
First, measure the wall area or shelf surface where you plan to install the rack. If you are mounting near the DB box, measure the exact distance from the outer edge of the DB box cover to adjacent obstacles, such as the front door frame, light switches, or intercom units. Ensure that the rack’s footprint leaves at least a 5 cm buffer from these elements so it does not block access or look cramped.
Second, map out the distance to your power outlets and the Fiber Termination Point (FTP). In many HDB flats, the FTP is located inside or right next to the DB box, but the nearest power sockets might be a meter away. Measure the cable path along the wall or skirting board. Never plan a setup where cables are stretched taut across a walkway, as this creates a severe tripping hazard and risks damaging the ports on your devices.
Third, check for motion paths and structural obstructions. Open the DB box door fully and measure its swing arc. Do the same for any nearby room doors or cabinet doors. Your router rack must sit completely outside these swing paths to prevent accidental impacts. If you plan to install the rack near a window, check that curtain tracks or blinds won’t drape over the router, which can block signals and trap heat.
Finally, measure your actual physical hardware. Gather your ONT, router, power extension strip, and power adapters. Place them on a table in the exact layout you want. Plug the power adapters into the extension strip and connect the ethernet cables. Now, measure the absolute maximum width, depth, and height of this entire assembled setup. This active footprint is the true minimum size your rack needs to be.
Common Sizing and Placement Mistakes to Avoid
When setting up a home network in a compact HDB flat, several common errors can compromise both your network performance and home safety.
The single most common mistake is prioritizing aesthetics over function by purchasing fully enclosed “router hiding boxes” made of solid PVC, wood, or acrylic. While these boxes hide messy cables, they act as thermal insulators. Without active ventilation, the temperature inside can quickly exceed 50°C, leading to hardware degradation, frequent dropouts, and a shortened router lifespan. Always opt for racks with open-grid shelves or slatted doors that permit natural air convection.
Another frequent pitfall is failing to account for the size of power adapters. Singapore’s Type G 3-pin plug is exceptionally bulky. Many router power adapters are integrated into these large plug heads. When plugged into a power strip, they stick out horizontally or hang down heavily. If your rack is too shallow or lacks a dedicated power compartment, these heavy bricks will hang precariously over the edge, putting physical strain on the sockets and cables, which can lead to loose connections.
Additionally, many homeowners block critical access points. The DB box contains your home’s Earth Leakage Circuit Breaker (ELCB) and circuit breakers. In an electrical emergency, you must be able to access this box instantly. Mounting a heavy, semi-permanent shelf directly in front of the DB box door, or stacking items that block it, is a serious safety hazard. Ensure your rack is easily removable or positioned to leave the DB box door completely unobstructed.
Lastly, never underestimate the weight of your complete networking setup. A multi-tier steel rack loaded with a router, ONT, switch, and power extension strip can easily weigh 3 kg to 5 kg. Mounting this onto a hollow partition wall using standard screws without drywall anchors will eventually pull the screws out of the plaster, causing a costly crash. Always verify your wall type and use appropriate anchoring hardware.
Frequently Asked Questions (FAQ)
Can I mount a router rack directly on the HDB DB box cover?
No, you should never drill into or mount a rack directly onto the metal or plastic cover of your HDB DB box. The DB box houses high-voltage electrical wiring, and drilling into the cover carries a severe risk of electric shock or damaging your home’s electrical system. Additionally, doing so may violate HDB renovation guidelines. Instead, mount the rack on the concrete wall adjacent to the DB box, or use damage-free adhesive hooks rated for the rack’s total weight if mounting on a smooth, non-structural cabinet panel surrounding the box.
What is the minimum depth needed for standard power adapters?
The minimum usable shelf depth to accommodate standard Singapore 3-pin power adapters and their cables is 15 cm. A typical UK 3-pin plug extends about 5 cm to 6 cm from the wall socket or power strip, and the power cord extending from the plug requires another 3 cm to 4 cm of clearance to bend safely without straining the wire. If your power strip is mounted flat on the shelf, a depth of 15 cm to 20 cm ensures that the plugs and cables remain fully supported within the footprint of the rack.
Community discussion
Share your experience or ask a question. Comments are reviewed before publication.