
Using 3M Bumpon adhesive pads is a highly effective, low-profile way to stop your bed headboard from banging against the wall. These small, self-adhesive polyurethane bumpers act as durable shock absorbers, dampening the impact between your furniture and the wall to restore quiet to your sleeping space.
In many modern homes, particularly compact apartments where space is at a premium, beds are often pushed directly against concrete or drywall partitions. Even minor movements from tossing and turning can cause the headboard to flex and strike the wall. By understanding why this movement occurs and selecting the appropriate adhesive bumpers, you can easily eliminate the noise and protect your home’s interior finishes without resorting to bulky or expensive structural modifications.
Why Your Bed Headboard Keeps Hitting the Wall
Before applying any physical fix, it is essential to identify the root causes of headboard movement. One of the most common culprits is loose joints, brackets, or hardware connecting the headboard to the bed frame. Over time, the constant micro-movements of daily use can cause bolts and screws to back out of their threads, leaving the headboard free to wobble and sway.
Products mentioned in this guide
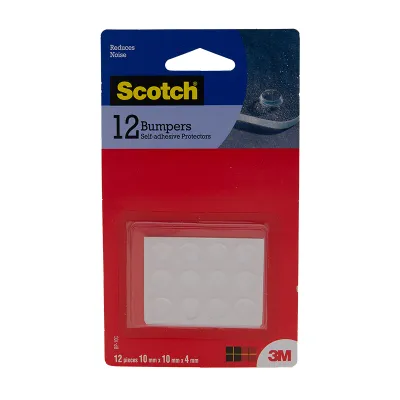
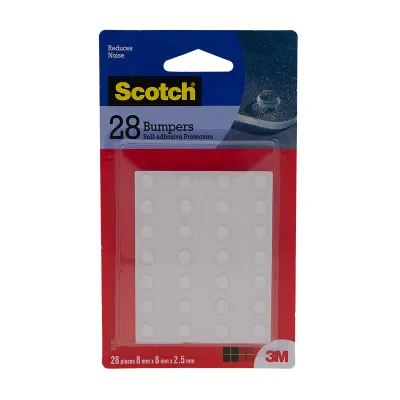
![[SG] Scotch™ Bumpons Circle - 10mm 12/P [EVERGREEN STATIONERY]](https://img.lazcdn.com/g/p/512c50a2e8841f35eb1bd5f00735382e.png_400x400q80.png_.webp)
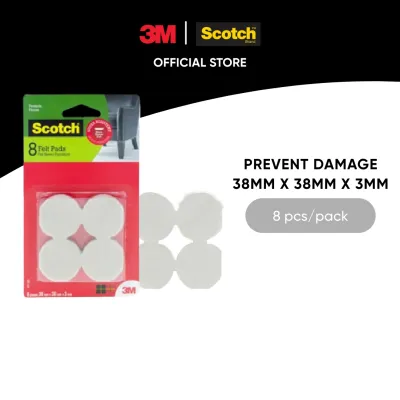
Prices are valid at publication and may change. Please refer to the product page for the latest price.
Another frequent issue is uneven flooring or missing glides under the bed legs. If your bedroom floor has a slight slope or if the protective feet on your bed frame are worn down unevenly, the entire bed base can shift or rock during use. This instability is amplified at the top of the headboard, turning a tiny wobble at the floor level into a significant swing that strikes the wall with considerable force.
Furthermore, architectural features like thick baseboards or skirting boards often prevent the bed frame from sitting completely flush against the wall. This design constraint forces the headboard to lean backward at a slight angle, creating a wedge-shaped gap. When you sit up to read or lean against the headboard, the frame flexes across this empty space, resulting in a sharp impact against the wall surface.
Finally, normal kinetic movement is an unavoidable part of using a bed. Activities such as sitting up, turning over in your sleep, or simply getting in and out of bed transfer lateral forces through the mattress and frame. Without a proper dampening interface, these forces inevitably translate into noisy vibrations and physical contact between the headboard and the wall.
How to Choose the Right 3M Bumpon for Your Headboard
Selecting the correct bumper pad size, shape, and thickness is crucial for effective noise reduction and long-term performance. The first step is to measure the exact gap between the back of your headboard and the wall when the bed is in its normal position. You want to choose a bumper that is slightly thicker than this gap, or positioned so that it makes gentle, continuous contact with the wall, preventing the headboard from gaining momentum before an impact.

Aesthetics also play a role in your selection. These elastomeric bumpers are available in clear, white, grey, black, and brown options. If the back of your headboard is exposed or visible from the side of the bed, choosing a clear bumper allows the natural wood grain or fabric color to show through, making the fix virtually invisible. For painted or dark wood headboards, matching the bumper color to the furniture frame ensures a clean, integrated look.
When browsing options, check the product packaging or manufacturer specifications for impact absorption ratings and load capacities. While all 3M Bumpon products are made from high-quality polyurethane that resists hardening and cracking, larger and thicker pads are generally better suited for heavier wooden or upholstered headboards. These heavier frames require more robust material density to absorb kinetic energy without bottoming out against the wall.
Additionally, consider the shape of the bumper. Cylindrical bumpers with flat tops offer a larger surface area, making them ideal for flat, broad headboard panels where the contact zone is predictable. Hemispherical or dome-shaped bumpers, on the other hand, are highly versatile and work exceptionally well on curved headboard frames or uneven wall surfaces, as they provide a single, consistent point of contact regardless of the angle of approach.
Step-by-Step Guide to Applying 3M Bumpon on a Headboard
To ensure a strong, long-lasting bond that can withstand years of subtle movement, you must follow a precise installation process. Begin by preparing the surface of the headboard. Dust, manufacturing residues, and natural wood oils can severely compromise the adhesive backing of the bumper pads. Clean the specific areas on the back of the headboard using a mild solvent, such as isopropyl alcohol mixed with water, and wipe it dry with a clean, lint-free cloth. Always check the manufacturer’s care instructions for your specific furniture finish before applying any cleaning agent to avoid discoloration.
Next, identify the exact contact points where the headboard physically meets the wall. You can do this by gently pushing the bed frame back against the wall and observing where the wood or fabric makes contact. Lightly mark these spots with a pencil on the back of the headboard. For optimal stability and load distribution, plan to place bumpers near the top corners and along any structural crossbeams that align with the wall.
Once the surface is clean and dry, carefully peel the bumper pad from its protective liner. It is critical to avoid touching the exposed adhesive surface with your fingers, as skin oils will weaken the bond. Align the bumper with your pencil marks and press it firmly onto the headboard. Apply steady, direct pressure for at least thirty seconds to activate the pressure-sensitive adhesive, ensuring complete contact across the entire base of the pad.
Before pushing your bed back into its final position, allow the adhesive to cure. In warm or highly humid climates, giving the adhesive sufficient time to bond is especially important. While the bumper may feel secure immediately, allowing it to cure undisturbed for 24 hours ensures the adhesive reaches its maximum holding strength, preventing the pads from shearing off when the bed is pushed against the wall.
Additional Ways to Stabilize a Wobbly Headboard
While adhesive bumper pads are excellent for dampening noise and protecting walls, some headboards may require additional mechanical stabilization if the underlying structure is severely compromised. Start by inspecting the connection points between your headboard and the bed frame. Use the appropriate wrench or screwdriver to tighten any loose bolts, screws, or brackets. Adding locking washers to these joints can help prevent them from vibrating loose again in the future.
If the design of your bed frame allows, you might also consider installing dedicated headboard stabilizers or anti-rattle brackets. These adjustable hardware accessories bridge the gap between the headboard and the wall, physically locking the frame in place to eliminate movement entirely. However, ensure that any hardware used is compatible with your wall type, especially when dealing with solid concrete walls that require specialized masonry anchors.
To prevent the entire bed base from shifting forward on smooth flooring, place non-slip furniture grips or heavy-duty rubber pads under the bed legs. In bedrooms with polished tile or hardwood floors, a heavy bed can easily slide forward during daily use, pulling the headboard away from the wall and creating a larger gap. Securing the feet of the bed ensures that your carefully placed bumper pads remain in constant, gentle contact with the wall surface.
When to Stop and Seek Professional Help
While most headboard wobbles can be resolved with simple DIY adjustments and bumper pads, there are times when structural damage requires expert intervention. If you notice deep cracks in the wooden frame, stripped screw holes that no longer hold hardware securely, or severely bent metal brackets, the structural integrity of the bed is compromised. Attempting to patch these issues with adhesive pads will not resolve the underlying safety hazard.
You should also assess the condition of your bedroom wall. If previous impacts have caused deep gouges, crumbling drywall, or exposed plaster, these areas must be properly repaired and painted before you reposition the bed. Applying bumper pads directly over damaged or unstable wall surfaces can cause the paint or plaster to peel away entirely under pressure.
If the headboard frame is severely compromised, wobbly to the point of being a tipping risk, or if you are unsure how to safely anchor a heavy custom headboard to a specific wall type, consult a professional furniture repair specialist or a qualified carpenter. Ensuring the physical safety of your sleeping environment should always take priority over a quick cosmetic fix.
Frequently Asked Questions (FAQ)
Will 3M Bumpon damage my wall paint when removed?
When properly applied to a well-primed, fully cured painted wall, 3M Bumpon pads are designed to be removed without causing significant damage. However, if the wall paint is old, poorly primed, or already peeling, the adhesive bond may pull some paint away during removal. To minimize this risk, use a gentle removal technique: slowly peel the bumper from one edge, or use a hairdryer on a low heat setting to soften the adhesive backing before gently pulling it away. Any residual adhesive left on the wall can typically be cleaned using a mild soapy water solution or a dedicated adhesive remover, checking first to ensure it does not discolor your paint.
How often should I replace the bumper pads on my headboard?
The lifespan of your bumper pads depends largely on the frequency of bed movement and the weight of the headboard. It is a good practice to perform a quick visual and tactile inspection of the pads every six to twelve months. Look for signs of permanent flattening, hardening of the polyurethane material, or a loss of elasticity, which reduces their shock-absorbing capabilities. If you notice a pad has shifted, lost its adhesion, or fallen off entirely, clean the area thoroughly and apply a fresh bumper to maintain consistent noise reduction and wall protection.
Community discussion
Share your experience or ask a question. Comments are reviewed before publication.