
Setting up a corner shelf display using modular components is an effective way to maximize underutilized vertical space in compact living areas. Corner spaces are notoriously difficult to furnish, often leaving awkward gaps that collect dust. By selecting a modular shelving system, you gain the flexibility to customize the height, width, and shelf configuration to match your specific storage needs. Successfully executing this project relies on systematic preparation, careful alignment of the interlocking components, and robust anchoring to ensure safety and stability.
Planning Your Corner Space and Shelf Layout
Before purchasing or unboxing any modular parts, you must precisely measure the physical boundaries of the target corner. Take three primary measurements: the vertical height from floor to ceiling, the width along the left wall, and the depth along the right wall. Do not assume your walls meet at a perfect 90-degree angle, as slight structural variations are common. Use a corner angle finder or a simple cardboard template to verify the true angle of the corner.
Look closely for any physical obstructions that could interfere with a flush installation. Baseboards running along the bottom of the wall are the most common obstacle, preventing the back of the shelving unit from touching the wall directly. Take note of electrical outlets, light switches, internet data points, air conditioning trunking, and window sills that project into the space. If your modular design features closed back panels or solid side supports, blocking these outlets can restrict access to power sources.
Products mentioned in this guide
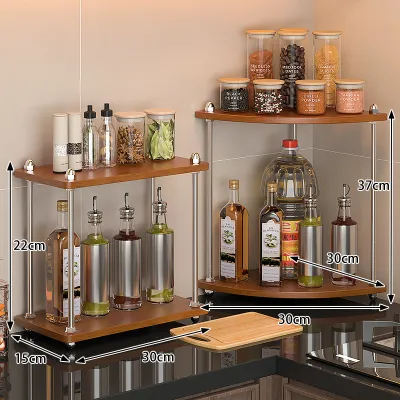
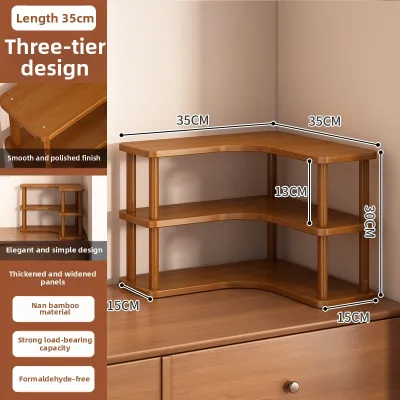
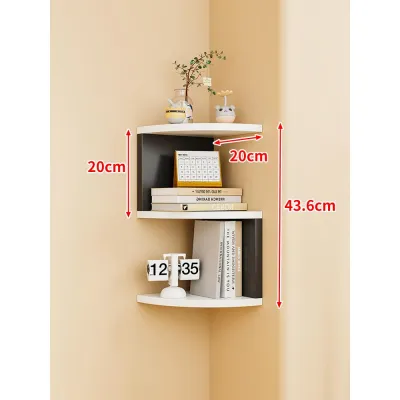
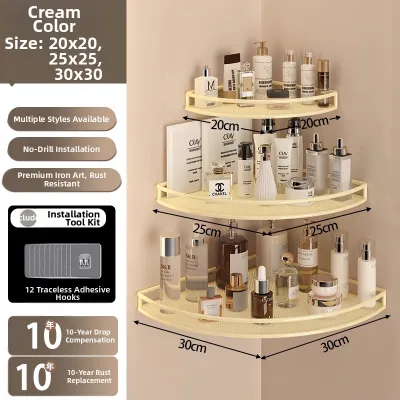
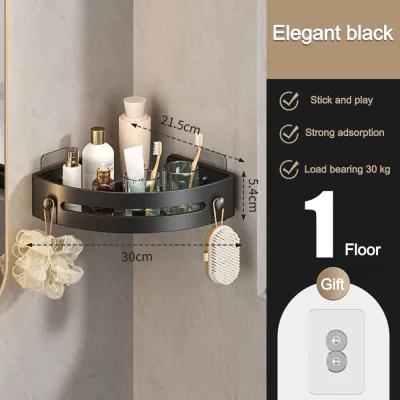
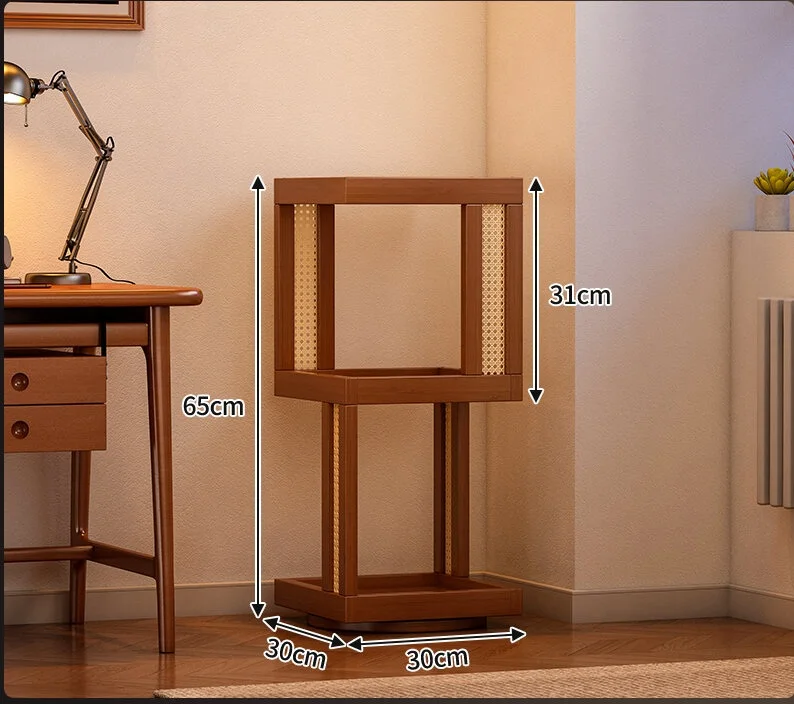
Prices are valid at publication and may change. Please refer to the product page for the latest price.
In high-rise housing landscapes like Singapore, logistical planning is just as critical as spatial planning. Ensure that the packaged boxes, or the fully assembled unit, can easily navigate narrow corridors, lift doors, and household entryways. If you reside in an HDB flat or condominium with tight stairwells, check the maximum clearance dimensions of your building’s service lift before ordering oversized modular components. Assembling the unit directly inside its designated corner is usually the safest way to avoid transport headaches.
Next, determine the optimal layout configuration for your modular pieces based on your functional goals. Common configurations include a classic L-shape that hugs both walls, a diagonal layout that cuts across the corner to create a flat front face, or a staggered step formation. Sketching your layout on grid paper helps visualize how the modules will fit together. Once you decide on a layout, unbox all components in a spacious, clear area and perform a thorough inventory against the manufacturer’s parts list, grouping connectors, panels, and screws before you begin assembly.
Essential Tools and Materials for Assembly
While many modular shelving kits include basic assembly tools like a small L-shaped hex key, having a dedicated set of high-quality hand tools will make the process smoother and prevent damage to the hardware. A standard Phillips-head screwdriver with a comfortable grip is essential for securing brackets, while a rubber mallet is invaluable for gently tapping interlocking modular joints into place without marring the finish. Keep a reliable steel tape measure close by to double-check spacing, and use a professional spirit level to guarantee that every horizontal surface is perfectly flat.

Protecting your home’s flooring is a critical step that should not be overlooked during the assembly process. Lay down a clean drop cloth, large piece of cardboard, or a non-slip mat to shield parquet, vinyl, or homogeneous tiles from accidental scratches or dents caused by dropped tools and heavy metal frame pieces. If your floor has minor surface variations, gather several adjustable plastic shims or adhesive felt pads. These small items allow you to make minute height adjustments at the base of the shelving unit, preventing wobbles on uneven surfaces.
Safety must remain a top priority, particularly for tall or narrow corner shelf display units. Before starting, check if the manufacturer’s instructions require the unit to be anchored to the wall. Ensure you have the appropriate wall anchoring kits on hand, which may include anti-tip straps, L-brackets, heavy-duty wall anchors, and matching screws. If your modular kit does not include anchoring hardware suitable for your specific wall type, purchase high-quality drywall anchors or concrete masonry plugs from a local hardware store before proceeding with the build.
Step-by-Step Assembly of the Modular Frame
Building the Base and Vertical Supports
The foundation of your modular corner shelf display determines the structural integrity of the entire finished unit. Begin by laying out the base plates, bottom feet, or caster wheels exactly as illustrated in the manufacturer’s assembly manual. Pay close attention to the orientation of these bottom components, as corner units often have asymmetrical base plates designed to distribute weight specifically toward the back corner. If your system utilizes adjustable leveling feet, screw them into the base plates completely, leaving a small amount of thread exposed for fine-tuning later.
Once the base is positioned in the designated corner, begin erecting the primary vertical support poles, side panels, or metal frames. If you are working alone, lean the vertical supports gently against the walls to prevent them from tipping over while you secure them to the base. Carefully align the pre-drilled holes or slot-in connectors of the vertical pillars with the receiving joints on the base. Secure these connections using the specified bolts or pins, but do not fully tighten them yet; keeping them slightly loose allows the frame to flex as you add more components.
Before moving upward, place your spirit level across the base plates in multiple directions—from left to right, front to back, and diagonally. If the bubble in the level is not perfectly centered, adjust the leveling feet or slide thin plastic shims underneath the base until the foundation is completely level. A level base prevents cumulative alignment errors as you build higher, which could otherwise cause the vertical supports to lean and make shelf installation difficult.
Adopt the rule of “finger-tightening” all structural screws and connectors during this initial stage. Using excessive force with a screwdriver or hex key early on can lock the frame into a slightly skewed position, making it nearly impossible to align the upper tiers or insert the shelf boards. By leaving the hardware finger-tight, you maintain enough play in the frame to make minor manual adjustments as the structure rises, ensuring a square and stress-free assembly.
Connecting Corner Joints and Horizontal Shelves
With the vertical supports stable, you can begin installing the specialized corner-specific connectors and horizontal shelf boards. Depending on the design of your modular system, this may involve attaching L-shaped corner brackets, three-way corner joints, or sliding custom-shaped triangular shelf panels into pre-formed slots. If your system uses metal collar sleeves on vertical poles, ensure all sleeves on a single tier are set to the exact same height mark before dropping the shelf frame over them.
Work systematically from the bottom tier upward, installing one horizontal shelf level at a time. This bottom-up approach keeps the center of gravity low during assembly and provides immediate structural reinforcement to the vertical supports as you climb. Carefully slide or drop each shelf board into place, verifying that the pre-drilled holes on the shelf align naturally with the brackets or pegs on the frame. If a shelf does not fit easily, do not force it down, as this can strip plastic threads, bend metal tabs, or crack wood veneer.
As you complete each tier, use your spirit level to check both the levelness of the horizontal shelf and the plumbness of the adjacent upright supports. If you notice a misalignment, gently tap the frame with a rubber mallet or slightly loosen the lower connectors to relieve any binding tension. Ensure that all corner joints are fully seated and that the shelf boards rest flush against their supporting brackets without any visible gaps, which guarantees even weight distribution across the modular grid.
Leveling, Securing, and Wall Anchoring
Once the entire modular frame is fully assembled and all shelves are in place, you must perform a final, comprehensive check before securing the hardware. Place your spirit level on the top shelf, middle shelf, and bottom shelf, checking both axes of each platform. Next, hold the level vertically against the front and side support pillars to ensure the unit is not leaning forward or to one side. A leaning shelf is not only visually unappealing but also subjects the joints to constant shear stress, significantly reducing its load capacity and increasing the risk of a structural failure.
After confirming that the unit is perfectly level and plumb, proceed to fully tighten all screws, bolts, and connectors. To prevent distorting the frame, tighten the hardware in a cross-pattern or diagonal sequence rather than working sequentially down one side. For example, tighten a bolt on the bottom left, then move to the top right, followed by the bottom right, and finally the top left. Apply firm pressure but avoid over-tightening, especially when working with engineered wood or plastic connectors, as excessive torque can strip the threads or split the material.
Wall anchoring is a non-negotiable safety step for any corner shelf display that exceeds a height of one meter, or any unit loaded with heavy or valuable items. To anchor the shelf securely, you must first identify the material of your wall. In Singapore, most residential walls are made of solid concrete, brick masonry, or lightweight drywall partition panels. Standard plastic wall plugs provided in generic kits are often inadequate for solid concrete; instead, you will need to use high-quality masonry anchors (such as nylon sleeve anchors or concrete screws) and a hammer drill with a masonry drill bit to create secure pilot holes.
If your wall is made of drywall, you must locate the vertical timber or metal studs behind the plasterboard using a stud finder and screw the anchoring brackets directly into them. If no studs align with your shelf brackets, use heavy-duty toggle bolts or hollow-wall anchors designed specifically for drywall loads. Never rely on simple plastic expansion plugs in hollow drywall, as they can easily pull out under tension.
Safety Warning and Stop Condition: If you are unsure of your wall’s composition, do not have the correct drilling tools, or find that the shelving unit still wobbles after attaching the anchoring brackets, stop the installation immediately. Do not load any items onto the shelves. Consult a qualified professional handyman or contact the shelving manufacturer’s technical support line to obtain the correct anchoring hardware and professional guidance for your specific home environment.
Safe Loading and Display Styling Tips
Loading your corner shelf display requires a careful balance between structural safety and visual design. The foundational rule of shelf safety is to place your heaviest items—such as thick books, large ceramic planters, or heavy storage boxes—on the lowest tiers of the unit. This keeps the center of gravity close to the floor, which dramatically increases the overall stability of the shelving unit and reduces the risk of tipping. Reserve the middle and upper tiers for lightweight decorative items, small framed photos, and delicate glassware.
Always refer to the manufacturer’s product manual to identify the maximum weight capacity specified for each individual shelf and the cumulative load limit for the entire unit. Never exceed these limits, as doing so can cause horizontal shelves to sag permanently, warp metal frames, or cause sudden joint failures. Keep in mind that a corner shelf display often has a deeper middle section than standard rectangular shelves; avoid concentrating all the weight in the deep center point, and instead distribute items evenly across the entire surface area of each shelf.
When styling your corner display, use the unique depth of the corner space to your aesthetic advantage. Place a larger, visually striking “anchor” piece—such as a tall vase or a sculptural art object—deep in the corner of a middle shelf to draw the eye inward. Stagger the heights and shapes of surrounding items to create a sense of movement and visual flow. For instance, pair a stack of horizontal books with a trailing potted plant on one side, and leave open space on the other to prevent the corner from looking cluttered or dark.
Over time, temperature fluctuations and the natural settling of your home can cause modular connections to loosen slightly. Establish a routine maintenance schedule to inspect your corner shelving unit at least once every six months. Empty the shelves, check that all wall anchors remain firmly seated in the wall, and use your hand tools to gently re-tighten any screws or bolts that may have backed out. Inspect the joints for any signs of stress, cracking, or bowing, especially if you have recently rearranged your display or added heavier items.
Troubleshooting Common Assembly Issues
During the assembly of modular shelving, you may encounter misaligned screw holes where a shelf bracket does not line up with the pre-drilled holes in the vertical uprights. This issue is almost always caused by tightening the lower frame bolts too early in the process. To resolve this, slightly loosen the screws on the adjacent joints and the base plate of the unit. This will restore flexibility to the frame, allowing you to gently pull or push the vertical supports into alignment until the problematic screw slides easily into its hole, after which you can retighten all hardware.
If your fully assembled corner shelf display wobbles or rocks when touched, the culprit is typically an uneven floor surface or an unevenly seated base joint. First, verify that all bottom feet or caster wheels are fully inserted and screwed down to the same depth. If the floor itself is sloped or uneven, use your spirit level to identify the low point and adjust the leveling feet accordingly. If your unit lacks adjustable feet, slide a durable plastic shim or a piece of dense felt padding under the affected corner until the wobble is completely eliminated.
Should you discover any damaged, bent, or missing modular components while unboxing or assembling the unit, do not attempt to force the damaged parts together or use makeshift hardware from your toolbox. Using compromised components can severely weaken the structural integrity of the shelving unit, leading to unexpected collapses. Stop the assembly process immediately, set the parts aside safely, and locate the exact part numbers in your instruction manual. Contact the manufacturer or the retail store’s customer service department to request official replacement parts before resuming your build.
Frequently Asked Questions (FAQ)
Can I expand my modular corner shelf with extra tiers later?
Yes, many modular shelving systems are designed for vertical or lateral expansion, but you must strictly adhere to the manufacturer’s engineering limits. Before adding extra tiers, consult the product manual to verify the maximum allowable height and total weight capacity for the expanded configuration. Keep in mind that increasing the height of a shelving unit significantly raises its center of gravity and increases the risk of tipping. Therefore, if you decide to add extra tiers to your corner shelf display, installing a robust wall anchoring system becomes an absolute safety requirement, regardless of whether it was optional at lower heights.
Does a low-profile corner display shelf still need wall anchoring?
While low-profile corner shelves (typically under one meter in height) have a lower center of gravity and are inherently more stable than tall units, wall anchoring is still highly recommended under several common conditions. If you plan to display heavy items near the top, place the unit on thick carpeting that causes it to lean, or live in a home with active young children or climbing pets, anchoring the shelf is essential to prevent accidental tip-overs. Always review the safety guidelines provided in your product manual, as manufacturers often specify anchoring requirements based on potential household hazards rather than unit height alone.
Community discussion
Share your experience or ask a question. Comments are reviewed before publication.