
Replacing worn-out, squeaking, or stuck wheels on your heavy furniture with robust, heavy-duty casters is one of the most effective ways to restore smooth mobility and prevent permanent floor damage. Whether you are dealing with a solid teak sideboard, a mobile kitchen island, or a heavy shelving unit in a humid home environment, upgrading to a high-quality heavy duty wheel ensures your furniture moves effortlessly without risking structural failure. The entire replacement process involves assessing your furniture’s structural base, choosing compatible caster mountings, safely extracting the old hardware, and securing the new wheels with precision.
By executing this upgrade methodically, you can avoid common pitfalls such as split wood sockets, stripped threads, or uneven load distribution. In Singapore’s humid climate, metal components are particularly prone to oxidation and seizing over time, making proper removal techniques and material selection critical for a long-lasting repair. Before beginning any modifications, check your furniture’s original care instructions and warranty guidelines. If you are unsure of the material composition or if the manufacturer’s instructions conflict with this guide, stop and consult the manufacturer or a qualified professional.
Assessing Furniture Compatibility and Choosing a Heavy Duty Wheel
Before purchasing replacement wheels, you must evaluate whether the furniture’s frame can handle the physical stress of heavy-duty casters. A heavy-duty wheel increases the point load at the mounting zones, which can cause structural failure if the base material is compromised. Inspect the underside of your furniture thoroughly, checking for signs of wood rot, deep cracks, joint separation, or thin panels that might buckle under concentrated weight. If the wood is soft, crumbly, or shows signs of splitting, the base must be reinforced or repaired before you attempt to install new hardware.
Products mentioned in this guide
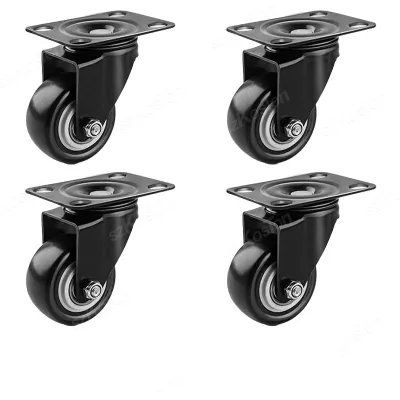
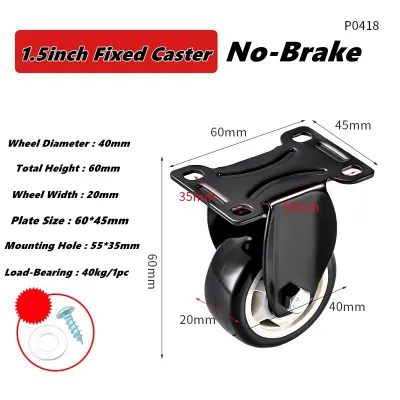
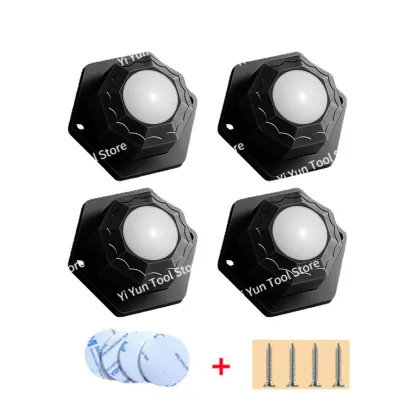
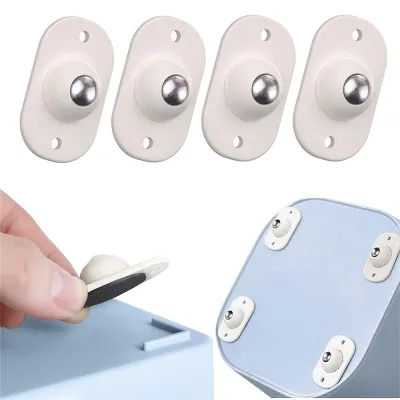
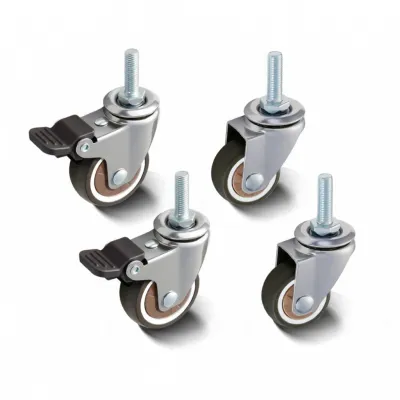
Prices are valid at publication and may change. Please refer to the product page for the latest price.
To determine the required load capacity for your new wheels, you need to calculate both static and dynamic weight limits. Start by estimating the empty weight of the furniture piece itself, then add the maximum weight of all items you plan to store inside or on top of it. Divide this total weight by the number of casters you plan to install (typically four) to find the minimum capacity required per wheel. To ensure a safe operating margin and account for uneven floors where one wheel might temporarily lift off the ground, select casters that are individually rated to support at least 33% more than this calculated per-wheel weight.
When upgrading your furniture wheels, you must also consider the finished dimensions of the modified piece. Installing larger heavy-duty casters will increase the overall height of the furniture, which can affect its usability and spatial compatibility. Measure your available space carefully, ensuring the elevated piece will still fit under low countertops, desks, or shelving. Additionally, verify that the added height does not prevent the furniture from clearing standard doorways or lift access openings in your building, especially if you plan to move the piece frequently between rooms.
Identifying the existing mounting mechanism is the next critical step in ensuring compatibility. Furniture wheels generally fall into two primary categories: stem casters and plate casters. Stem casters feature a metal rod that inserts directly into a pre-drilled hole or socket in the furniture leg, and they are sub-categorized into grip-ring stems, threaded stems, or square stems. Plate casters, on the other hand, feature a flat metal top plate with multiple bolt holes that screw directly into a wide, flat wooden surface. Examine your current setup to see which style your furniture uses, as switching from a stem to a plate caster usually requires a flat, wide mounting surface and sufficient structural depth to accept mounting screws.
Your choice of wheel material directly impacts how smoothly the furniture rolls and whether your floors remain pristine. In many Singapore homes, flooring materials range from hard homogeneous tiles and marble to delicate vinyl, laminate, or polished parquet wood. Hard nylon or metal wheels can easily scratch, gouge, or wear down protective floor finishes when rolling under heavy loads. For hard indoor surfaces, look for non-marking polyurethane or soft thermoplastic rubber wheels, which cushion the load and roll quietly without leaving scuff marks. If the furniture will transition across mixed environments, such as from tiled utility areas to carpeted rooms, a medium-density rubber wheel provides a versatile balance of grip and floor protection.
Essential Tools and Materials for Caster Replacement
Having the correct tools on hand prevents delays and minimizes the risk of damaging your furniture during the replacement process. Gather a set of basic hand tools, including flathead and Phillips screwdrivers, an adjustable wrench, a socket set, and locking pliers or vice grips for stubborn hardware. For stem casters, a claw hammer or a dedicated pry bar can assist in popping out tightly wedged stems.

Because metal components frequently rust or seize in humid tropical environments, a can of penetrating oil is invaluable for loosening stuck threads or rusted sleeves. You should also prepare safety gear, such as heavy-duty work gloves to protect your hands from sharp metal edges and safety glasses to shield your eyes from flying wood splinters or rust flakes. For precise measurements of stem diameters and bolt hole spacing, a digital caliper or a high-quality tape measure is highly recommended.
Depending on the condition of your furniture base, you may also need a power drill with a set of wood drill bits to create clean pilot holes for plate screws or to enlarge stem sockets. Keep wood filler, wood glue, and solid wood dowels nearby in case you need to fill and reinforce old, stripped screw holes before drilling new ones. Finally, ensure you have grade-appropriate mounting screws, bolts, and lock washers that match the specifications of your new heavy-duty plate casters.
Step 1: Safely Removing Old and Stuck Furniture Wheels
To begin the physical removal, you must first eliminate any risk of injury or furniture damage by completely emptying the piece of all contents. Safely tip the furniture onto its side or back onto a soft protective blanket or carpet to expose the underside, ensuring that you do not put lateral stress on the old wheels as you tilt the frame. If the furniture is exceptionally heavy or awkward, use sturdy wooden blocks or jack stands to elevate the base, and enlist a helper to assist with the lifting. Never allow the old, worn wheels to bear the weight of the furniture while you are actively working on or loosening the mounting points.
For furniture equipped with plate casters, the removal process is typically straightforward but requires care to avoid stripping the screw heads. Use a screwdriver or socket wrench that fits the mounting screws or bolts perfectly, applying firm downward pressure as you turn counterclockwise to break any paint or rust seals. Keep all removed hardware organized in a small tray, even if you plan to replace it, as these pieces serve as a valuable reference for thread size and length. If a screw head is stripped or rusted solid, clamp your locking pliers tightly onto the exposed screw head or bolt shaft to manually turn and extract it.
Stem casters can be more challenging to extract, especially if they have been seated in wooden legs for decades. For grip-ring stems, insert the claw of a hammer or a flat pry bar between the shoulder of the caster and the bottom of the furniture leg, using a scrap piece of wood underneath to protect the furniture finish from leverage marks. Gently pry downward, applying even pressure to slide the metal stem out of its plastic or metal sleeve. If the stem is seized or rusted inside a metal socket, spray a generous amount of penetrating oil directly into the joint, allow it to sit for at least 15 to 20 minutes, and then use locking pliers to twist the caster back and forth while pulling outward.
Once the old casters are successfully removed, take the time to clean the mounting area thoroughly to ensure a flat, stable surface for the new hardware. Use a wire brush or a stiff utility brush to clear away accumulated rust, old wood splinters, dust, and dried adhesive from the mounting holes or plate footprints. Inspect the bare wood or metal socket for any hidden damage that was previously obscured by the old caster body.
If at any point during the removal process you notice the furniture leg cracking, the wood splitting deeply, or the structural base showing signs of severe rot, stop immediately. Do not attempt to force a new caster into a compromised frame, as the concentrated weight will likely cause a catastrophic collapse when the furniture is uprighted. In such cases, consult a professional furniture repair specialist to reinforce the legs or rebuild the mounting base before proceeding.
Step 2: Installing New Heavy-Duty Casters Securely
When installing new heavy-duty stem casters, precision is vital to prevent the wood from splitting under pressure. If your new casters use grip-ring stems, align the stem straight with the existing socket or sleeve and push it firmly inward until you hear or feel the metal ring click into place. For threaded stems, carefully thread the bolt into the socket by hand first to ensure you do not cross-thread the connection, then tighten it securely using an open-ended wrench. If the new stem feels slightly too tight or if you are installing a new socket sleeve, check the manufacturer’s instructions for the exact drill bit size required, and drill a clean, straight pilot hole rather than forcing the hardware into an undersized opening.
For plate casters, position the new metal plate over the solid wood base, ensuring it sits completely flush against the surface without rocking. If the bolt pattern of the new heavy-duty plate does not align perfectly with the old screw holes, you must mark and drill new pilot holes. Slide the plate slightly away from the old holes to find fresh, solid wood, mark the center of each slot with a pencil, and drill pilot holes using a bit that matches the inner shaft diameter of your mounting screws. Secure the plate firmly using high-grade wood screws or through-bolts, adding flat washers and lock nuts on the opposite side if you have access to the interior of the cabinet base.
Achieving absolute levelness across all four corners is critical when upgrading to heavy-duty wheels, as even a minor height discrepancy will cause the furniture to wobble. If one caster sits higher than the others, it will bear a disproportionate amount of the total load, leading to premature wheel failure or frame warping. Measure the distance from the bottom of the furniture frame to the floor at each wheel location to verify consistency. If you detect any unevenness, adjust the seating depth of threaded stem casters or insert thin, durable plastic or metal shims behind the mounting plates of plate casters to level the frame.
When tightening the mounting hardware, apply proper torque techniques to ensure a long-lasting connection that will not vibrate loose. Tighten the screws or bolts in a diagonal, crisscross pattern to distribute the clamping force evenly across the mounting plate or socket base. Tighten the hardware until it is snug and the lock washers are compressed flat, but avoid over-tightening with excessive force. Over-torquing can easily strip the threads in wooden surfaces, crush the wood fibers beneath the plate, or deform the metal mounting brackets, which compromises the overall structural stability of the upgrade.
Step 3: Testing Stability and Adjusting the Upgraded Furniture
With all the new heavy-duty casters securely fastened, you can now safely prepare to upright the furniture. Gently lower the furniture back onto its new wheels, avoiding dropping it abruptly, which can cause sudden impact damage to the new bearings or mounting points. Once the furniture is standing on its own, check its levelness using a spirit level placed on the top surface in both directions. Push down firmly on each corner of the piece individually to check for any rocking, instability, or flexing in the base joints.
Before loading your items back into the furniture, perform a progressive rolling test to verify that the wheels swivel and roll smoothly. Push the empty furniture slowly across your floor, testing both straight-line movement and 360-degree pivoting maneuvers. Listen carefully for any unusual grinding, clicking, or squeaking noises, which are common indicators of misaligned wheel axles, loose mounting bolts, or debris trapped inside the ball-bearing raceways. If you detect any resistance or unusual sounds, inspect the hardware immediately to ensure no components are rubbing against the furniture frame.
Once the empty test is successful, gradually reload the furniture with its original contents up to its normal operating capacity. Repeat the rolling and pivoting tests under this realistic load, paying close attention to how the wheels respond to the increased weight. The furniture should still move with minimal resistance, and the frame should show zero signs of bowing or shifting.
Finally, test any locking or braking mechanisms equipped on your new heavy-duty casters to ensure they function reliably under load. Engage the brakes on all locking wheels and attempt to push the furniture gently; the wheels should remain locked in place without slipping or sliding across your flooring. If the brakes fail to hold or if the wheels slide easily on smooth surfaces like polished marble or homogeneous tiles, adjust the brake tension according to the manufacturer’s specifications or consider placing non-slip caster cups under the wheels when the furniture is parked long-term.
Common Pitfalls and Mistakes to Avoid During the Upgrade
One of the most frequent errors when upgrading furniture wheels is miscalculating the actual load capacity required. Many homeowners only consider the static weight of the empty furniture, completely forgetting to factor in the heavy books, files, kitchen equipment, or tools stored inside. Furthermore, dynamic forces—such as the sudden impact of pushing a heavy cabinet over a threshold or carpet transition—can momentarily double the load placed on a single wheel. Always choose casters with a rated capacity that comfortably exceeds your maximum estimated total weight to prevent sudden wheel collapse.
Another common pitfall is ignoring floor compatibility and choosing wheel materials solely based on their weight ratings. While hard nylon, solid steel, or cast iron wheels can support immense amounts of weight, they will quickly destroy residential flooring like hardwood, laminate, or luxury vinyl tiles. The high point pressure from a hard wheel under a heavy load can leave permanent indentations, scratches, or wear tracks in your floor finishes. Always verify that the wheel material is specifically rated as non-marking and safe for your particular type of indoor flooring.
Forcing a mismatched or slightly oversized caster stem into an existing socket is a mistake that often results in permanent damage to the furniture leg. If a stem is even a fraction of a millimeter too large, forcing it into a wooden leg can act like a wedge, splitting the wood grain along its entire length. If the original socket is worn out or too small, always take the time to remove the old sleeve, drill a properly sized hole, and install the new sleeve that came with your heavy-duty caster set.
Finally, failing to secure the mounting hardware against vibration is a recipe for future failure. As furniture is rolled across grout lines, floor joints, or textured surfaces, the constant micro-vibrations will naturally work standard screws and bolts loose over time. When installing plate casters, always use lock washers, nylon-insert lock nuts, or apply a drop of medium-strength threadlocker to the bolt threads. This simple step ensures that the hardware remains tightly fastened, preserving the structural integrity of your furniture and keeping your heavy-duty wheels rolling safely for years to come.
Frequently Asked Questions (FAQ)
How do I accurately measure the stem size of my old casters?
To ensure you purchase the correct replacement, you must measure both the diameter and the length of the existing caster stem with high precision. Do not rely on a standard tape measure, as a difference of just one millimeter can prevent the new stem from fitting or cause it to wobble inside the socket. Instead, use a digital caliper to measure the exact outer diameter of the metal stem shaft and the total length from the base of the stem to its tip. Additionally, identify the stem type: grip-ring stems have a small metal ring near the top, threaded stems feature screw threads (which require you to verify the thread pitch), and grip-neck stems have a flared top.
Can I install heavy-duty casters on particleboard or MDF furniture?
Installing heavy-duty casters directly onto particleboard or medium-density fiberboard (MDF) is highly risky because these engineered woods lack the structural grain and density of solid wood. Under heavy dynamic loads, standard wood screws will easily tear out of MDF, causing the caster to rip away and damage the furniture base. If you must upgrade casters on particleboard furniture, you should reinforce the base first. Glues and screws alone are insufficient; instead, secure a solid wood backing block or a thick plywood plate to the underside of the cabinet using high-strength adhesive and through-bolts that run completely through the cabinet floor, distributing the weight across a much larger surface area.
Community discussion
Share your experience or ask a question. Comments are reviewed before publication.