
Replacing worn sliding wardrobe door pulleys requires identifying your door’s mechanical tracking system, safely removing the heavy door panel from its frame, installing exact-match replacement rollers, and fine-tuning the alignment screws for a smooth glide. When sliding doors begin to stick, jump, or scrape along the track, worn-out rollers are almost always the culprit. Addressing this issue promptly prevents permanent damage to the metal tracks and restores the effortless, quiet operation of your bedroom furniture.
In space-constrained urban homes, such as HDB flats and condominiums in Singapore, sliding wardrobes are highly popular space-saving solutions. However, the combination of daily use and high tropical humidity can cause dust, hair, and lint to clump inside the tracks, accelerating pulley wear. Undertaking this repair yourself is a highly manageable DIY project that saves on professional service fees, provided you follow the correct safety and mechanical steps.
Assess Your Wardrobe Door System and Pulley Type
Before purchasing replacement door pulleys, you must identify the specific mechanical configuration of your wardrobe. Sliding wardrobe doors are not universal; installing the wrong type of roller assembly can cause the door to derail, jam, or damage the track. Taking a few minutes to inspect how your doors hang and glide ensures you buy compatible hardware and prepare the correct tools for the job.
Products mentioned in this guide
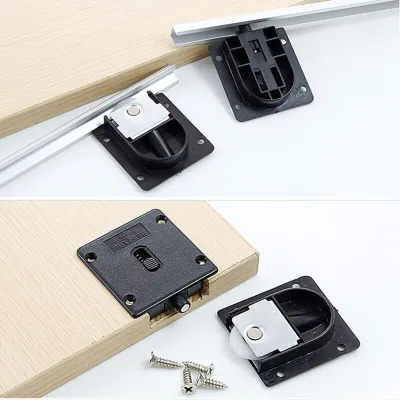
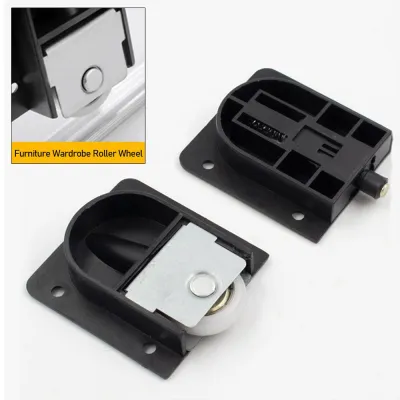
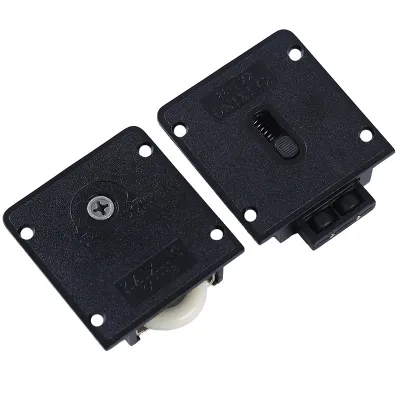
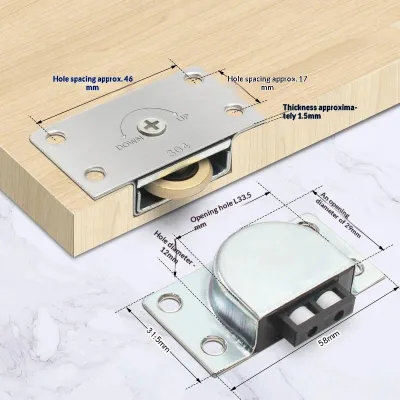
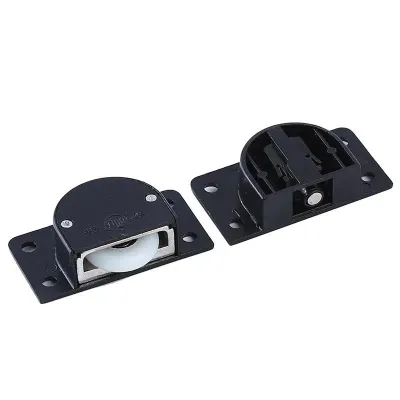
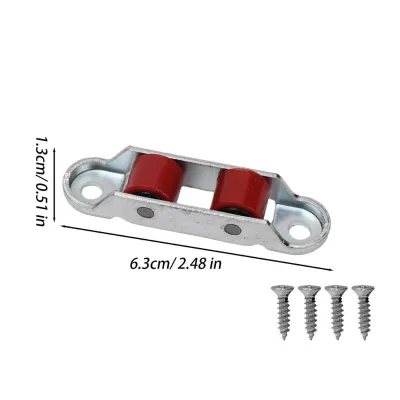
Prices are valid at publication and may change. Please refer to the product page for the latest price.
Every sliding door relies on a specific weight-bearing mechanism that dictates how it should be handled during removal and installation. Attempting to force a door off its tracks without understanding its mechanical design can bend the aluminum rails or chip the door panels. Inspecting the top and bottom edges of the door frame will reveal which system your wardrobe uses.
Top-Hung vs. Bottom-Rolling Systems
Top-hung wardrobe doors suspend the entire weight of the door panel from an overhead track. In this configuration, the rollers are attached to the top edge of the door and run along a heavy-duty upper rail, while the bottom of the door is kept in line by a simple guide channel or floor guide. These systems are common in premium, sleek wardrobe designs because they eliminate thick bottom tracks on the floor, but they require sturdy overhead support.
Bottom-rolling wardrobe doors rest their full weight on a track installed along the floor or bottom wardrobe carcass. The bottom rollers feature wheels that ride directly on a raised metal rail, while the top track contains simple guide rollers or plastic channels that keep the door upright and prevent it from tipping forward. This design is highly common in standard built-in and freestanding wardrobes because it distributes the door’s weight directly onto the floor.
To visually identify your system, open the wardrobe door halfway and look closely at the upper and lower tracks. If you see heavy metal brackets, wheels, and adjustment screws at the top of the door, you have a top-hung system. If the top track is a simple, empty metal channel and the bottom track features prominent metal rails with wheels visible at the base of the door, your system is bottom-rolling.
Checking Door Weight and Track Condition
Before proceeding with a DIY replacement, you must assess whether the project is safe to perform without professional assistance. Standard replacement door pulleys are rated for specific load capacities, which are typically listed on the manufacturer’s packaging. You must ensure that the replacement hardware you select is rated to support the estimated weight of your specific wardrobe doors.
Inspect the physical condition of the metal tracks along their entire length. Run a clean cloth along the rails to check for warping, deep dents, cracks, or structural sagging in the wardrobe frame. If the tracks are severely bent or the wardrobe carcass has sagged due to age, simply replacing the pulleys will not resolve the sliding issues, as the new wheels will still get caught in the damaged sections of the track.
When to Call a Professional:
- Damaged Tracks: The aluminum or steel tracks are bent, cracked, or lifting away from the wardrobe frame.
- Excessive Weight: The door is exceptionally heavy, made of solid hardwood, or features thick, floor-to-ceiling mirrored glass panels.
- Structural Sagging: The wardrobe frame itself has warped, causing the door opening to become misaligned.
- Unidentified Hardware: The existing pulley system is highly proprietary, custom-built, or lacks accessible replacement parts.
Gather the Right Tools and Replacement Pulleys
Having the correct tools on hand before you begin prevents mid-project delays and ensures a smooth, safe installation. Because wardrobe doors are awkward to handle, organizing your workspace and preparing your equipment beforehand is essential for a successful outcome.

Essential Tools and Equipment:
- Screwdrivers: Both Phillips and flathead screwdrivers are required to remove mounting screws and adjust pulley height.
- Allen Key Set: Some modern European-style wardrobe systems use hex screws for mounting and adjustment.
- Adjustable Wrench: Useful for tightening locknuts on top-hung roller brackets.
- Vacuum Cleaner: Equipped with a crevice tool attachment to thoroughly clean the tracks.
- Microfiber Cloths and All-Purpose Cleaner: To wipe away stubborn grease, dust, and grime.
- Work Gloves and Safety Glasses: To protect your hands from sharp metal edges and your eyes from falling debris during overhead work.
When sourcing your replacement door pulleys, the most reliable method is to remove one of the old rollers first and take it to a local hardware specialist, or compare it carefully with detailed listings on online marketplaces. You must match the physical dimensions of the old hardware, including the wheel diameter, the width of the mounting stem, the screw hole alignment, and the wheel profile (flat, concave, or convex) to ensure seamless compatibility.
Additionally, always recruit a second person to assist you with this project. Wardrobe doors are tall, heavy, and difficult to balance. Having a helper to support the weight of the door while you unhook the rollers or align the tracks is crucial to prevent personal injury, damaged flooring, or shattered glass panels.
Safely Remove the Sliding Door from the Tracks
Removing the door panel is the most physically demanding part of the replacement process. To protect your home’s interior, clear a large working area in the bedroom and lay down thick protective blankets, yoga mats, or heavy cardboard on the floor. This prevents the heavy door corners from scratching delicate parquet, vinyl, or tiled flooring while you work.
Removing Bottom-Rolling Doors:
- Locate the Adjustment Screws: Find the small access holes at the bottom corners of the door face or edge. Use a screwdriver to turn the adjustment screws counterclockwise, which retracts the wheels upward into the door frame and lowers the door panel.
- Lift the Door: Stand in the center of the door panel with your helper. Grip the sides of the door firmly and lift it vertically upward into the deep top track channel.
- Tilt and Release: While holding the door in the raised position, tilt the bottom of the door outward toward you to clear the bottom track rail.
- Lower and Remove: Carefully lower the door downward and outward to release the top of the door from the upper guide channel.
Removing Top-Hung Doors:
- Locate the Safety Locks: Look at the top roller brackets inside the wardrobe. Many systems feature a plastic safety clip, retaining tab, or locknut that prevents the door from jumping off the track.
- Disengage the Locks: Flip the plastic tabs open or loosen the safety screws using the appropriate screwdriver or Allen key.
- Lift Off the Track: With your helper supporting the weight, lift the door panel slightly upward to unhook the roller wheels from the overhead rail.
- Extract the Door: Carefully pull the door away from the wardrobe frame, ensuring the bottom guides slide smoothly out of the floor channel.
Once the door is completely free from the wardrobe frame, carry it carefully to your prepared workspace. Lay the door completely flat on the protective blankets with the pulley side facing upward and easily accessible. Never lean a heavy glass or mirrored door against a wall unsupported, as it can easily slip and shatter.
Swap the Old Pulleys and Clean the Hardware
With the door safely laid flat, you can now access the mechanical components. Take a moment to examine how the old pulley assembly is seated within the door frame. Most wardrobe doors have recessed pockets or surface-mounted brackets that hold the roller housing in place.
Use your screwdriver or Allen key to remove the mounting screws securing the old pulley assembly to the door. Keep these screws in a small container, as you may need to reuse them if the replacement kit does not include new hardware. Gently pry the old roller housing out of its pocket or bracket, taking care not to splinter the surrounding wood or bend the metal frame of the door.
Once the old hardware is removed, inspect the mounting holes and the surrounding material. If the wardrobe door is made of particleboard or MDF, the screw holes may have become stripped or loose over time. If you notice minor wood damage, you can apply a small amount of wood filler or insert wooden dowel plugs to reinforce the area before installing the new screws, ensuring a tight, secure hold.
Before installing the new door pulleys, perform a thorough cleaning of the entire door edge and the wardrobe tracks. Use your vacuum cleaner’s crevice tool to extract years of accumulated dust, pet hair, and lint from the deep recesses of both the top and bottom tracks. Wipe the tracks down with a damp microfiber cloth and a mild cleaner to remove sticky residue, ensuring a perfectly clean surface for the new wheels.
Align the new replacement pulley assembly with the mounting pocket or bracket on the door. Insert the mounting screws and tighten them securely, ensuring the housing sits perfectly flush with the door edge. Manually spin the new wheels to verify that they rotate freely, do not wobble, and do not rub against the sides of the door frame or housing. If the new pulleys feature adjustable tension or height screws, use your screwdriver to set them to the middle position initially, which makes rehanging the door much easier.
Rehang the Door and Fine-Tune the Alignment
Reinstalling the wardrobe door is a direct reversal of the removal process. With the help of your assistant, lift the door panel and carry it back to the wardrobe frame, keeping it upright and balanced.
Rehanging Bottom-Rolling Doors:
- Insert the Top: Guide the top edge of the door into the deep upper track channel at a slight angle.
- Align the Bottom: Push the door upward into the top channel, compress the spring-loaded bottom rollers manually or using a flat tool, and swing the bottom of the door over the lower rail.
- Seat the Wheels: Gently lower the door so the grooves of the bottom pulley wheels rest securely on the raised metal rail of the track.
Rehanging Top-Hung Doors:
- Hook the Rollers: Lift the door panel and hook the top roller wheels securely over the overhead track rail.
- Engage Safety Locks: Slide the plastic safety clips back into the locked position or tighten the retaining screws to ensure the door cannot jump off the track during use.
- Insert Bottom Guides: Ensure the bottom of the door rests correctly within the floor guide channel.
Once the door is on the tracks, slide it back and forth gently to test the movement. It should move without resistance, but it may sit crookedly or leave a gap at the side wall. To correct this, locate the adjustment screws on the lower corners of bottom-rolling doors or on the top brackets of top-hung doors.
Turning the adjustment screw clockwise will raise that corner of the door, while turning it counterclockwise will lower it. Adjust the screws on both sides incrementally until the door is perfectly vertical (plumb) and sits completely flush against the wardrobe side panel when closed. Slide the door across the entire length of the track to ensure it glides quietly, stops cleanly, and does not derail or rub against the adjacent door.
Maintain Your Tracks and Pulleys for Long-Term Use
To maximize the lifespan of your newly installed door pulleys and prevent future sticking, establish a simple, regular maintenance routine. Taking care of your wardrobe hardware prevents premature wear and keeps your doors sliding effortlessly for years to come.
Key Maintenance Practices:
- Monthly Vacuuming: Run your vacuum cleaner's crevice tool along the bottom tracks once a month to remove dust and debris before it can wrap around the wheel axles.
- Gentle Operation: Avoid slamming the wardrobe doors. Forceful impacts can crack plastic or nylon wheels, bend the aluminum tracks, or loosen the mounting screws over time.
- Tighten Hardware: Every six months, inspect the mounting and adjustment screws on your door pulleys. The vibration from daily sliding can cause these screws to back out slightly, leading to misalignment.
When it comes to lubrication, always consult the wardrobe manufacturer’s care instructions first. Many modern nylon, plastic, or brass sliding door pulleys are designed to run on dry, clean tracks and feature sealed ball bearings that do not require external oiling. Applying wet lubricants like standard WD-40, household oil, or grease to the tracks is highly discouraged, as these substances act as magnets for dust, hair, and lint, creating a sticky abrasive paste that quickly ruins the new wheels. If the manufacturer explicitly recommends lubrication, apply a very light coat of dry silicone spray to the track and wipe away any excess immediately.
Community discussion
Share your experience or ask a question. Comments are reviewed before publication.