
Replacing worn-out felt pads on furniture legs is a highly effective way to protect your home’s flooring from unsightly scratches, scuffs, and gouges. In Singapore, where many residential interiors feature premium flooring materials like polished marble, homogeneous tiles, luxury vinyl tiles (LVT), or classic teak parquet, maintaining pristine floors is a priority. Over time, the protective felt pads on chairs, tables, and sofas wear down, compress, or fall off, exposing the hard wood, metal, or plastic of the furniture legs directly to your floors. The key to a successful, long-lasting replacement lies in two critical phases: completely dissolving and removing the old, hardened adhesive residue, and preparing a pristine, dry surface for the new pads to bond with.
Many homeowners make the mistake of simply sticking new felt pads directly over the crusty, uneven remains of the old adhesive. This shortcut inevitably leads to the new pads peeling off or sliding sideways within a matter of days. By taking a systematic approach to cleaning, preparing, and applying your new floor protectors, you can ensure they remain firmly anchored for months or even years. This guide walks you through the step-by-step process of safely removing old pads, choosing the right solvents for your furniture finish, and applying new felt pads to achieve maximum adhesion and lasting floor protection.
Tools and Materials You Will Need
Before you begin the replacement process, gathering the correct tools and materials will ensure you can work efficiently without risking damage to your furniture’s finish or your flooring. Using the wrong tools, such as sharp metal blades or harsh chemical strippers, can easily scratch wood, strip away paint, or ruin delicate veneers.
Products mentioned in this guide
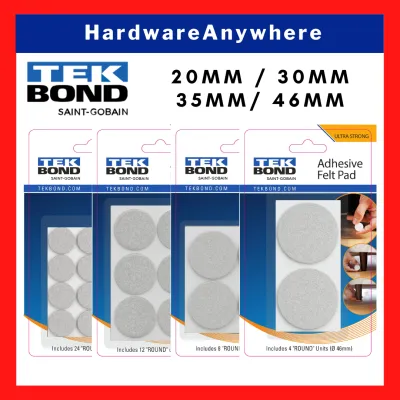
![[Min Buy Any 3] Steve & Leif Heavy Duty Round Felt Self Adhesive Furniture Felt Sliders Anti-Skid Pads](https://img.lazcdn.com/g/p/044da93e9c9e56f3e393d27958cba463.jpg_400x400q80.jpg_.webp)
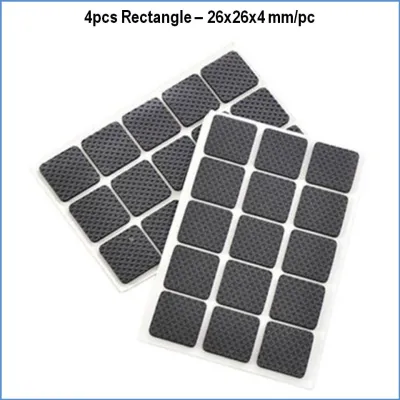
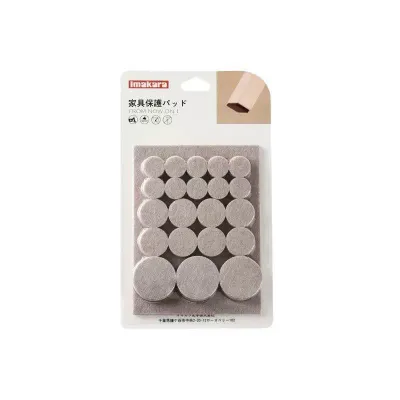
![[SG] 8/18pcs Premium Felt Soft Close Cushions Chair Leg Furniture Pads Floor Protector Drawers Doors](https://img.lazcdn.com/g/p/26672e505c6d3c21ac8e4c7c4e179179.png_400x400q80.png_.webp)
Prices are valid at publication and may change. Please refer to the product page for the latest price.
Acquire the following essential items before starting:
- Plastic scraper or dull putty knife: A plastic scraper, an old credit card, or a plastic dough scraper is ideal. Avoid metal putty knives or utility blades, as they can easily gouge natural wood or scratch protective lacquer finishes.
- Clean microfiber cloths: You will need several lint-free cloths to apply solvents, wipe away dissolved glue, and dry the furniture legs.
- Mild adhesive solvents: Isopropyl alcohol (70% or 90% concentration) works exceptionally well for most modern finishes. For highly delicate, antique, or oil-finished woods, have a bottle of standard cooking oil (such as canola, vegetable, or olive oil) or mineral oil on hand. Citrus-based commercial adhesive removers are also highly effective but must be used with caution.
- Mild surface cleaner: A gentle dishwashing liquid mixed with warm water or a mild, pH-neutral surface cleaner is necessary to remove any oily residue left behind by solvents.
- Replacement felt pads: Select high-density, heavy-duty felt pads. Measure the diameter or dimensions of your furniture leg bases beforehand to ensure a perfect match. You can choose pre-cut circles or squares, or opt for larger felt sheets that you can custom-cut to fit unique leg shapes.
- Sharp household scissors: Essential if you need to trim felt sheets or adjust the shape of pre-cut pads to prevent overhang.
- Hairdryer: A standard household hairdryer is highly useful for applying gentle heat to soften stubborn, aged adhesives.
- Nitrile gloves: Recommended to protect your skin if you are sensitive to isopropyl alcohol or commercial adhesive removers.
Step 1: Safely Removing the Old Felt Pads
The physical removal of old, compressed felt pads must be approached with care to prevent structural damage to the furniture legs. Because furniture legs bear the weight of the entire piece, any deep gouges or cracks created during this process can compromise the leg’s integrity or ruin its aesthetic appeal.

Before starting any work, ensure the furniture piece is completely stable. For heavy dining chairs, armchairs, dining tables, or sideboards, carefully lay the item on its side or upside down on a soft, clean surface, such as a thick blanket, yoga mat, or clean rug. This protects the upper portions of the furniture from being scratched by your floor and prevents the piece from tipping over unexpectedly while you work, which could cause personal injury or damage.
Once the legs are easily accessible, attempt to gently lift the edge of the old felt pad using your plastic scraper, an old credit card, or even your fingernail. If the pad is old and the adhesive has dried out, it may peel away relatively easily. Work slowly around the perimeter of the leg, peeling the pad toward the center.
For stubborn, tightly bonded pads, do not attempt to pry them off with brute force. Forcing a stuck pad can tear the wood fibers of solid timber legs, peel off delicate wood veneers, or pull away layers of paint and lacquer. Instead, use your hairdryer on a low, warm setting to soften the glue. Hold the hairdryer approximately 10 to 15 centimeters away from the bottom of the leg, directing the warm air flow at the joint between the felt and the wood for 20 to 30 seconds. The heat will quickly soften thermoplastic or acrylic-based adhesives, allowing you to slide your plastic scraper underneath and lift the pad away smoothly.
Always monitor the condition of the furniture leg closely during heat application. If you observe the paint, veneer, lacquer, or protective finish beginning to bubble, lift, soften, or discolor, turn off the hairdryer immediately. Stop using heat and switch entirely to a slower, solvent-based removal method to prevent permanent surface damage.
Step 2: Cleaning Off Stubborn Adhesive Residue
Removing the physical felt pad is only half the battle. The most critical step in ensuring your new felt pads stay secure is removing every trace of the old, hardened adhesive residue. When a felt pad is compressed under the weight of furniture over several years, the glue undergoes chemical changes and hardens into an uneven, bumpy crust.
If you attempt to apply a new self-adhesive felt pad directly over this crusty residue, the new adhesive will only make contact with the high points of the old glue. This drastically reduces the contact surface area, preventing the pressure-sensitive adhesive from forming a secure bond. Within a few days of sliding the chair back and forth across your floors, the lateral shear force will cause the new pad to slide off, leaving sticky glue tracks on your pristine tiles or wooden floors.
Choosing a Safe Solvent for Your Furniture Finish
To dissolve the old adhesive safely, you must select a solvent that breaks down the glue without chemically attacking or stripping the protective finish of your furniture. Always check the furniture manufacturer’s care label or original documentation for specific cleaning instructions. If no instructions are available, you must perform a spot test before applying any solvent. Apply a tiny drop of the chosen liquid to an inconspicuous area of the furniture leg—such as the inner side near the top joint—and wipe it off after a minute to ensure it does not cause clouding, discoloration, or softening of the finish.
Different finishes require different solvent approaches:
- Isopropyl alcohol: This is highly effective for removing synthetic adhesives and is generally safe for modern polyurethane, lacquer, and metal finishes. However, it can dissolve shellac or highly delicate varnishes, so always spot test first.
- Cooking oil or mineral oil: This is the safest option for delicate, antique, or oil-finished woods. The oil slowly penetrates the sticky adhesive polymers, neutralizing their stickiness so they can be wiped away without stripping the wood's natural oils or delicate finishes.
- Citrus-based cleaners: These commercial removers work well on tough synthetic glues but can occasionally soften certain plastics or painted surfaces if left on for too long.
Never use harsh chemicals such as acetone, nail polish remover, paint thinner, or toluene on varnished wood, veneered surfaces, plastics, or painted metal. Acetone is an incredibly aggressive solvent that will instantly dissolve lacquers, melt plastic components, and leave permanent, unsightly white cloudy patches on finished wood. If the furniture material is unidentified, or if instructions conflict, stop and consult the manufacturer or a qualified professional furniture restorer.
Breaking Down and Wiping Away the Glue
To maintain precise control over the moisture level and prevent damage, never pour solvents directly onto the furniture leg. Excessive liquid can easily seep into the wood grain, swell joint dowels, dissolve structural wood glues, or cause permanent staining. Instead, apply a small amount of your chosen solvent directly to a clean microfiber cloth until it is damp but not dripping.
Press the solvent-dampened cloth firmly against the adhesive residue on the bottom of the furniture leg. Hold it in place for two to three minutes. This waiting period is crucial, as it allows the solvent to penetrate the hardened glue and break down its chemical bonds.
Once the adhesive has softened, use the microfiber cloth to gently rub the residue in a circular motion. The old glue should begin to roll up into small, sticky beads that can be easily wiped away. For thicker, stubborn layers of glue, use your plastic scraper to gently shave off the softened residue, working flat against the surface. Avoid scraping aggressively or digging the corners of the scraper into the wood. If a layer of residue remains, repeat the process of applying the solvent-dampened cloth and rubbing rather than resorting to physical force.
Step 3: Preparing the Surface for Maximum Adhesion
Once all traces of the old adhesive have been successfully removed, the surface of the furniture leg is still not ready for the new felt pad. The solvents, citrus cleaners, or cooking oils used in the previous step leave behind a microscopic chemical film. This oily or solvent-rich layer acts as a barrier that will repel the fresh adhesive on your new felt pads, causing them to slide off almost immediately.
To neutralize this film, you must thoroughly clean the bottom of the furniture leg. Lightly dampen a clean microfiber cloth with a mild soap solution (such as a single drop of dishwashing liquid mixed into a cup of warm water) or a standard, non-streaking glass cleaner. Gently wipe the surface to strip away any remaining oils or solvent traces.
After cleaning, drying the surface completely is paramount. Even microscopic moisture trapped beneath a newly applied felt pad will compromise the adhesive’s chemical grip, leading to premature failure. Wipe the leg thoroughly with a fresh, dry, lint-free cloth.
In Singapore’s naturally humid climate, wood pores can retain moisture easily. To guarantee absolute dryness, allow the furniture legs to air-dry for at least 15 to 20 minutes in a well-ventilated room or an air-conditioned space before proceeding to the application phase.
Step 4: Applying the New Felt Pads Correctly
Applying the new felt pads requires precision and patience to ensure they remain centered, secure, and highly effective at protecting your floors.
First, verify the size and alignment of your replacement pads. The felt pad should ideally match the shape of the leg base perfectly or be slightly smaller (by approximately 1 millimeter around the entire perimeter). If a felt pad is too large and overhangs the edge of the leg, the exposed sticky adhesive will collect dust, hair, and grit. More importantly, the overhanging edge will catch on tile grout lines, rug edges, or floor transitions when the furniture is moved, peeling the pad off the leg. If necessary, use sharp household scissors to trim the pads to the exact dimensions of the leg base before removing the backing.
When you are ready to apply the pad, peel back only a small portion of the protective paper backing. Avoid touching the exposed sticky adhesive with your bare fingers. The natural oils, moisture, and skin cells on your fingertips will instantly contaminate the adhesive, significantly reducing its bonding strength.
Align the exposed edge of the pad with the center of the furniture leg base. Once aligned, slowly pull the remaining paper backing away while pressing the pad down onto the wood. This technique prevents air bubbles from becoming trapped beneath the pad.
Once the pad is in place, apply firm, even pressure. Use your thumb or the flat base of a heavy tool to press down hard across the entire surface of the felt pad. Maintain this intense, direct pressure for 30 to 60 seconds. This step is vital because self-adhesive felt pads use pressure-sensitive adhesives (PSAs). The physical pressure forces the semi-solid adhesive to flow into the microscopic pores and crevices of the furniture leg, establishing a powerful physical bond.
Finally, allow the adhesive to cure. Do not stand the furniture upright, place weight on it, or slide it across the floor immediately. Leave the furniture undisturbed for 12 to 24 hours. Moving the furniture too early subjects the fresh bond to lateral shear forces before the adhesive has fully set and cured, which is the single most common cause of premature felt pad failure.
Step 5: Verifying the Installation and Routine Maintenance
After allowing the adhesive to cure for the full 12 to 24 hours, you can safely return the furniture to its upright position. Before placing it back in its permanent location, perform a quick “slide test” on a clean, smooth section of your floor. Gently slide the furniture piece back and forth to ensure it glides smoothly without catching, tilting, or producing any scraping noises.
If you notice any slight misalignment or overhanging felt that you missed earlier, use your sharp household scissors to carefully trim the excess. Keeping the edges flush with the leg profile is essential for long-term durability.
For homes in Singapore, maintaining felt pads is an ongoing task due to the prevalence of hard flooring surfaces like homogenous tiles, marble, and engineered wood. These floors are highly susceptible to damage from abrasive grit.
When this grit becomes embedded in the soft fibers of the felt pad, the pad effectively transforms into a block of coarse sandpaper. Every time a dining chair is pulled out or a sofa shifts, this embedded grit is ground directly into your floor’s protective sealant or finish, causing micro-scratches that dull the surface over time.
To prevent this, establish a routine maintenance schedule:
- Inspect every 3 to 6 months: Flip your frequently used furniture, such as dining chairs, and inspect the bottom of the pads.
- Clean out debris: Use a stiff brush, an old toothbrush, or a pair of tweezers to gently remove any embedded pet hair, dust bunnies, or grit from the felt fibers.
- Check for compression: Over time, the weight of the furniture will compress the felt until it becomes thin, hard, and loses its cushioning properties. If a pad feels hard to the touch, has worn thin, or is heavily saturated with dirt, repeat this replacement process immediately to ensure your floors remain perfectly protected.
Frequently Asked Questions (FAQ)
Why do my new felt pads keep falling off after a few days?
Premature felt pad failure is almost always caused by invisible surface contaminants or insufficient curing time. If any oily residue from solvents, cooking oils, or old adhesive remains on the furniture leg, the new glue cannot establish a proper bond. Additionally, moving the furniture or placing heavy weight on it before the 12-to-24-hour curing window is complete will shear the fresh adhesive. To fix this, remove the failed pad, clean the leg thoroughly with isopropyl alcohol, let it dry completely, apply a new pad, and allow it to cure fully before use.
Is it safe to use acetone or nail polish remover to clean the glue?
No, acetone and standard nail polish removers are highly aggressive chemical solvents that are generally unsafe for finished furniture. Acetone will quickly dissolve, strip, or cloud varnishes, lacquers, wood veneers, and painted finishes, causing permanent aesthetic damage. It should only be used on bare, untreated metals or specific solvent-resistant plastics, and even then, only after a successful spot test in an inconspicuous area. For finished wood or painted furniture, stick to safer alternatives like isopropyl alcohol, citrus cleaners, or cooking oil.
How often should I replace felt pads on heavy dining chairs?
For frequently moved furniture like dining chairs, you should inspect the felt pads every 6 to 12 months. Because these chairs are slid across the floor multiple times a day, their pads compress rapidly and easily collect abrasive floor grit. Stationary heavy furniture, such as sideboards, wardrobes, or sofas, may only require replacement every 2 to 3 years, or when you decide to rearrange the room. Always replace any felt pad immediately if it appears worn thin, has lost its cushioning, or has hard debris embedded in it.

Community discussion
Share your experience or ask a question. Comments are reviewed before publication.