
Replacing worn-out castor wheels on your furniture with new 2-inch replacements is a highly effective way to restore smooth mobility, protect your flooring, and extend the lifespan of your favorite pieces. Whether you are upgrading an office chair, a mobile kitchen island, or a heavy storage cabinet, the process requires a clear understanding of your furniture’s base structure and the specific mounting mechanism currently in place. By systematically identifying the mounting type, preparing the correct tools, and following a careful removal and installation sequence, you can complete this project successfully and ensure your furniture remains stable and easy to maneuver.
Identify Your Current Castor Wheel Mounting Type
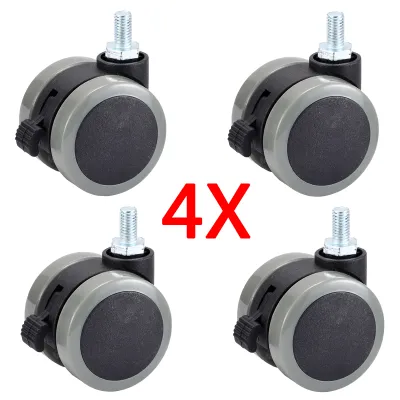
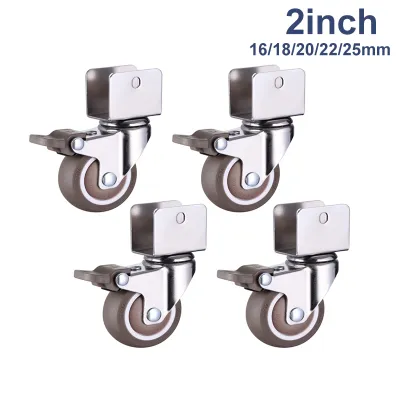
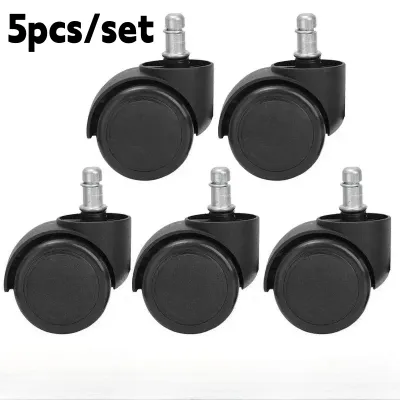
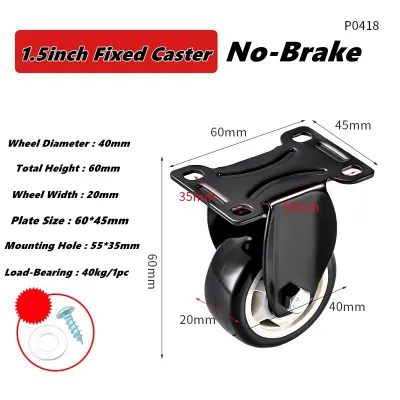
Before purchasing your new 2-inch castor wheels, you must determine how the existing wheels are attached to the furniture base. Flip the furniture piece over or tilt it securely to inspect the underside. You will find one of two primary mounting styles: a stem mount, where a metal pin extends from the wheel assembly directly into a pre-drilled hole or socket in the furniture, or a plate mount, where a flat metal plate is screwed directly onto the flat bottom surface of the furniture leg or frame.
If you have a stem mount, you need to identify the specific stem configuration. The most common types are grip ring stems, which feature a small metal ring near the top of the stem that compresses to lock the wheel into place, and threaded stems, which screw into a threaded metal insert like a bolt. There are also friction stems, which rely entirely on a tight fit within a plastic or metal socket. Use a caliper or a precise ruler to measure both the diameter and the length of the existing stem. Even a tiny mismatch in stem diameter can prevent the new 2-inch castor from fitting securely or cause it to wobble and damage the furniture leg.
Products mentioned in this guide



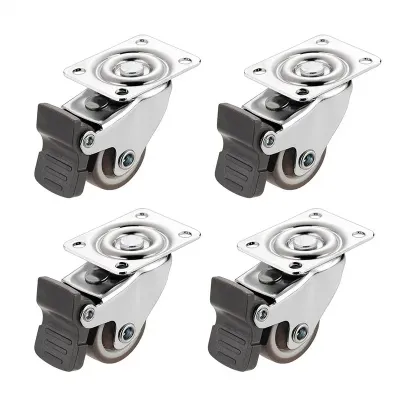
Prices are valid at publication and may change. Please refer to the product page for the latest price.
For plate-mounted wheels, you must measure the dimensions of the flat mounting plate itself, as well as the distance between the screw holes from center to center. Matching these dimensions with your new 2-inch castor wheels ensures that you can reuse the existing screw holes, which preserves the structural integrity of the wood. If the new plate is slightly different, you will need to plan for drilling new pilot holes, which requires verifying that the furniture base has sufficient surface area and thickness to accommodate the new screw positions without splitting.
Gather the Necessary Tools and Safety Equipment
Having the right tools on hand before you begin prevents unnecessary delays and protects both your furniture and your hands from injury. For basic removal and installation, gather a flathead screwdriver, a Phillips-head screwdriver, a pair of sturdy pliers, and an adjustable wrench. A rubber mallet is highly recommended for stem-mounted castors, as it allows you to tap the new stems into place without cracking the plastic wheel housing or bending the metal components.

Safety and surface protection are equally important when working on furniture projects. Lay down a thick moving blanket, heavy cardboard, or a clean tarp on your floor to prevent scratches to your tiles, vinyl, or hardwood while the furniture is turned over. Wear a pair of snug-fitting work gloves to protect your hands from sharp metal edges, rusted screws, or sudden slips of the screwdriver.
Additionally, keep a can of penetrating oil or a silicone-based lubricant nearby. Older furniture pieces often have rusted, seized, or painted-over screws and stems that resist manual force. Applying a small drop of penetrating oil to these stubborn joints and letting it sit for a few minutes can make the removal process significantly easier and prevent you from stripping the screw heads or damaging the surrounding wood.
Step-by-Step Guide to Removing Old Castor Wheels
To begin the removal process, clear the surrounding area and safely position the furniture piece. For heavy items like sideboards or desks, enlist the help of another person to lift and tilt the piece onto its side or back. Ensure the furniture is stable and supported by wooden blocks or soft supports so it does not tip over or place excessive structural stress on its joints while you work.
For stem-mounted wheels, the removal method depends on the stem type. If you have grip ring or friction stems, slide the flat head of a pry bar or a sturdy flathead screwdriver between the top of the castor housing and the bottom of the furniture leg. Gently apply leverage, working your way around the stem to pry it straight out of the socket. If the stem is stubborn, wrap a cloth around the wheel housing, grip it firmly with pliers, and twist while pulling outward. For threaded stems, use an open-ended or adjustable wrench to grip the hex nut located just above the wheel, then turn it counterclockwise until the stem unscrews completely from the threaded insert.
Plate-mounted wheels require a different approach. Use the correct size screwdriver to back out the mounting screws. To avoid stripping the screw heads, apply firm downward pressure as you turn the screwdriver counterclockwise. If you encounter a screw that is rusted or painted over, scrape away any paint buildup from the screw head slot first, apply a drop of penetrating oil, and wait five minutes before attempting to turn it. If a screw head is completely stripped, use a screw extractor tool or grip the outer edge of the screw head with locking pliers to turn it.
Once all the old wheels are removed, take a moment to clean and inspect the mounting area. Wipe away accumulated dust, pet hair, and old grease using a damp cloth. Inspect the wooden legs or metal frame for cracks, splinters, or signs of rot. If you are using stem mounts, look inside the existing sockets to ensure they are not cracked, loose, or worn out, as a damaged socket will prevent the new 2-inch castor from staying securely in place.
How to Install the New 2-Inch Castor Wheels
With the mounting areas clean and inspected, you can proceed to install your new 2-inch castor wheels. If you are installing stem-mounted castors, align the stem of the new wheel directly with the opening of the socket. Push the stem in by hand as far as it will go. If it is a grip ring stem, you will feel resistance as the ring meets the socket entrance. Place a block of wood or a folded cloth over the wheel to protect it, and use a rubber mallet to tap the bottom of the wheel housing gently but firmly until the stem clicks or seats fully against the base of the furniture leg.
For plate-mounted 2-inch castors, place the new plate over the mounting area. If the screw holes align perfectly with the existing holes, you can begin driving the screws. If you are using new screw locations, mark the center of each hole with a pencil, then drill shallow pilot holes using a drill bit slightly smaller than the core of your wood screws. This prevents the wood from splitting as the screws are driven in. Secure the plate by inserting all screws loosely first, then tightening them in a diagonal pattern to ensure the plate seats evenly against the flat surface without warping or tilting.
After securing all the new wheels, verify the overall floor clearance. A 2-inch wheel diameter is excellent for providing a balance of mobility and low profile, but you must ensure that no part of the furniture’s lower frame, dust covers, or decorative trim scrapes against the floor surface. Measure the distance from the bottom of the furniture frame to the floor to confirm there is a consistent gap across all sides of the piece.
Testing and Maintaining Your Newly Installed Wheels
Once all four wheels are installed, carefully upright the furniture piece with assistance. Before placing any heavy items back onto or inside the furniture, perform an initial load test. Gently press down on different corners of the furniture to ensure the weight is distributed evenly and that none of the legs wobble or flex.
Next, roll the furniture slowly in multiple directions. The 2-inch wheels should swivel and roll smoothly without dragging, squeaking, or pulling to one side. If you notice any resistance, check to see if a wheel is misaligned or if a stem has not been fully inserted into its socket. For plate mounts, double-check that all screws are fully tightened and flush with the plate surface, as a protruding screw head can interfere with the swivel action of the castor.
To keep your new wheels rolling smoothly over the long term, establish a simple maintenance routine. Periodically inspect the wheels for accumulated hair, threads, or dust, which can wrap around the axles and restrict movement. Use a pair of tweezers or a utility knife to carefully clear away any debris. Additionally, check the tightness of the mounting screws or the seating of the stems every few months, especially on furniture pieces that are moved frequently, to prevent loose fittings from causing structural damage.
Troubleshooting Common Castor Wheel Issues
During or after the installation process, you may encounter a few common challenges. If you find that your new stem-mounted wheels keep falling out of their sockets when the furniture is lifted, the existing sockets are likely worn out or stretched. To resolve this, you can install new plastic or metal socket inserts that match your stem size, or wrap a small piece of plumbing tape or electrical tape around the grip ring area of the stem to create a tighter friction fit within the old socket.
If you are dealing with plate-mounted wheels and find that the old screw holes are stripped or do not align with the new plate, do not attempt to force the screws into the damaged wood. Instead, fill the old holes completely by inserting wooden toothpicks or dowels dipped in wood glue. Once the glue dries, cut the dowels flush with the surface, sand the area smooth, and drill fresh pilot holes for your new screws. This creates a solid wood foundation that holds the screws securely under load.
Another common issue is uneven rolling, which often occurs if one leg of the furniture is slightly shorter than the others or if the mounting surfaces are not perfectly level. Check the bottom of each leg with a spirit level. If you find minor height differences, you can place thin plastic or metal shims underneath the mounting plates of the shorter legs before screwing them down to level the furniture and ensure all four 2-inch wheels make firm contact with the floor.
Frequently Asked Questions (FAQ)
Can I replace stem-mounted wheels with plate-mounted ones?
Yes, you can transition from stem-mounted wheels to plate-mounted ones, provided the base of your furniture has sufficient surface area and structural thickness. To make this switch, you must first remove the old stem and its socket insert. Fill the remaining empty socket hole completely with a solid wooden dowel coated in wood glue to restore the structural integrity of the leg. Once the glue has fully cured and the dowel is cut flush, you can position the new mounting plate over the solid base, drill new pilot holes, and secure the plate with wood screws. Ensure the wood is thick enough so the screws do not penetrate through the visible top surface of the furniture base.
Do I need to lubricate the new 2-inch castor wheels after installation?
Most high-quality, newly purchased 2-inch castor wheels come pre-lubricated from the factory and do not require immediate lubrication upon installation. Before applying any oil, check the manufacturer’s product label or instructions, as adding unnecessary lubricants can attract dust, pet hair, and grit, leading to premature wear of the bearings. If the wheels eventually begin to squeak or roll stiffly after months of use, apply a small drop of dry silicone lubricant or light machine oil directly to the swivel bearings and wheel axle. Avoid using heavy greases or standard penetrating oils, which can degrade plastic or rubber wheel materials over time.
Community discussion
Share your experience or ask a question. Comments are reviewed before publication.