
Replacing fixed table legs with adjustable ones is a practical way to stabilize a wobbly desk, adapt a table for uneven floors, or create a more ergonomic workspace. Whether you are setting up a home office in a compact apartment or modifying a dining table, upgrading to adjustable legs allows you to fine-tune the height and stability of your furniture. Before starting, ensure your table top material and thickness can safely support the stress of new mounting hardware and the dynamic load of adjustable mechanisms.
Assess Your Table and Choose the Right Adjustable Legs
Before purchasing replacement hardware, inspect the material of your table top. Solid wood, particleboard, and MDF all react differently to fasteners. While solid wood is highly durable, its long-term performance depends heavily on the quality of its protective finish and joints. Check the manufacturer’s care instructions to ensure your table top material is suited for your specific use environment, especially in humid climates where moisture can affect engineered wood. Measure the exact thickness of the table top to determine the maximum screw length you can safely use without puncturing the upper surface.
Next, identify the current leg attachment method. Some tables use direct screw-in plates, while others rely on hanger bolts embedded in the wood or complex metal brackets. Understanding this mechanism helps you plan the removal process and decide whether you can reuse any existing mounting points. If the old mounting holes are stripped or do not align with your new hardware, you will need to prepare the surface for new pilot holes.
Products mentioned in this guide
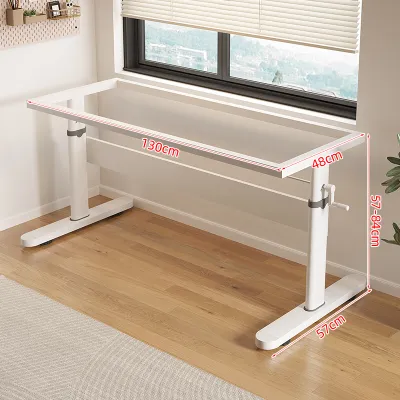
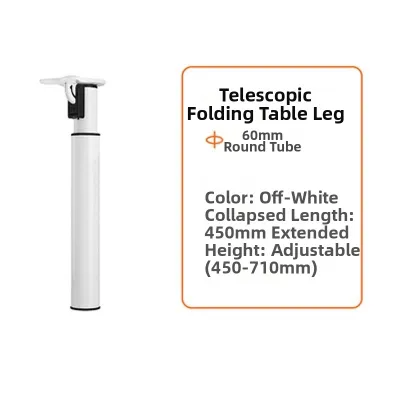
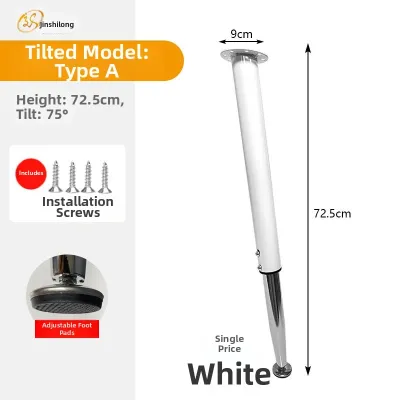
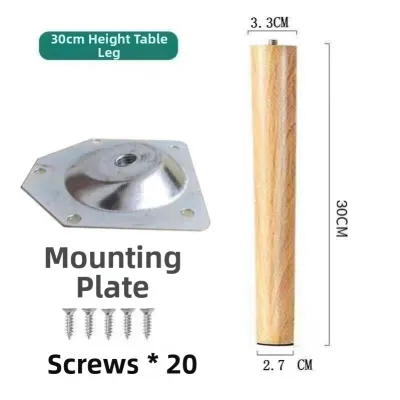
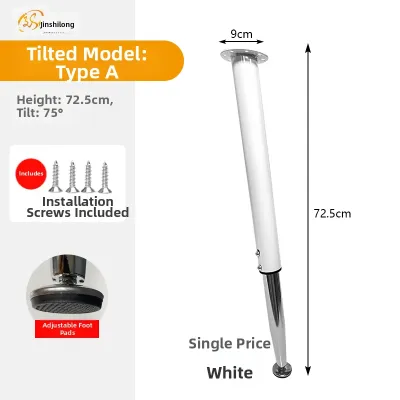
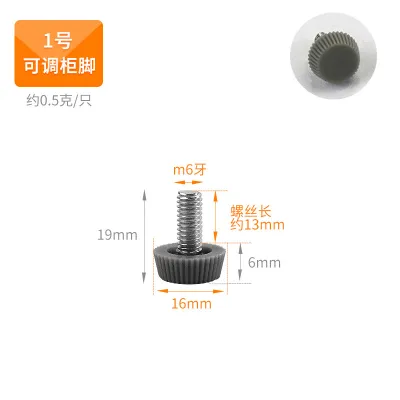
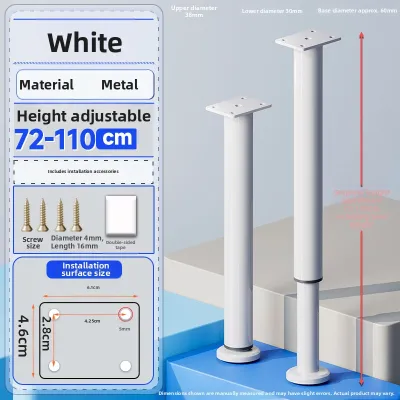
Prices are valid at publication and may change. Please refer to the product page for the latest price.
When selecting your new adjustable table legs, verify their load capacity, height adjustment range, and mounting plate dimensions against your table’s size and intended use. Consider the weight of the table top itself combined with the items you plan to place on it, such as heavy monitors or books. Before purchasing, measure the finished dimensions of your table and verify that the modified table will still fit through your doorways or lift access if you plan to move it later. Investing S$40 to S$100 in a robust set of adjustable legs can significantly extend the lifespan of your existing table top.
Gather the Necessary Tools and Materials
Having the correct tools on hand prevents mid-project delays and minimizes the risk of damaging your furniture. For the removal and measurement phases, you will need a standard screwdriver set, Allen wrenches, a reliable measuring tape, a sharp pencil, and a carpenter’s square to ensure perfect alignment.

For drilling and fastening, prepare a power drill and a set of drill bits suitable for your specific table top material. You will also need replacement wood screws that match the diameter of the mounting plate holes; ensure these screws are short enough to remain safely within the table top’s thickness while still providing sufficient thread engagement.
Do not overlook safety and surface protection. Work on a flat, stable floor with plenty of clearance, especially if you are working within the tight confines of a typical residential room. Lay down a soft blanket, thick cardboard, or a non-slip mat to protect the table’s finished surface from scratches while it is flipped upside down. Wear safety glasses to protect your eyes from flying wood dust during drilling, and use work gloves to handle heavy or sharp metal components.
Step 1: Safely Remove the Existing Fixed Legs
Begin by clearing all items off the table to prevent accidents. Carefully lift the table and flip it upside down, resting the top surface directly onto your protective blanket or mat. If the table is exceptionally heavy or bulky, ask another person to help you lift and flip it to avoid straining yourself or damaging nearby walls and doorways.
Once the table is upside down, examine the fasteners securing the old legs. Use the appropriate screwdriver or Allen wrench to loosen and remove the screws or bolts. If the legs are attached via hanger bolts threaded into embedded plates, unscrew the legs counterclockwise until they detach from the table. Keep a small container nearby to hold the old hardware so loose screws do not roll away or scratch the exposed underside of the table.
After removing the legs, evaluate the condition of the old screw holes. If your new adjustable leg mounting plates cover these holes completely, you can leave them as they are. However, if the old holes are exposed or interfere with the placement of the new plates, fill them with a high-quality wood filler. Allow the filler to dry completely according to the manufacturer’s instructions, then sand the area flush with a fine-grit sandpaper to create a smooth, level surface for the new hardware.
Step 2: Mark and Drill New Mounting Holes
Precise alignment is critical to ensuring your table remains stable and does not wobble once upright. Use your measuring tape and carpenter’s square to measure the distance from the edges of the table top to the corners where the new legs will sit. Symmetrical placement is essential, so double-check that the edge clearance is identical for all four corners.
Place the new mounting plates over your marked positions. Use a sharp pencil to trace the exact center of each screw hole onto the underside of the table top. Once all holes are marked, remove the plates and double-check your measurements diagonally across the table to confirm that the layout is perfectly square.
Select a drill bit that is slightly smaller than the core diameter of your mounting screws. To prevent drilling completely through the table top, measure the safe drilling depth and wrap a piece of painter’s tape around the drill bit as a visual depth stop. Hold the drill perfectly perpendicular to the table surface and drill the pilot holes slowly, stopping immediately when the tape marker reaches the wood surface. Clean away any accumulated wood dust from the holes before proceeding.
Step 3: Install the Adjustable Legs and Verify Stability
Align the new mounting plates with the freshly drilled pilot holes. Insert the screws and tighten them manually or with a power drill set to a low torque limit. Avoid over-tightening the screws, especially when working with particleboard or MDF, as excessive force can easily strip the threads in the wood and compromise the hold.
Once the mounting plates are securely fastened to the table top, attach the adjustable leg bodies to the plates. Depending on the design, this may involve screwing the leg into a threaded collar, sliding it into a bracket, or securing it with locking pins. Ensure that all locking mechanisms, threads, or clips are fully engaged and tightened according to the manufacturer’s assembly instructions.
With all four legs securely attached, carefully flip the table back onto its feet, ensuring you do not drag the legs across the floor during the transition. Place a spirit level on the table surface to check for flatness. Adjust the height of each leg individually by turning the adjustable feet or extending the telescoping sections until the bubble on the spirit level is perfectly centered. Test the locking mechanisms on each leg to ensure they hold firmly under downward pressure.
Troubleshooting Common Installation Issues
If your table continues to wobble after installation, first check the levelness of your floor, as uneven tiles or floorboards are common culprits. Fine-tune the individual adjustable feet to compensate for these floor variations. If the wobble persists, double-check that all screws on the mounting plates are tightened evenly and that there is no play between the leg body and the mounting plate.
Stiff or difficult height adjustment mechanisms are often caused by wood dust, debris, or manufacturing residue trapped in the threads or locking collars. Inspect the adjustment areas, clean them thoroughly with a dry cloth or a small brush, and apply a dry lubricant if recommended by the manufacturer. Avoid using wet or greasy lubricants that can attract dust and clog the mechanism over time.
An uneven table top that cannot be corrected by minor adjustments usually indicates that the mounting plates were installed off-center. To verify this, measure the diagonal distances between the legs; if the diagonal measurements are unequal, the legs are misaligned. You will need to flip the table, remove the misaligned plates, fill the incorrect pilot holes, and re-drill them using precise measurements.
Frequently Asked Questions (FAQ)
Can I install adjustable legs on a glass or stone table top?
Glass and stone table tops cannot be drilled using standard woodworking tools and screws, as attempting to do so will shatter glass or crack stone. These materials require specialized mounting methods, such as UV-cured adhesives, industrial-strength bonding agents, or custom metal clamping brackets that grip the edges. If you have a glass or stone table top, it is highly recommended to consult a professional fabricator or furniture specialist to ensure the mounting system is safe and structurally sound.
How do I prevent the new screws from splitting a thin wooden top?
To prevent thin or brittle wood from splitting, always drill pilot holes before inserting screws, as this relieves the internal pressure within the wood fibers. Ensure you select a drill bit that matches the inner shank of the screw rather than the outer threads. Additionally, double-check the length of your screws against the thickness of your table top, ensuring the screw length is at least 3 to 5 millimeters shorter than the table thickness to avoid puncturing or bulging the finished upper surface.
Community discussion
Share your experience or ask a question. Comments are reviewed before publication.