
Replacing the rollers on a bed frame is a straightforward home maintenance task that can instantly restore smooth mobility, prevent damage to your flooring, and eliminate annoying squeaks or instability. Over time, bed casters can wear down, crack, or become clogged with dust and fibers, making it difficult to move the bed for cleaning or rearranging. By identifying the correct replacement hardware, preparing your workspace, and following a methodical installation process, you can safely swap out old rollers and extend the lifespan of your bed frame.
Ensure Your Replacement Rollers Fit and Support the Bed
Before purchasing any replacement hardware, you must determine the exact specifications of your existing bed rollers to ensure a secure fit and adequate weight support. Bed rollers generally fall into two primary categories: stem-mounted and plate-mounted casters. Stem-mounted casters feature a metal pin or rod that inserts directly into a socket or sleeve in the bed frame leg. Plate-mounted casters, on the other hand, utilize a flat metal plate that is screwed or bolted directly onto the flat bottom surface of the bed frame leg. Identifying which style your bed frame uses is the first step in selecting the correct replacement.
Once you have identified the mounting style, precise measurements are essential. For stem-mounted rollers, use a ruler or a basic caliper to measure both the diameter and the length of the metal stem. Even a millimeter of difference can prevent the stem from fitting into the socket or cause it to wobble loosely. For plate-mounted rollers, measure the length and width of the mounting plate, as well as the distance between the screw holes (often referred to as the hole spacing). This ensures the new plate will align perfectly with the existing screw holes, preventing the need to drill new holes that could weaken the wooden or metal frame.
Products mentioned in this guide
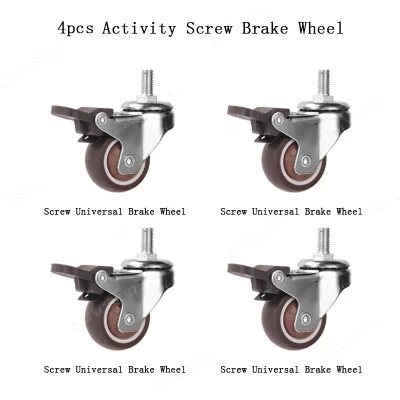
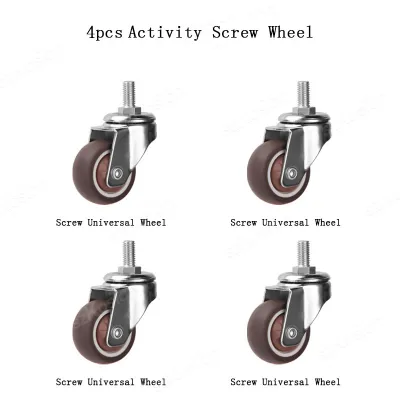
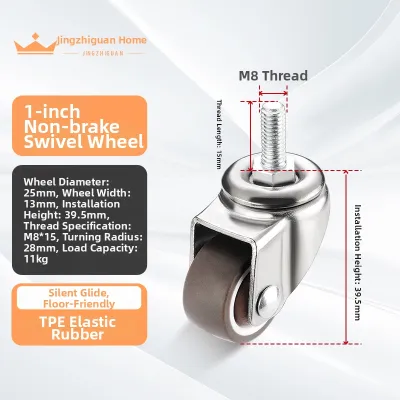
Prices are valid at publication and may change. Please refer to the product page for the latest price.
Weight capacity is another critical factor that must not be overlooked. You should check the manufacturer’s label, original packaging, or product manual to find the weight capacity limits per roller. Remember that the total weight capacity must support not only the bed frame itself but also the mattress, bedding, and the occupants. If you are unable to find these specifications, or if the bed frame has been previously modified, it is highly recommended to consult the bed frame manufacturer or a qualified furniture repair professional before proceeding. Installing rollers with insufficient weight ratings can lead to sudden structural failure, damaging your flooring or causing personal injury.
Prepare Your Tools and Safely Elevate the Bed Frame
A successful installation relies on having the right tools prepared and establishing a safe, stable working environment. Depending on whether your bed frame uses stem or plate casters, gather common hand tools such as adjustable wrenches, flathead and Phillips screwdrivers, pliers, and a rubber mallet. Having these tools within arm’s reach prevents unnecessary interruptions once you begin the physical replacement process.

Before attempting to lift or tilt the bed frame, you must completely clear the bed. Remove all pillows, blankets, sheets, and the mattress itself, along with any under-bed storage boxes or items. Attempting to work on a fully loaded bed frame is extremely dangerous, as the shifting weight can cause the frame to tip, bend, or collapse. Clearing the frame reduces its weight significantly, making it much easier and safer to manipulate.
To access the rollers, you will need to elevate the bed frame. Safely support the elevated frame using sturdy wooden blocks or rated jack stands placed securely under the frame’s main support beams. Never rely on unstable objects, stacked books, soft pillows, or the old, compromised rollers themselves to hold the weight of the frame while you work. Ensure the support blocks are resting on a flat, level surface to prevent any slipping.
At this stage, perform a quick structural inspection. If you notice severe warping, deep cracks in wooden legs, or bent metal brackets on the bed frame, stop the process immediately. Attempting to install new rollers on a structurally compromised frame is unsafe and will not resolve the underlying instability. In such cases, seek professional furniture repair assistance or consider replacing the frame entirely.
Remove the Old Casters Without Damaging the Frame
Removing the old casters requires patience and care to avoid cracking wooden legs or stripping metal threads. For stem casters, the removal method depends on how they are secured. Some stem rollers can be pulled straight out of their sockets with a firm tug. If the stem is stuck, you can gently pry it out using the claw end of a hammer or a small pry bar. To protect the bed frame leg from cosmetic or structural damage, always place a protective wooden block or a thick piece of cardboard between the pry tool and the frame leg to distribute the force evenly. If the stem is threaded, use an adjustable wrench to unscrew it counterclockwise.
For plate-mounted casters, the process involves unbolting or unscrewing the mounting plate from the bottom of the leg. While holding the wheel assembly steady with one hand to prevent it from spinning or twisting, use a screwdriver or wrench to loosen and remove the fasteners. Keep a close eye on the screws or bolts as you remove them; if they are still in good condition, you may be able to reuse them, though using new, high-quality hardware is often preferred.
Once the old rollers are removed, take the opportunity to thoroughly clean the mounting area. Dust, pet hair, and floor debris often accumulate around bed legs and inside stem sockets. Use a dry cloth or a small brush to clear out any debris. Inspect the leg bottoms carefully for any signs of damage, such as stripped threads in metal frames, or splintering and cracking in wooden legs.
If you discover that a leg bottom is severely split, stripped, or otherwise compromised, do not attempt to force the new roller into place. Installing new hardware into a damaged leg will not provide a secure hold and can cause the leg to fail completely under weight. Stop the installation and consult a professional carpenter or furniture repair specialist to reinforce or repair the leg before proceeding.
Securely Attach the New Bed Rollers
With the mounting areas clean and inspected, you can begin installing the new bed rollers. If you are installing stem casters, insert the stem into the existing socket or sleeve. Many stem casters require a friction fit, meaning you should hear or feel a distinct click as the retaining ring on the stem seats into the socket. If the fit is tight, you can use a rubber mallet to gently tap the bottom of the caster wheel assembly until the stem is fully inserted. If the new rollers came with new plastic or metal sleeves (sockets), remove the old sleeves from the bed legs first and tap the new sleeves into place before inserting the caster stems.
For plate-mounted casters, align the new mounting plate with the existing screw holes on the bottom of the bed leg. Using the original screws or the manufacturer-recommended fasteners that came with your replacement kit, hand-thread the screws first to ensure they are properly aligned. Then, use a screwdriver or wrench to tighten them securely. Ensure the plate sits completely flush against the flat surface of the leg to prevent any uneven weight distribution.
During the installation, make sure that any locking mechanisms or brakes on the new rollers are fully disengaged. This prevents unnecessary stress on the locking tabs while you are handling and positioning the frame. Once the rollers are securely attached, test the locking levers manually to ensure they engage and disengage smoothly without binding.
A common mistake during installation is over-tightening the fasteners. Whether you are screwing in a plate caster or tightening a threaded stem, forcing the hardware can strip the threads in metal frames or crack the wood fibers in wooden legs. Tighten the fasteners until they are snug and secure, but avoid applying excessive force. If a stem or screw does not seem to go in smoothly, back it out and check for cross-threading or debris inside the hole.
Test Stability and Lock Mechanisms Before Use
Before returning your mattress and bedding to the frame, you must verify that the new rollers are stable, level, and functioning correctly. Slowly and carefully lower the bed frame off the support blocks or jack stands until all rollers are resting flat on the floor. Check for any wobbling, uneven leg contact, or visible gaps between the wheels and the floor surface. The frame should sit perfectly level; any tilt or wobble indicates that a roller may not be fully seated or that the legs themselves are uneven.
Next, test the mobility of the bed frame by gently rolling it in multiple directions. The wheels should rotate and swivel smoothly without catching, dragging, or making grinding noises. Once you have confirmed smooth movement, engage the brakes or locking mechanisms on each designated locking roller. Attempt to push the bed frame gently with the locks engaged; the bed should remain firmly in place without sliding or rolling.
Finally, return the mattress and bedding to the frame. Over the first few weeks of regular use, make a habit of monitoring the new rollers and their fasteners. The weight of the mattress and occupants can cause initial settling, which may occasionally loosen screws or stems. Inspect the legs for any shifting, unusual noises, or loosening, and retighten the hardware according to the manufacturer’s instructions if necessary. Regular checks ensure your bed remains safe, stable, and easy to move for years to come.
Frequently Asked Questions (FAQ)
Can I use larger bed rollers to make my bed higher?
While it may be tempting to install larger or taller rollers to increase under-bed storage space, doing so can introduce significant safety risks. Larger rollers alter the bed frame’s original design geometry, raising its center of gravity and increasing the risk of tipping or structural failure under lateral force. Additionally, taller casters place greater leverage on the bed frame legs and mounting sockets, which can cause wooden legs to split or metal brackets to bend over time. Always check the bed frame manufacturer’s maximum height and weight specifications before changing caster sizes. If you require extra bed height, it is much safer to use dedicated bed risers designed specifically for your frame’s leg type, rather than oversized rollers.
Why do my new bed rollers keep falling out?
If your new stem rollers repeatedly fall out when the bed is lifted or moved, the issue is typically caused by an improper fit or worn-out mounting sockets. Over time, the wooden or plastic sockets inside the bed legs can stretch, crack, or wear down, losing the friction grip required to hold the caster stem in place. Alternatively, you may have selected a replacement stem with a diameter that is slightly too small for the existing socket. To resolve this, verify your measurements against the manufacturer’s specifications. If the socket itself is enlarged or damaged, you will need to replace the plastic or metal sleeve inserts inside the bed legs, use compatible stem adapters, or consult a professional to repair the leg structure.
Community discussion
Share your experience or ask a question. Comments are reviewed before publication.