
Replacing bed frame legs is a practical way to restore stability, adjust bed height, or update the look of your bedroom furniture without buying a new frame. While the process is generally straightforward, success depends on matching the attachment mechanisms and ensuring the new legs can safely support the combined weight of the frame, mattress, and sleepers. This guide walks you through the assessment, removal, and installation process to help you complete the upgrade safely and correctly.
To replace bed frame legs successfully, you must first identify the existing attachment mechanism, such as a threaded bolt or a mounting plate. Once you have acquired compatible replacement legs, you will need to clear the bed, support the frame securely, remove the old legs, and install the new ones evenly. Testing the bed for stability and protecting your flooring are the final steps to ensure a safe, long-lasting setup.
Assess Compatibility Before You Start
Before purchasing replacement bed frame legs, you must determine if they are structurally and mechanically compatible with your existing bed frame. Mismatched hardware can lead to unstable joints, damaged frames, or complete structural failure under load.
Products mentioned in this guide
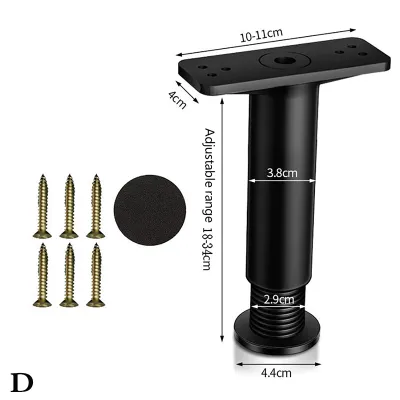
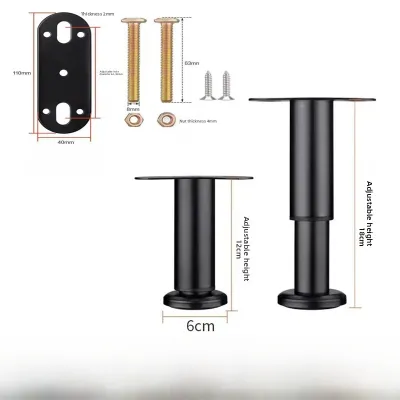
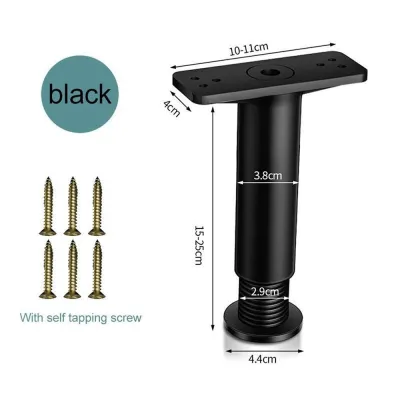
Prices are valid at publication and may change. Please refer to the product page for the latest price.
First, identify the attachment mechanism on both the old and new legs. The most common types include screw-in threaded bolts, bolt-on brackets, and plate-mounted hardware.
Screw-in legs typically use a hanger bolt that protrudes from the top of the leg and screws directly into a threaded insert in the frame. Bolt-on brackets and plate-mounted hardware require separate screws or bolts to secure a metal plate to the underside of the frame, into which the leg is then attached.
Next, verify the weight capacity and material strength of the new legs against the total load of your bed frame, mattress, and sleepers. While manufacturers often provide general weight guidelines, you should inspect the material of the replacement legs.
Solid wood and heavy-duty steel generally offer high structural integrity, but their performance depends heavily on the quality of the joints and the installation method.
Measure the required height clearance carefully. Changing the height of your bed frame affects not only the aesthetic of your bedroom but also your ease of entry and exit, as well as under-bed storage capacity.
Ensure the new legs match your desired bed height while keeping the overall center of gravity low enough to prevent tipping or swaying.
Finally, inspect the existing attachment points on the frame. Look closely for stripped threads, rust on metal components, or wood damage such as cracking or splitting around the mounting holes.
If the structural integrity of the frame’s attachment points is compromised, installing new legs directly into them may not be secure, and you may need to use adapter plates or repair the frame first.
Gather the Right Tools and Safety Gear
Having the correct equipment prepared beforehand ensures you can remove and install the bed legs safely without damaging the frame, stripping the hardware, or injuring yourself.

Start by gathering the basic hand tools required for your specific hardware type. Depending on how your current and new legs attach, you may need adjustable wrenches, screwdrivers (both flathead and Phillips), socket sets, or Allen keys.
Using the exact size tool for each bolt or screw prevents stripping the heads, which can make future adjustments or removals extremely difficult.
Prepare protective items to safeguard both yourself and your home. Work gloves protect your hands from sharp metal edges, splinters, and pinch points during disassembly.
A soft mat, moving blanket, or large piece of cardboard should be laid out on the floor to protect your flooring from scratches and prevent the bed frame’s finish from getting scuffed while you work.
Lifting a bed frame can be awkward and heavy, so safety must be a priority. It is highly recommended to have a helper assist you with lifting and holding the frame.
If you are working alone, prepare sturdy support blocks, such as solid wooden blocks or heavy-duty boxes, to safely support the weight of the frame while the legs are detached.
Safely Remove the Old Bed Legs
Removing the existing legs requires a careful, systematic approach to preserve the structural integrity of the bed frame’s attachment points and prevent personal injury.
Begin by clearing the bed completely. Remove all bedding, pillows, and the mattress. If your bed uses a separate box spring or heavy wooden slats, remove those as well.
Clearing these items significantly reduces the weight of the frame, making it much easier to maneuver and preventing sudden collapses that could cause injury.
Once the frame is bare, support it securely. Position your helper or place your sturdy support blocks under the corners and center rails of the frame.
Never rely on your own strength to hold the frame up with one hand while unscrewing a leg with the other, as this can lead to dropped frames, damaged floors, or pinched fingers.
Unscrew or unbolt the old legs slowly. If your bed uses screw-in legs, turn them counterclockwise by hand. For bolted legs, use your wrench or socket set to loosen the nuts.
Keep track of all washers, nuts, and bolts as you remove them, especially if you plan to reuse the original hardware or if the new legs do not come with a complete installation kit.
During removal, inspect the hardware and the frame. If you encounter severe rust, stripped threads that refuse to turn, or cracking in the wood or metal of the frame, stop immediately.
Forcing a stuck bolt can crack the frame beyond repair. In these situations, consult the furniture manufacturer or a qualified professional to safely resolve the issue.
Install the New Legs Securely
Attaching the new legs correctly ensures a stable, level, and durable foundation that will support your bed for years to come.
Align the new legs with the existing attachment points on the frame. If the new legs are compatible with the original hardware, you can reuse those bolts and washers. Otherwise, use the hardware provided in the manufacturer’s installation kit.
Ensure that any washers are placed in the correct order to distribute pressure evenly across the joint.
Tighten the connections gradually and evenly. If a leg is secured by multiple bolts, tighten them in an alternating star pattern rather than tightening one completely before moving to the next.
This alternating method ensures even tension across the mounting plate. Avoid over-tightening the hardware, as excessive force can strip the threads of metal inserts or crack wooden frames, permanently weakening the connection.
If your new legs use a different attachment style than the original ones, you will need to install universal mounting plates or adapter brackets.
Secure these plates firmly to the underside of the bed frame using the recommended wood screws, ensuring they are positioned flat against the frame’s surface. Once the plates are secure, you can attach the new legs to them according to the manufacturer’s instructions.
Verify that all legs are attached to the exact same depth and angle. Even a minor variation in leg height or angle can cause uneven weight distribution, putting excessive stress on a single leg and leading to premature wear, squeaking, or structural failure.
Test for Stability and Protect Your Floors
Once all the new legs are installed, you must verify that they provide a secure, level, and quiet base before putting the mattress back on the bed.
Check the bed frame for levelness using a spirit level placed on the side rails and center support. If your new legs feature adjustable leveling feet, turn them clockwise or counterclockwise to compensate for any unevenness in your flooring.
A level frame prevents the mattress from sliding and ensures weight is distributed evenly across all support points.
Apply weight to the corners and center of the frame to test for stability. Gently shake the frame from side to side and end to end to check for wobbling, squeaking, or shifting.
If you hear any noises or feel movement, locate the source and tighten any loose connections. Squeaking is often a sign of metal-on-metal friction or loose bolts.
To protect your flooring from scratches, dents, or scuffs, attach protective pads to the bottom of the legs. Felt protectors are ideal for hardwood, laminate, or tile floors, while rubber caps or caster cups work well on carpets to prevent deep indentations.
Finally, establish a regular maintenance routine. The vibrations from daily use can gradually loosen new hardware over time.
Make a plan to re-check the tightness of all bolts and screws after the first few weeks of use, and then perform a quick inspection every six months to ensure the bed remains safe and stable.
Frequently Asked Questions (FAQ)
Can I replace bed legs without taking the bed apart?
Whether you can replace the legs without fully taking the bed apart depends on the type of attachment mechanism and the weight of your setup. Simple screw-in legs can sometimes be replaced while the mattress remains on the frame, provided you have a helper to lift and support one corner of the bed at a time. However, this method carries a higher risk of the bed shifting or falling. For bolt-on or plate-mounted legs, you must remove the mattress, box spring, and slats. This gives you the necessary access, leverage, and safety clearance to use tools without damaging the bed components.
What should I do if the new legs do not fit the existing holes?
If the new legs do not align with the existing holes, do not force the hardware or attempt to cross-thread the bolts, as this will ruin the threads. Avoid drilling new holes directly into the frame without a proper structural assessment, as drilling in the wrong spot can weaken the frame’s load-bearing capacity. Instead, use universal bed leg mounting plates or adapter brackets. These plates screw into the frame and provide a new, secure threaded insert that matches your new legs. Alternatively, contact the furniture manufacturer to find compatible adapters designed specifically for your frame model.
Community discussion
Share your experience or ask a question. Comments are reviewed before publication.