
Replacing worn-out ball bearing wheels on furniture casters is a highly practical way to restore effortless mobility to office chairs, heavy storage cabinets, and mobile kitchen carts. Over time, friction, dust accumulation, and load stress can degrade the internal bearings, leading to stiff movement, floor scratches, or annoying squeaks. While it is sometimes possible to swap out just the wheel, replacing the entire caster assembly is generally the most secure and reliable path to restoring smooth rolling action.
Taking the time to understand the mounting style of your furniture and securing the correct replacement parts will save you both time and effort. This guide outlines how to identify your current hardware, safely extract stubborn old casters, and install new ball bearing wheels to ensure your furniture glides smoothly across your floors.
Identify Your Caster Type and Mounting Style
Before purchasing any replacement parts, you must determine the specific mounting style and dimensions of your existing casters. Furniture casters are generally divided into two main categories: stem casters and plate casters. Stem casters, which are incredibly common on office chairs and light shelving units, insert directly into a pre-drilled socket or sleeve. Plate casters, often found on heavier cabinets, workbenches, and drawer slides, feature a flat metal plate that mounts to the underside of the furniture using screws or bolts.
Products mentioned in this guide
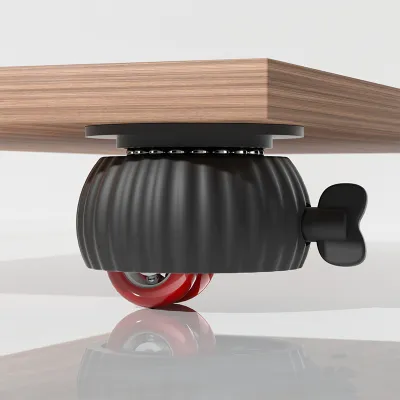
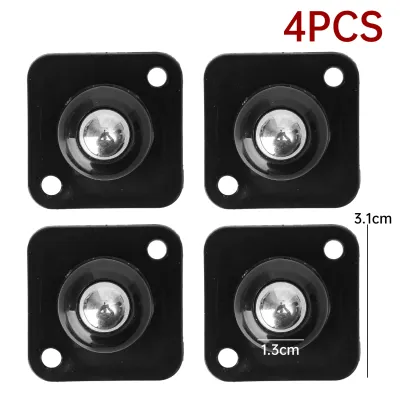
Prices are valid at publication and may change. Please refer to the product page for the latest price.
Within the stem caster category, you will encounter three primary designs. Grip ring stems feature a small, split metal ring near the top of the stem that compresses when pushed into the socket, holding the caster in place through friction. Grip neck stems taper toward the top and lock into a specialized plastic or metal socket sleeve. Threaded stems behave like standard bolts, screwing directly into a threaded metal insert embedded within the furniture leg.
To ensure a perfect fit, use a precise measuring tool like a digital caliper or a fine-scale ruler. For stem casters, measure both the exact diameter and the length of the metal stem; even a difference of one millimetre can prevent the replacement stem from fitting into the socket or cause it to wobble. For plate casters, measure the overall dimensions of the mounting plate and, crucially, the distance between the bolt holes from centre to centre.
While you might consider replacing only the individual ball bearing wheel while keeping the original caster housing, this is often impractical. Most residential and office furniture casters use riveted axles that are permanently sealed during manufacturing. Attempting to drill out or force open these rivets can weaken the structural integrity of the housing. Replacing the entire caster assembly is the industry-standard approach, ensuring you get a fresh, factory-aligned housing, a clean stem, and pristine bearings that distribute weight evenly.
Always check the furniture manufacturer’s original label, user manual, or product specifications before buying replacements. This step is vital to verify the maximum load capacity and ensure the new casters can safely support the weight of the furniture along with its typical contents or users. In humid climates like Singapore, selecting high-quality materials with corrosion-resistant finishes is also key to preventing early joint failure or rust.
Tools and Materials You Will Need
Having the correct tools on hand before you begin ensures a seamless replacement process and prevents unnecessary interruptions. Most caster replacements can be completed using basic hand tools that are readily available in most household toolkits.

Assemble the following items on your workspace:
- Flathead screwdriver: Useful for prying and leveraging friction-fit stems.
- Pliers: Helpful for gripping and pulling stubborn stems or pins.
- Adjustable wrench: Required for loosening and tightening threaded stems or hex bolts.
- Rubber mallet: Essential for gently tapping new stem casters into place without causing structural damage.
- Pry bar: Provides extra leverage for tightly wedged grip ring stems.
- Penetrating oil: Highly recommended for loosening rusted, seized, or stripped hardware.
- Clean cloth: Used to wipe away old grease, dust, and debris from the mounting area.
- Work gloves: Protects your hands from sharp metal edges, rust flakes, and accidental pinch points.
- Replacement ball bearing casters: Ensure these are fully unpacked, inspected, and verified against your measurements before starting.
Step-by-Step Guide to Removing Old Casters
Removing old casters requires patience to avoid damaging the furniture base, especially when dealing with older wood or plastic components that may have become brittle over time.
Removing Grip Ring or Grip Neck Stem Casters
To begin, lay the furniture safely on its side or upside down on a soft, protective surface, such as a clean rug or a piece of cardboard, to prevent scratching the frame. Locate the junction where the caster stem meets the socket collar at the base of the furniture.
Insert the tip of a flathead screwdriver or a small pry bar into the tiny gap between the caster collar and the furniture base. Slide a clean cloth underneath the shaft of your tool to act as a buffer, preventing the metal from scratching or denting the furniture frame.
Gently apply downward pressure on the handle of your tool to leverage the caster upward. This action will compress the internal grip ring, allowing the stem to pop out of its socket. Once the collar is loose, grip the caster wheel and pull the stem straight out of the hole. If the stem resists, use a pair of pliers to grip the exposed metal stem firmly, twisting slightly as you pull.
Removing Threaded Stem and Plate Casters
For threaded stem casters, locate the hex nut integrated into the stem just above the wheel housing. Fit an adjustable wrench securely onto this nut and turn it counterclockwise to unscrew the caster from the threaded insert.
For plate casters, use a screwdriver or a socket wrench to remove the mounting screws or bolts holding the plate to the furniture base. Loosen the screws gradually in a diagonal, criss-cross pattern to distribute the tension evenly and prevent the plate from warping or putting sudden pressure on a single screw hole.
If the hardware is rusted, seized, or stripped—a common issue in humid coastal environments—apply a few drops of penetrating oil directly to the threads. Allow the oil to sit for ten to fifteen minutes to break down the rust before attempting to turn the hardware again. Always ensure the furniture is supported securely by an assistant or a stable work block so it does not tip or slip while you are applying force.
When to Stop and Seek Professional Help
While replacing casters is generally a straightforward task, certain structural issues require professional intervention to prevent permanent damage to your furniture.
Stop the process immediately if you encounter any of the following conditions:
- Severely stripped threads: If the internal threads of a mounting socket are entirely worn away, a new threaded stem will not hold securely.
- Cracked wood or plastic: If the furniture leg or base is split, inserting a new caster will widen the crack and cause structural failure.
- Welded or riveted mounts: Casters that are permanently welded or riveted to metal frames cannot be removed with domestic hand tools.
If the mounting socket is deformed, loose, or requires specialized extraction tools, consult the furniture manufacturer or contact a qualified local furniture repair technician to assess and repair the base safely.
How to Install the New Ball Bearing Casters
Installing your new ball bearing casters correctly ensures that the weight of the furniture is distributed evenly, allowing for effortless, silent movement.
Installing Stem Casters
Before inserting the new caster, use a clean cloth to wipe out any dust, old grease, or debris from inside the mounting socket. This ensures that the new stem can slide in smoothly and seat completely flush.
Align the new stem so that it is perfectly straight with the opening of the socket. Holding the caster at an angle can damage the plastic sleeve or wood fibers inside the socket, leading to a loose fit. Press the stem firmly into the hole by hand until you feel the grip ring meet the socket opening.
Place a folded cloth over the caster fork to protect the finish, then use a rubber mallet to tap the caster gently but firmly into place. Continue tapping until the collar of the caster sits completely flush against the furniture base. Never use a metal hammer directly on the caster assembly, as the harsh impact can fracture the outer wheel or misalign the delicate internal ball bearing housing.
Installing Threaded and Plate Casters
For threaded stems, align the bolt with the threaded insert and begin turning it clockwise by hand. Hand-threading for the first three to four rotations is crucial to prevent cross-threading, which can permanently ruin the insert.
For plate casters, align the new plate with the existing screw holes on the furniture base. Insert all the mounting screws or bolts by hand to ensure they are properly aligned. Once all screws are in place, use a wrench or screwdriver to tighten them gradually in a diagonal sequence.
Tighten the hardware until it is snug and secure, but avoid overtightening. Applying excessive force can strip the threads in wooden bases or crack plastic mounting plates. If your replacement kit includes lock washers, place them between the bolt head and the plate; these washers help absorb operational vibrations and prevent the bolts from loosening over time.
Checking Alignment and Clearance
Once all the new casters are installed, perform a manual inspection before placing the furniture upright. Spin each wheel by hand to verify that it rotates smoothly and that the ball bearing mechanism is not binding, sticking, or rubbing against the caster fork.
Check the overall height of the new casters to ensure they are identical to the original set. Keeping the furniture perfectly level is essential, particularly for drawer slides, multi-legged tables, and office chairs, where even a slight height mismatch can cause instability, uneven wear, or structural strain.
Testing and Maintenance for Longevity
To maximize the lifespan of your new ball bearing wheels, regular testing and simple preventative maintenance are highly recommended.
Place the furniture upright on a flat, level surface. Test the installation under normal working conditions by sitting in the chair or placing typical items back onto the shelving unit. Roll the furniture gently back and forth to ensure it glides smoothly, swivels without resistance, and does not wobble or make unusual noises.
Over time, rolling wheels naturally accumulate hair, dust, clothing fibres, and pet dander from the floor. This debris can wrap around the wheel axle and work its way into the bearing track, eventually causing the bearings to seize. Periodically inspect the wheels and use a pair of tweezers or a utility knife to carefully clear away any trapped fibres.
Refer to the product label or manufacturer instructions to determine if your new ball bearing wheels are sealed or open. Sealed bearings are pre-lubricated and maintenance-free. Open bearings, however, may require periodic lubrication with a manufacturer-approved grease or dry silicone spray to maintain smooth rotation, especially in humid environments where moisture can dry out factory lubricants. Finally, establish a routine to check and retighten plate screws or threaded stems every few months, as daily movement and floor vibrations will naturally loosen hardware over time.
Frequently Asked Questions (FAQ)
Can I just replace the wheel instead of the whole caster?
While you can replace just the wheel on heavy-duty industrial casters that feature removable bolt-on axles, most standard home and office furniture casters use permanently riveted axles. For these standard models, replacing the entire caster assembly is the most practical, secure, and reliable option, ensuring all components wear evenly.
Why are my new ball bearing wheels squeaking?
Squeaking is usually caused by fine debris or hair trapped in the bearing track, a lack of lubrication in unsealed bearings, or slight rubbing between the wheel edge and the caster housing. Clean the axle area thoroughly and, if permitted by the manufacturer’s care instructions, apply a small amount of approved lubricant to quiet the noise.
Do ball bearing casters work on all floor types?
The internal ball bearings ensure smooth rolling and swiveling, but the outer wheel material determines floor safety. Soft polyurethane or rubber wheels are ideal for protecting hard surfaces like parquet, vinyl, or polished tiles from scratches, while hard nylon or plastic wheels are better suited for low-pile carpets where they can roll without sinking.
Community discussion
Share your experience or ask a question. Comments are reviewed before publication.