
Replacing a broken angle bracket on a bed frame or shelf is a practical DIY task that restores structural integrity and prevents costly furniture replacements. When a bracket cracks, bends, or pulls away from the frame, the joint loses its load-bearing capacity, which can lead to sagging, wobbling, or sudden collapse. By systematically assessing the damage, removing the old hardware, selecting a compatible replacement, and securing the new bracket with proper fastening techniques, you can safely stabilize your furniture. This guide outlines the step-by-step process to execute this repair successfully using basic household tools.
Assess the Joint and Prepare Your Workspace
Before attempting any hardware replacement, you must thoroughly evaluate the damaged joint to understand why the bracket failed and to ensure the surrounding material can support new hardware. A broken bracket is often a symptom of deeper structural stress, such as overloaded shelves, shifting bed frames, or wood degradation caused by high humidity. Begin by inspecting the wood, engineered board, or metal surrounding the bracket. Look closely for secondary damage, such as hairline cracks, splintering, or stripped screw holes where the fasteners have pulled free. If you are working with particleboard or medium-density fibreboard (MDF)—materials common in many flat-pack shelves—check if the board has crumbled or swollen, as these materials are particularly susceptible to moisture damage in humid environments.
In regions with high relative humidity, such as Singapore, the moisture in the air can cause wood fibers to swell and contract repeatedly. This natural movement puts continuous stress on furniture joints, often leading to loose screws and eventual bracket failure. When assessing a bed frame, pay close attention to the corner joints where the side rails meet the headboard and footboard. These areas bear the brunt of dynamic forces when you get in and out of bed. For shelves, inspect the underside of the shelf board where the bracket supports the span; sagging in the middle of a shelf can pull the bracket away from the wall or the vertical support frame, creating a leverage effect that can snap the metal or tear out the fasteners.
Products mentioned in this guide
![[SG STOCK] 4PCS L-BRACKET Stainless Steel Shelves Angle Bracket 150mm/125mm/100mm/80mm/50mm/ 40mm/25mm/20mm](https://img.lazcdn.com/g/p/af30d6f6ccb81e134ddb9e4dded44c50.png_400x400q80.png_.webp)

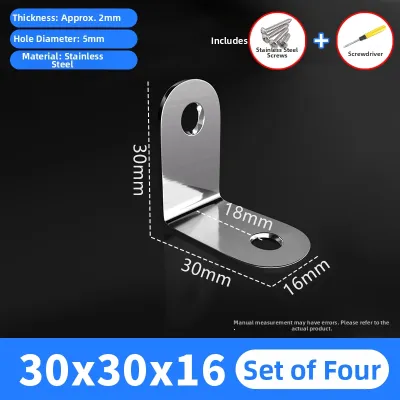
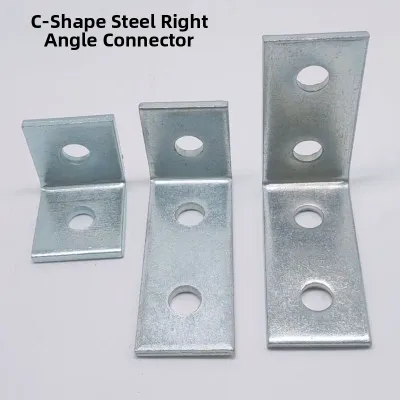
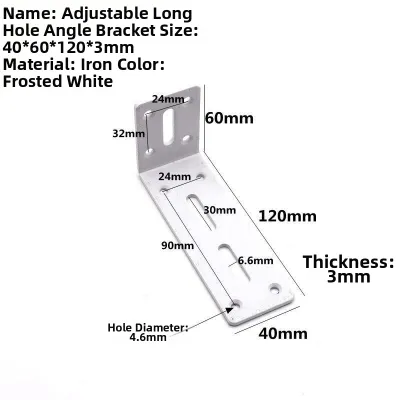
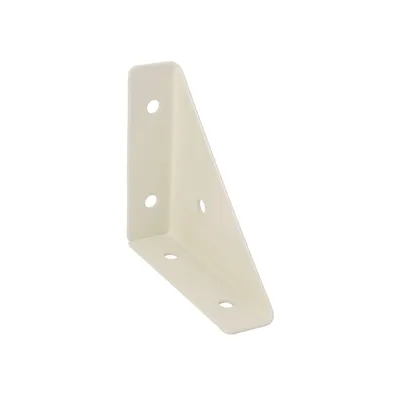
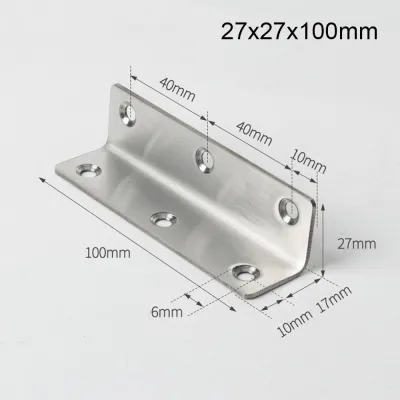
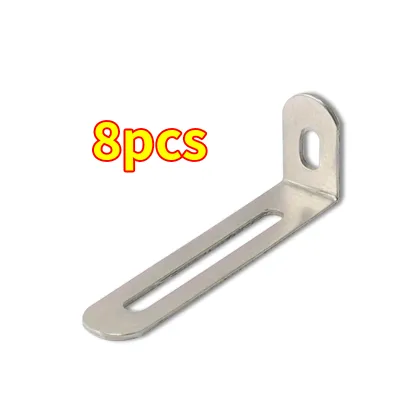
Prices are valid at publication and may change. Please refer to the product page for the latest price.
Once you have assessed the damage, prepare a safe, clear workspace. For a bed frame, remove the mattress, bedding, and slats to expose the joint fully and reduce the weight on the frame. For a wall shelf or freestanding shelving unit, completely unload all items and place them in a safe area. Never attempt to replace a bracket on a partially loaded structure, as the sudden shift in weight can cause the joint to collapse, leading to injury or further damage to your home. Physically support the frame or shelf using temporary wooden blocks, a secondary support stand, or the assistance of another person to keep the pieces aligned and stable while you work.
Gather all necessary hand tools before starting the repair. Depending on the existing fasteners, you will typically need a manual screwdriver (both Phillips and flathead), a set of hex keys (Allen keys) for furniture bolts, and pliers to grip stubborn or damaged screws. If you are working in tight corners, a stubby screwdriver or a right-angle ratcheting screwdriver can provide the necessary clearance. Keep a small container nearby to hold old screws and debris, ensuring your workspace remains organized and free of hazards.
Remove the Broken Angle Bracket Safely
Removing the damaged hardware requires patience to avoid worsening the condition of the furniture’s structural material. Start by backing out the intact screws or bolts securing the broken bracket. Apply firm, downward pressure on the screwdriver to prevent the tool from slipping and stripping the screw head. If you encounter stubborn fasteners that refuse to turn, a drop of penetrating oil can help loosen metal-on-metal connections, though you should avoid getting oil on unfinished wood surfaces to prevent staining.

Rusted fasteners present a unique challenge, especially in older furniture or pieces kept in damp areas. If a screw head is covered in rust, use a wire brush to clean the recess before attempting to insert your screwdriver. This ensures the tool can seat fully, reducing the risk of stripping the head. If the screw is completely seized, applying a small amount of penetrating fluid and letting it sit for ten to fifteen minutes can break the rust bond. When working with metal bed frames, be careful not to damage the pre-welded threaded nuts or brackets attached to the frame itself. If these integrated components are damaged, you may need to use a through-bolt with a locking nut instead of a standard machine screw.
If you encounter stripped or snapped screws, standard extraction methods are necessary. For a screw with a partially stripped head, placing a wide rubber band between the screwdriver tip and the screw head can provide the extra grip needed to turn it. For completely stripped or snapped screws, a dedicated screw extractor tool or locking pliers can grip the exposed shank to back it out. If a screw has sheared off flush with the wood surface, you may need to drill a small pilot hole directly into the center of the broken screw shank before using an extractor, taking care not to damage the surrounding wood fibers.
After successfully removing the old bracket and fasteners, clean the mounting surface thoroughly. Use a stiff brush or a dry cloth to clear away wood shavings, dust, old adhesive, or rust. A clean, flat surface is essential for ensuring the new bracket sits completely flush against the joint, which prevents uneven stress distribution when the joint is tightened. If you discover that the structural material is severely compromised—such as wood that is crumbling, deeply split, or showing signs of rot—stop the repair. In such cases, the material will not safely hold new fasteners, and you should consult a professional furniture repair specialist or replace the damaged structural component entirely.
Select a Compatible Replacement Bracket
Choosing the correct replacement angle bracket is critical to restoring the original load capacity and stability of your furniture. Do not simply purchase the first bracket you find; instead, take the broken bracket with you to a local hardware store or use its dimensions as a precise reference when shopping on an online marketplace. Measure the arm length of both sides of the bracket, the overall width, and the thickness of the metal. Additionally, measure the distance between the screw holes (hole spacing) to determine if you can reuse the existing mounting points.
When browsing replacement options, you will encounter various designs, including standard L-brackets, reinforced gusseted brackets, and flat corner plates. Gusseted brackets feature a diagonal metal rib welded or stamped into the corner of the angle, which significantly increases resistance to bending under heavy loads. These are highly recommended for bed frames and heavy-duty storage shelves. Standard L-brackets are suitable for lighter decorative shelving or smaller furniture pieces. Always check the thickness of the metal; a bracket made of 2mm or 3mm steel will offer substantially more rigidity than a thin, flexible bracket stamped from sheet metal.
The material and finish of the replacement bracket must match the structural demands of the furniture and its environment. For heavy-duty applications like bed frames, which must support both static and dynamic loads, select thick, heavy-gauge steel or reinforced steel brackets. For shelving units, standard steel, brass, or zinc-plated brackets are generally sufficient, provided they match the weight requirements of the items you plan to store. In humid climates, choosing corrosion-resistant finishes like stainless steel, galvanized steel, or powder-coated finishes is highly recommended to prevent rust from weakening the joint over time.
Verify whether the hole pattern of the new bracket aligns with the existing pilot holes in your furniture. If the holes align perfectly, you can reuse them, provided the wood fibers inside are still intact and capable of gripping a screw. If the new bracket has a different hole configuration, you must plan to drill new pilot holes. When planning new holes, ensure they are positioned far enough away from the old, damaged holes to prevent the wood from splitting or cracking under tension.
Install the New Bracket and Secure the Joint
To install the replacement bracket, begin by aligning it precisely over the joint. If you are using the existing pilot holes, position the bracket so the holes line up perfectly. If you are drilling new pilot holes, mark the center of each hole with a pencil or an awl. Use a drill bit that matches the inner shank diameter of your screws (excluding the threads) to drill the pilot holes to the correct depth. This step is crucial, as drilling a hole that is too small can cause the wood to split when the screw is driven in, while a hole that is too large will prevent the screw threads from gripping securely.
To ensure the repaired joint functions correctly, it must be perfectly square. Use a combination square or a speed square to verify that the shelf or bed frame components are at a precise 90-degree angle before you tighten the fasteners. If the joint is secured out of square, it will introduce twisting forces into the frame, which can lead to premature failure of the new bracket or cause the furniture to wobble. Clamp the pieces firmly in place once they are square, then proceed with drilling your pilot holes and driving the screws. This step ensures that the load is distributed evenly across the entire surface of the bracket rather than concentrating stress on a single corner.
Insert the fasteners by hand for the first few turns to ensure they enter straight and do not cross-thread, which is a common issue with metal frames or pre-installed threaded inserts. Once the screws are started, use a manual screwdriver to tighten them gradually. Avoid using high-torque power drills or impact drivers for this step, as they can easily over-tighten the screws, stripping the wood fibers or cracking plastic and composite materials. Tighten the screws in an alternating pattern—tightening each one slightly in turn—to distribute the pressure evenly across the bracket.
If you find that the original pilot holes are stripped and cannot grip the new screws, you must repair the holes before securing the bracket. For wooden frames or shelves, a reliable method is to clean out the hole, apply a small amount of high-quality wood glue, and insert a wooden dowel or several wooden toothpicks into the hole. Once the glue has dried completely, cut the excess wood flush with the surface and drill a new pilot hole. Alternatively, for heavy-duty applications or metal frames, you can install specialized threaded brass inserts or use slightly larger gauge screws, provided the bracket’s hole diameter can accommodate them without modification.
Verify the Repair and Maintain the Joint
Once the new angle bracket is securely installed, you must verify the stability of the joint before returning the furniture to regular service. Gradually apply controlled weight to the shelf or bed frame, observing how the joint behaves under load. Listen closely for any creaking, popping, or cracking sounds, which can indicate that the fasteners are slipping or the wood is under excessive stress. Visually inspect the joint to ensure there are no gaps opening up between the bracket and the furniture surface.
Gently shake or wiggle the bed frame or shelf to check for any residual wobbling or instability. If the structure feels solid and does not deflect under reasonable force, the repair is successful. If you notice any movement, re-examine the fasteners to ensure they are fully tightened, and check that the bracket is sitting flush against both surfaces of the joint. If the wobbling persists, you may need to add a secondary bracket or reinforce other joints on the furniture piece to distribute the load more evenly.
To ensure the longevity of your repair, establish a simple maintenance routine. Furniture joints are subject to continuous micro-movements from daily use, which can gradually loosen fasteners over time. Schedule a visual inspection of the repaired joint every six months. During these checks, use a manual screwdriver to gently test the tightness of the screws, snugging them up if they have backed out slightly. Keep the area around the bracket clean and dry, especially in humid environments, to prevent moisture from accumulating and compromising the wood or metal hardware.
Frequently Asked Questions (FAQ)
Can I use a larger angle bracket for extra support?
Yes, using a larger angle bracket can be an effective way to distribute weight over a wider surface area, which is particularly useful for reinforcing weak or aging joints. However, this approach comes with trade-offs. A larger bracket requires more physical space, which may not be available in tight corners or recessed areas of bed frames and shelving units. You must also ensure that the larger bracket does not interfere with other structural components, drawers, or mattress placement.
Additionally, larger brackets typically require larger, thicker screws to secure them. Forcing thicker screws into existing pilot holes without enlarging them first can easily split the wood, causing irreversible damage to the frame. If you decide to upsize your hardware, always drill new, appropriately sized pilot holes and verify that the surrounding material is thick enough to accommodate the longer screws without penetrating through to the finished exterior of the furniture.
What should I do if the screw holes are completely stripped?
When screw holes in wood or engineered board are completely stripped, they lose their ability to grip fastener threads, rendering the joint unstable. The most effective solution is to rebuild the hole using wood glue and wooden dowels. Clean any loose debris from the stripped hole, coat a hardwood dowel that matches the hole’s diameter with wood glue, and tap it firmly into the hole. Allow the glue to cure fully according to the manufacturer’s instructions, then cut the dowel flush with the surface. You can then drill a fresh pilot hole directly into the center of the dowel.
For heavy-duty applications like bed frames, or when working with MDF, installing threaded metal inserts is a highly durable alternative. These inserts screw directly into a pre-drilled hole in the wood, providing a permanent metal thread that accepts machine screws. If the damage to the joint area is extensive and cannot be repaired with dowels or inserts, you may need to shift the mounting position of the bracket slightly, drilling new pilot holes in an undamaged section of the frame, provided this does not compromise the alignment of the joint.
Community discussion
Share your experience or ask a question. Comments are reviewed before publication.