
Refilling a bean bag chair is a straightforward way to restore its original comfort, support, and structure after the filling has compressed over time. The process involves preparing a draft-free workspace, carefully opening the outer cover and inner liner, and using a funnel to transfer new expanded polystyrene (EPS) beads or alternative fillers into the bag. By taking a few precautions to manage static electricity and avoiding overfilling, you can easily revive your favorite seat and extend its lifespan.
Signs Your Bean Bag Needs Refilling
Over months or years of regular use, the tiny beads inside a bean bag naturally compress under weight. You will notice the first clear sign of compression when you sit down and sink almost completely to the floor, finding little to no structural support for your back or hips. The bag may also look visibly deflated, wrinkled, or saggy even when no one is sitting on it.
Before purchasing new filler, it is helpful to distinguish between beads that simply need a good fluffing and those that have degraded. If shaking and rolling the bean bag redistributes the filling and temporarily restores its loft, the beads may still have some life left in them. However, if the bag remains flat and dense despite your best efforts to fluff it, the beads have likely lost their elasticity and require a partial or complete refill.
Products mentioned in this guide


2 Lazada user ratings
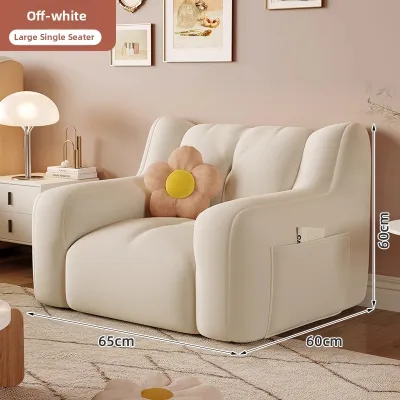
Item received in good condition. Delivery is fast. The packing a bit dusty. But inside is OK. Light weight and quality OK. Size also ok.



44 Lazada user ratings
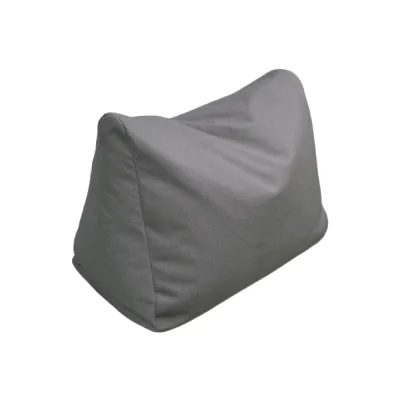
Received order within 48hrs. Measurement is not as high as stated but shorter and the colour isnt dark gray but a lighter silvery gray. When…Read full reviewShow less
Received order within 48hrs. Measurement is not as high as stated but shorter and the colour isnt dark gray but a lighter silvery gray. When sitted, it goes really low. It's ok with added cushioning at the base..reliability 3/5.
Color is nice, material ok. However, the foam in the beanbag was insufficient for my liking and I will need to topup the filling for better …Read full reviewShow less
Color is nice, material ok. However, the foam in the beanbag was insufficient for my liking and I will need to topup the filling for better comfortable.
Received parcel with torn packaging, missing the small pillow; otherwise bean bag is in a good size for adults, light but comfortable when s…Read full reviewShow less
Received parcel with torn packaging, missing the small pillow; otherwise bean bag is in a good size for adults, light but comfortable when seated.
Comfortable and cozy, Waterproof and easy to clean, 🎨Design: nice!
Delivery is fast. Easy to maintain. Right size for a kid.

Prices are valid at publication and may change. Please refer to the product page for the latest price.
Always check the manufacturer’s care label, which is usually sewn into the inner seam of the outer cover or the liner. This label often contains specific instructions regarding the recommended type of filler, the maximum volume the bag can hold, and important safety warnings about zipper locks. Following these guidelines helps preserve the integrity of the seams and ensures you do not void any existing product warranties.
Tools and Materials Needed for the Job
Selecting the correct filler material is the most critical step in achieving the desired firmness and durability. Most modern bean bags use expanded polystyrene (EPS) beads, which are lightweight, moisture-resistant, and highly resilient. If your original product tag specifies a different material, such as shredded memory foam or micro-beads, try to match that material to maintain the intended feel and support of the chair.

Gathering the right tools before you begin will prevent messy spills and make the transfer process much smoother. You will need a large plastic funnel or a DIY cone made from rolled-up heavy paper or cardboard to direct the beads into the opening. A plastic measuring jug or a clean, dry plastic bottle with the bottom cut off can serve as an excellent scoop for transferring the beads in controlled amounts. Keep a vacuum cleaner nearby, but ensure you remove any brush attachments that might trap or scatter static-charged beads.
Safety and cleanup gear are essential when working with lightweight, static-prone materials. Wearing a simple dust mask prevents you from accidentally inhaling tiny particles or static-charged beads that might drift into the air. Having a bottle of static guard spray or a spray bottle filled with a light mist of water on hand will help neutralize the static electricity that causes the beads to cling to your hands, clothes, and the sides of the packaging.
Step-by-Step Guide to Refilling Your Bean Bag
Refilling a bean bag is a physical task that requires patience, steady hands, and a systematic approach. The entire process can be broken down into three main phases: opening the protective covers, transferring the new filler safely, and sealing the bag securely. Setting aside about thirty to forty-five minutes will allow you to complete each step carefully without rushing.
Before you begin, choose a suitable workspace, preferably a large, draft-free room with hard flooring, such as a tiled kitchen or a laminate-floored living room. Avoid working outdoors, near open windows, or directly under ceiling fans and air conditioning vents. Even the slightest breeze can catch the lightweight beads and scatter them across the room, making cleanup exceptionally difficult.
Step 1: Prepare Your Workspace and Open the Covers
To begin, lay the bean bag flat on your prepared floor space and locate the zipper on the outer cover. Many manufacturers use child-safety zippers that do not have a traditional pull tab, preventing young children from opening the bag and accessing the loose filling. To unlock these safety zippers, gently insert a paperclip or a small, sturdy wire loop into the zipper lock mechanism to act as a temporary pull tab.
Once unlocked, slowly unzip the outer cover completely, taking care not to pull too hard or strain the fabric. Carefully slide the outer cover off the inner liner, much like removing a pillowcase. Set the outer cover aside in a clean, dry area where it will not collect dust or stray beads during the refilling process.
Next, locate the zipper on the inner liner, which holds the actual bead filling. This zipper is often also equipped with a safety lock or hidden under a protective fabric flap. Open this inner zipper very slowly, only a few centimeters at first, to check the level of the existing beads and ensure they are not pressed tightly against the opening, which could cause an immediate spill.
Step 2: Add the Filler Beads Safely Without Mess
Insert the narrow end of your funnel or DIY paper cone securely into the opened zipper of the inner liner. Hold the liner fabric tightly around the neck of the funnel with one hand to create a temporary seal, ensuring there are no gaps where loose beads can escape. If you have a helper, ask them to hold the funnel steady while you handle the filler packaging.
Open your bag of new filler beads by cutting a small corner off the plastic packaging rather than opening the entire top. This creates a controlled spout that makes pouring much easier. Slowly pour the new beads into the funnel in small, steady batches, allowing them to flow smoothly down into the liner.
Static electricity is the biggest challenge during this step, as it causes the beads to cling to the packaging and fly outward. To combat this, lightly spray the outside of the filler bag and the funnel with static guard spray before you start pouring. Alternatively, you can lightly mist the air around your workspace with water to increase humidity, which naturally reduces static cling without getting the beads wet.
Step 3: Check the Fill Level and Reseal the Liner
After adding a substantial portion of the new beads, temporarily close the inner zipper and test the fill level. Gently press down on the bag or sit on it carefully to assess its firmness and support. A properly filled bean bag should support your weight comfortably without letting your body sink all the way to the floor, while still retaining enough flexibility to mold to your shape.
It is crucial to leave a small amount of empty space—typically about ten to fifteen percent of the bag’s total volume—at the top of the liner. If you pack the bean bag completely full, the beads will have no room to shift when you sit down, resulting in a hard, uncomfortable seat and putting excessive pressure on the seams.
Once you are satisfied with the firmness, carefully pull the liner fabric away from the zipper track to clear any stray beads that might get caught in the teeth. Slowly zip the inner liner completely shut, ensuring the safety lock engages properly. Slide the outer cover back over the liner, align the corners, and zip it closed, removing your temporary paperclip pull tab when finished.
Post-Refill Shaping and Maintenance Tips
Once your bean bag is fully sealed, spend a few minutes manually massaging and shaking the bag to blend the new and old beads together. This helps distribute the fresh, bouncy beads evenly throughout the chair, eliminating any dense pockets or uneven lumps. Roll the bag across the floor a few times to help the filling settle into its natural shape.
To prolong the lifespan of your newly refilled bean bag, establish a routine of weekly fluffing. Simply pick up the bag, shake it vigorously, and drop it back down to redistribute the beads and prevent them from compressing prematurely in one spot. Additionally, keep the bean bag away from direct heat sources, such as radiators, heaters, or intense sunlight, as prolonged heat exposure can degrade the polystyrene material and cause the beads to shrink faster.
During the refilling process or routine maintenance, always inspect the seams and zippers of both the inner liner and outer cover. If you notice any signs of tearing, fraying threads, or zipper failure, stop immediately and consult the manufacturer for repair options or replacement parts. Using a bean bag with a compromised liner can lead to a massive spill of loose beads, which poses a cleanup challenge and a potential safety hazard.
Frequently Asked Questions (FAQ)
Can I mix different types of beans or beads in the same bag?
Mixing different types of filler materials, such as combining standard EPS beads with shredded memory foam or micro-beads, is generally not recommended unless specified by the manufacturer. Different materials have distinct densities, compression rates, and weights, which can cause them to separate over time. This separation often leads to an uneven, lumpy texture and can put uneven stress on the inner liner’s seams. To maintain the structural integrity and comfort of your bean bag, it is best to stick to a single type of filler that matches the original specifications.
How do I clean up spilled bean bag beads safely?
If you experience a spill, avoid using a broom or a standard vacuum cleaner with a rotating brush attachment, as these tools generate static electricity and will cause the lightweight beads to scatter further or cling tightly to the bristles. Instead, lightly spray the spilled area with static guard spray or a fine mist of water to neutralize the charge. Use a vacuum cleaner hose without any attachments to suck up the beads directly, or use a damp microfiber cloth to wipe them up from hard surfaces, as the moisture will easily overcome the static cling.
Community discussion
Share your experience or ask a question. Comments are reviewed before publication.