
Renovation dust is notoriously invasive. Unlike ordinary household dust, the fine particles generated from cutting drywall, hacking tiles, and sanding wood can suspend in the air for days, settling into the smallest crevices of your home. If left unprotected, your furniture can suffer permanent damage, including scratched finishes, stained upholstery, and clogged mechanical parts.
To safeguard your investments, you must implement a systematic protection plan. Properly covering your furniture requires more than throwing an old sheet over a sofa; it involves assessing your space, selecting materials designed to block microscopic particles, and applying secure wrapping techniques. This guide provides a comprehensive, step-by-step approach to keeping your furniture pristine throughout any home improvement project.
Assess Your Space and Prepare Furniture for Covering
Before purchasing any protective materials, you must evaluate the layout of your home and the scope of the upcoming work. Renovation projects vary in dust production. Activities like floor sanding, wall demolition, and tile cutting create high volumes of airborne grit, while minor painting or electrical work produces localized debris. Identifying high-risk zones near active work areas allows you to prioritize which items require heavy-duty sealing and which can manage with lighter protection.
Products mentioned in this guide
![[SG Ready Stock]Masking Film with Tape 240cm/300cm/400cm Painting Protection Covering for Plastic Drop Cloth Sheet Spraying Dust Cover Furniture Dustproof Cover](https://img.lazcdn.com/g/p/cf8629ee8572f06e3fbb5012fda44aa3.png_400x400q80.png_.webp)
![[LOCAL SG] 2pc Plastic Drop Cloth / 9 X 12FT / Renovation / Furniture Cover / Dust protection/PVC Cover / Painting Cover](https://img.lazcdn.com/g/p/7a3793557bfad6e6a94cdc481500d18b.jpg_400x400q80.jpg_.webp)
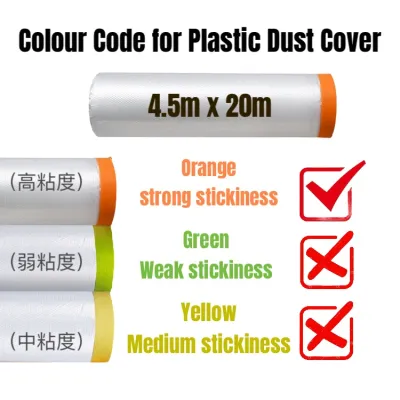
![[SG Ready Stock] Pre Taped Dust Cover Dust Protection Protective Cover Dust Proof For Walls Furniture Kitchen Cabinets Plastic Dust Prevention Screen for renovation/Home improvement (HIP)](https://img.lazcdn.com/g/p/9285f84e548178c9aeb78d6f9fe97654.jpg_400x400q80.jpg_.webp)
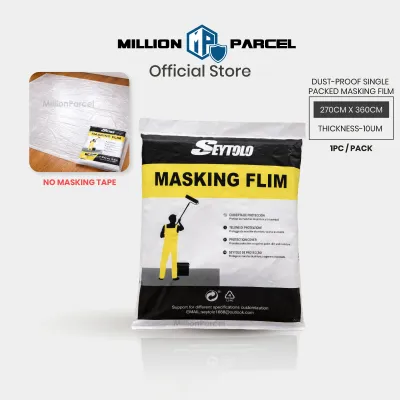
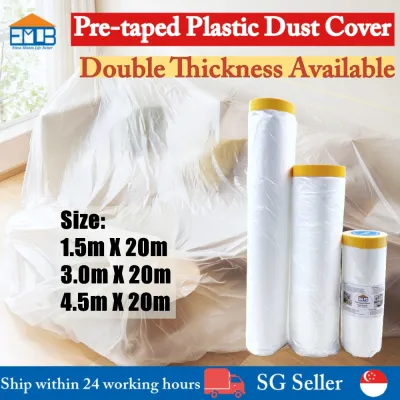
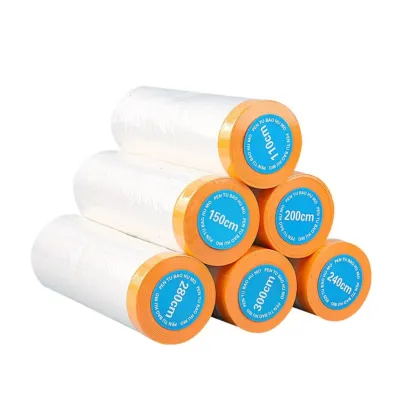
Prices are valid at publication and may change. Please refer to the product page for the latest price.
Next, categorize your furniture by size, material sensitivity, and mobility. This categorization helps you decide whether to relocate items or protect them in place.
- High-Mobility Items: Small chairs, side tables, cushions, and decorative pieces should be moved out of the active renovation zone entirely. If you live in a typical apartment where space is at a premium, designate a single, low-traffic room as a "safe zone" to store these items. Seal the door of this room with plastic sheeting and painter's tape to prevent dust migration.
- Low-Mobility Items: Large wardrobes, heavy dining tables, and sectional sofas are difficult to move through tight corridors or doorways. These items must be covered in place.
When planning to move large furniture, always measure the finished dimensions of the item against your doorways, hallways, and lift access. Attempting to force a heavy sideboard through a narrow frame in a hurry can cause structural damage to both the furniture and your walls. If an item must remain in the work zone, pull it away from the walls toward the center of the room. This central positioning gives contractors space to work while keeping your furniture clear of direct wall impacts, paint splatters, and falling debris.
Select the Right Dust Covers and Securing Materials
Choosing the correct protective barrier is essential to prevent both dust penetration and structural damage. The two primary options for covering furniture are plastic sheeting and breathable fabric covers. Each material serves a specific purpose, and using the wrong one can lead to unintended consequences.

Plastic Sheeting vs. Breathable Fabric
Heavy-duty plastic sheeting (polyethylene) is completely impervious to liquids, making it excellent for protecting furniture from paint spills, wet plaster, and heavy moisture. However, plastic completely traps air. In humid climates, such as in Singapore, trapping air underneath plastic for extended periods can create a greenhouse effect. This trapped moisture can lead to mold growth on fabric upholstery, warping in solid wood, and clouding on delicate lacquer finishes.
Breathable fabric covers, often made from non-woven polypropylene, allow moisture to evaporate while still blocking fine dust particles. For long-term renovations or highly sensitive materials like leather and solid wood, breathable covers are highly recommended. If you must use plastic for liquid protection, drape a breathable fabric layer over the furniture first, then place the plastic loosely on top, ensuring the bottom remains open to allow air circulation.
Selecting Safe Adhesives and Fasteners
Securing your covers requires adhesives that will not degrade your furniture’s surfaces. Standard packing tape, duct tape, and high-tack masking tape should never be applied directly to wood finishes, paint, veneer, or leather. These adhesives can bake onto surfaces over time, leaving a sticky residue that is difficult to remove, or worse, stripping away the protective topcoat when peeled off.
Instead, opt for low-tack painter’s tape designed for delicate surfaces. Always check the manufacturer’s label on the tape to verify its clean-removal rating, which typically ranges from 14 to 60 days. Before applying tape to a visible area of your furniture, perform a patch test on an inconspicuous spot, such as the underside of a table leg, to ensure it does not lift the finish. For securing plastic to plastic, standard heavy-duty tape is perfectly fine, provided it never touches the furniture itself.
Step-by-Step Guide to Wrapping and Securing Your Furniture
Once you have gathered your materials, follow this systematic sequence to wrap and seal your furniture. Skipping preparation steps can trap abrasive dust beneath your covers, leading to scratches when the covers shift during the renovation.
Step 1: Clean and Dry All Surfaces
Before any cover touches your furniture, clean every surface thoroughly. Vacuum fabric upholstery to remove existing grit, and wipe down wood, metal, and glass surfaces with a dry or slightly damp microfiber cloth. Any dust or dirt left on a hard surface can act like sandpaper if the protective cover rubs against it during the renovation. Ensure all surfaces are completely dry before proceeding to prevent moisture from becoming trapped under the wrap.
Step 2: Drape from Top to Bottom
Unroll your renovation dust cover and drape it over the furniture, starting from the highest point. Ensure the cover extends all the way to the floor. If you are using multiple sheets of plastic or fabric to cover a large item, overlap the seams by at least 20 to 30 centimeters. This generous overlap prevents fine dust from drifting through the seams when air currents shift in the room.
Step 3: Seal the Seams and Edges
Use your low-tack painter’s tape to seal the overlapping seams of the dust covers. Next, secure the bottom edges near the floor. If the furniture has legs, you can gather the excess material around each leg and secure it with elastic ties, stretch wrap, or tape wrapped around the cover itself.
When securing the covers, avoid over-tightening. Pulling plastic or fabric too tight can put unnecessary stress on delicate furniture joints, decorative moldings, or protruding hardware, potentially causing warping or breakage. The goal is a snug, sealed fit that prevents air currents from carrying dust underneath the cover.
Tailored Protection for Delicate and Upholstered Pieces
Standard wrapping methods may not suffice for highly delicate, valuable, or uniquely shaped furniture. These items require specialized handling to prevent physical impact damage and moisture issues.
Protecting Glass and Polished Wood
Glass tabletops, mirrored panels, and highly polished wood finishes are highly susceptible to scratches and impact chips. A thin renovation dust cover will not protect these surfaces from a dropped tool or a heavy piece of debris.
For these items, add a cushioning layer beneath your dust cover. Use thick moving blankets, felt padding, or heavy-duty bubble wrap to cover the surface first. Once the padding is in place, wrap the entire piece in your dust cover or stretch wrap to hold the padding securely. If you are protecting a glass tabletop, check if the glass can be safely detached from its base according to the manufacturer’s guidelines. If so, store the glass panel vertically in a safe, low-traffic room, wrapped in blankets.
Managing Moisture in Leather and Fabric Upholstery
Upholstered furniture requires careful ventilation planning. Leather is a natural, porous material that needs to breathe to maintain its structural integrity. Wrapping a leather sofa tightly in plastic sheeting for more than a few days can cause the leather to sweat, leading to mold, mildew, and discoloration.
For leather and fabric sofas, always use a breathable non-woven fabric cover as the primary barrier. If the renovation involves wet work like painting or plastering nearby, you can drape plastic over the top of the breathable cover during active work hours. However, you must remove or loosen the plastic layer at the end of each day to allow the upholstery to breathe.
Disassembling Complex Furniture
If your furniture features removable parts, such as dining table legs, detachable sofa cushions, or adjustable shelving, consider disassembling them. Removing these components makes the main frame lighter and easier to protect. Store loose cushions in clean, sealed plastic bags in a dry area. Always keep screws, brackets, and assembly hardware in a labeled bag taped to the underside of the corresponding furniture piece so nothing is lost during the chaos of renovation.
Safely Uncover and Inspect Furniture After Renovation
Once the dusty work is complete, the temptation is to rip off the covers immediately. However, rushing this process can release weeks of accumulated dust back into your living space, undoing all your hard work.
The Gentle Removal Process
Before removing any covers, allow the air in the room to settle for at least 24 hours after the final cleanup by your contractors. If you have an air purifier, run it on high to capture lingering airborne particles.
When you are ready to uncover the furniture, do so slowly and gently. Do not shake the covers. Start from the top and roll the plastic or fabric inward, trapping the settled dust inside the roll as you go. Carefully carry the soiled covers directly to a trash bin or outside the home for disposal or cleaning.
Post-Renovation Inspection and Care
With the covers removed, conduct a thorough inspection of each piece of furniture. Check for the following issues:
- Moisture Buildup: Look for damp spots, musty odors, or white mold spores, especially in deep crevices or along the base of upholstered items.
- Tape Residue: Check areas where painter's tape was applied. If any sticky residue remains, do not scrape it with sharp tools. Use a mild, manufacturer-approved cleaner or a specialized adhesive remover safe for that specific finish.
- Fine Dust Penetration: If any dust bypassed your seals, vacuum the surfaces immediately using a vacuum cleaner equipped with a HEPA filter to prevent spreading the particles.
Finally, restore your furniture’s finish according to the manufacturer’s care instructions. For solid wood, this may involve applying a light coat of high-quality wood conditioner or wax. For leather, apply a specialized leather conditioner to restore moisture lost during the dry, dusty renovation period.
Frequently Asked Questions (FAQ)
Can I use regular bed sheets instead of specialized renovation dust covers?
While regular cotton bed sheets are breathable, they are not effective barriers against fine renovation dust. The weave of standard household linens is too porous, allowing microscopic concrete, drywall, and wood dust particles to pass directly through the fabric and settle onto your furniture. Specialized renovation dust covers are manufactured with a much tighter, non-woven structure designed specifically to trap microscopic debris while still maintaining breathability.
How long can furniture remain safely covered without damage?
In a humid environment, furniture should not remain tightly sealed under non-breathable plastic covers for more than a few days at a time. If you are using high-quality, breathable fabric covers, your furniture can remain covered for several weeks. Regardless of the material used, you should conduct weekly checks by lifting the covers to inspect for humidity buildup, musty smells, or pest activity, ensuring the environment beneath the cover remains dry and stable.
Should I cover electronics and appliances with the same dust covers?
Electronics and appliances require different handling than standard furniture. Never cover active or plugged-in electronics, as trapping heat can cause permanent internal damage or pose a fire hazard. Always unplug your devices and allow them to cool completely before covering. Use specialized anti-static covers or breathable fabric wraps rather than standard plastic, which can generate static electricity that damages sensitive internal circuitry.
Community discussion
Share your experience or ask a question. Comments are reviewed before publication.