
Applying a 3M bumper to household furniture is one of the quickest and most effective ways to eliminate noisy slams, prevent surface scratches, and protect cabinetry from daily wear and tear. Whether you are sealing cabinet doors, cushioning heavy drawers, or stabilizing table legs, these small polyurethane components rely on a highly specialized adhesive backing to stay firmly in place. However, simply peeling a pad off its sheet and slapping it onto a dusty surface will almost certainly lead to premature failure.
To achieve a long-lasting bond that survives years of repeated impacts, you must follow a systematic application process. This guide details how to prepare your furniture surfaces, handle the pads without compromising their adhesive strength, and position them for optimal cushioning. By understanding the mechanics of pressure-sensitive adhesives, you can ensure your protective bumpers remain securely attached to wood, laminate, glass, and metal surfaces alike.
Why Bumper Pads Fail and How Surface Prep Prevents It
When a protective pad falls off after only a few weeks, many homeowners assume the adhesive itself is defective. In reality, modern acrylic adhesives engineered by manufacturers like 3M are incredibly robust, but they require direct, microscopic contact with the substrate to function. The presence of household dust, airborne grease particles, or invisible moisture creates a barrier that prevents the adhesive from wetting the surface and forming a secure molecular bond.
Products mentioned in this guide
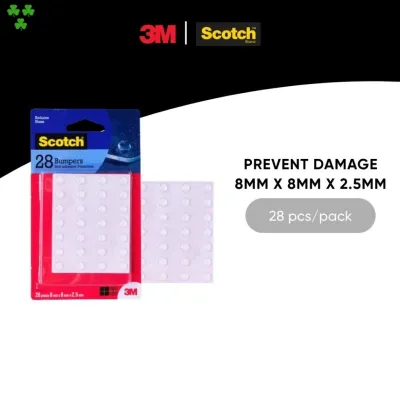
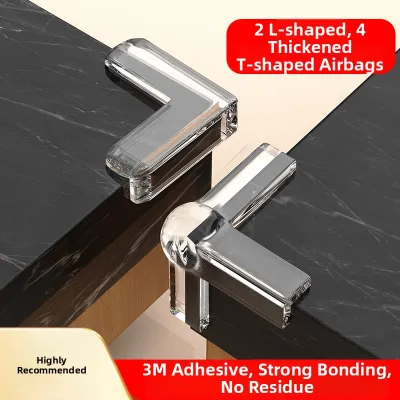
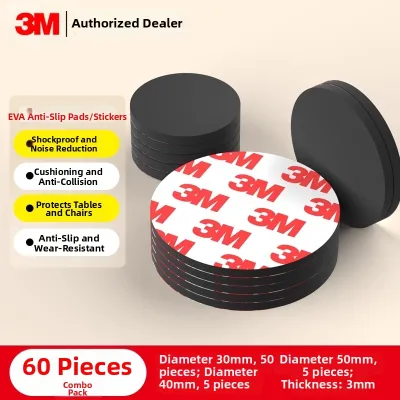
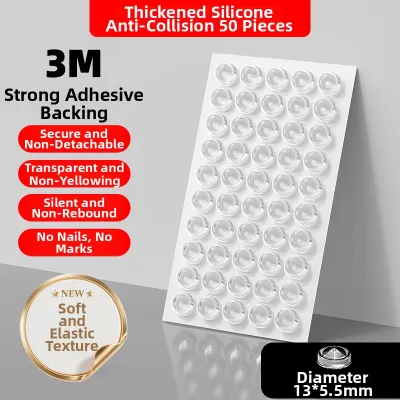
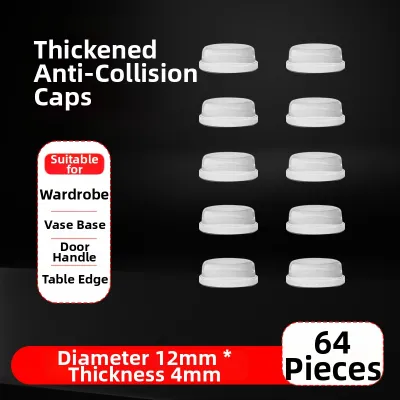
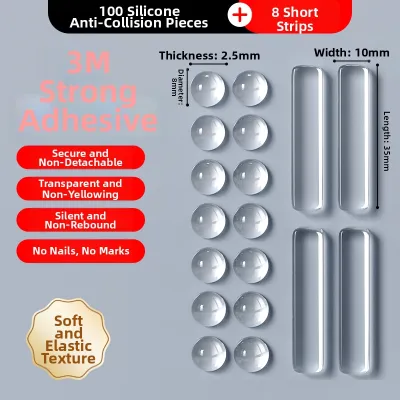
Prices are valid at publication and may change. Please refer to the product page for the latest price.
Standard household cleaning sprays are a major contributor to adhesive failure. Many multi-surface cleaners, wood polishes, and glass sprays leave behind a thin, slippery film of silicone, wax, or surfactant designed to make surfaces look shiny or repel dust. While these residues are pleasant to the touch, they act as a release agent for pressure-sensitive adhesives, causing the newly applied pad to slide off under the slightest lateral force.
Taking just two minutes to properly prepare the furniture surface can extend the lifespan of your bumper pads from a few weeks to several years. Proper preparation strips away these invisible contaminants, exposing the clean, raw surface of the furniture material. This allows the adhesive to flow into the microscopic pores of the wood, laminate, or metal, creating a high-strength mechanical and chemical bond that resists shear forces.
Essential Tools for a Clean Installation
Achieving a professional-grade installation requires gathering a few basic household supplies before you begin peeling any adhesive backings. Having these tools ready ensures you do not rush the process or resort to substandard cleaning methods that could ruin the adhesive bond.

- 3M Bumper Pads: Choose the appropriate shape, thickness, and color (clear, black, or brown) to match your specific furniture aesthetic and clearance needs.
- Isopropyl Alcohol (70% or higher): Also known as rubbing alcohol, this solvent is crucial because it dissolves grease and evaporates rapidly without leaving any residue. Alternatively, you can use a dedicated adhesive prep wipe.
- Clean Microfiber Cloth: A lint-free microfiber cloth or high-quality paper towel ensures you do not introduce new fibers or dust to the cleaned area.
- Tweezers or a Toothpick: This simple tool helps you lift the bumper pad off its protective backing sheet without touching the sticky side with your fingers.
Avoid using standard glass cleaners, multi-surface chemical sprays, dish soap, or damp water-only cloths. Glass and multi-surface cleaners contain additives that leave residues, while dish soaps often contain skin-conditioning oils that compromise adhesive performance. A simple water-dampened cloth is also insufficient because it cannot dissolve oils and may trap moisture beneath the pad, leading to rapid peeling.
Step-by-Step Guide to Applying 3M Bumper Pads
Applying a 3M bumper requires a deliberate approach to ensure the pressure-sensitive adhesive activates correctly and cures to its maximum strength. Follow these four chronological steps to achieve an optimal bond on any clean furniture surface.
Before beginning, always check the applied product’s label and the treated item’s manufacturer instructions to ensure compatibility with isopropyl alcohol. If instructions conflict, the item is unidentified, or the use is not covered, stop and consult the manufacturer or a qualified professional.
Step 1: Clean the Surface
Begin by pouring a small amount of isopropyl alcohol onto your clean microfiber cloth. Wipe the exact contact points on the furniture where the bumper pads will be placed. Do not simply wipe the general area; scrub the specific spot with moderate pressure to strip away stubborn oils, grease, and old polish. Allow the surface to air dry completely, which typically takes only a few seconds as the alcohol evaporates. Ensure no moisture remains trapped on the surface before proceeding.
Step 2: Peel Without Touching
Carefully peel the bumper pad from its protective backing sheet. To preserve the integrity of the adhesive, avoid touching the sticky underside with your bare fingers. The natural oils and sweat on your skin will instantly contaminate the acrylic adhesive, significantly reducing its bonding capacity. Instead, use a clean pair of tweezers to grip the pad by its edge, or carefully peel the backing sheet away while holding only the non-adhesive polyurethane top of the bumper.
Step 3: Position and Press
Align the bumper pad precisely over the dried, clean target area. Once the pad touches the surface, you cannot reposition it without ruining the adhesive layer, so take your time during alignment. Press the pad down firmly with your thumb. Apply continuous, heavy pressure directly downward for 10 to 15 seconds. Because 3M bumpers use pressure-sensitive adhesives, this physical force is required to deform the adhesive layer, forcing it to flow into the microscopic texture of the furniture surface to establish a true bond.
Step 4: Allow Cure Time
Avoid using the furniture immediately after application. While the initial tack is strong enough to keep the pad in place, the adhesive requires time to flow and cure fully. Check the specific 3M product packaging for exact cure times. As a general rule, maximum adhesion typically develops over a 24 to 72-hour period. During this crucial curing window, avoid slamming cabinet doors, sliding heavy drawers, or dragging chairs, as premature shear stress can permanently weaken the bond.
Where to Place Bumper Pads on Specific Furniture
Strategic placement of your bumper pads ensures they provide maximum noise dampening, prevent structural warping, and protect surrounding surfaces without interfering with the mechanical operation of your furniture. Different furniture types require specific placement patterns to distribute forces evenly.
Cabinet Doors and Drawers
For standard vertical cabinet doors, place one bumper pad in the top corner and another in the bottom corner on the side opposite the hinges. This dual-point placement provides a balanced cushion when the door closes, preventing the wood or laminate from twisting or warping over time due to uneven impact forces. If you only place a single pad in the middle, the door may rattle at the top or bottom, and the constant uneven pressure can slowly misalign the hinges.
For exceptionally wide or deep drawers, place the pads on both the left and right top corners of the drawer front’s inner face, where it makes contact with the cabinet frame. This layout ensures even impact distribution when the drawer is pushed closed, reducing the risk of the drawer jamming or damaging its internal slides. Before adhering the pads, do a quick test fit to ensure their thickness will not prevent the drawer from closing flush or interfere with the smooth operation of the drawer slides.
Chair and Table Legs
Applying protective pads to the bottom of chair and table legs is essential for protecting hard floors from unsightly scratches and reducing high-frequency scraping noises. To ensure the pad performs effectively, place it exactly in the geometric center of the leg’s bottom surface. This central placement ensures that the downward weight of the furniture and its occupant is distributed evenly across the entire surface of the bumper, preventing uneven compression and premature wear.
Matching the size of the bumper pad to the footprint of the furniture leg is critical for its longevity. If a pad is too large and overhangs the edges of the leg, it will catch on the floor when the chair is dragged, causing the adhesive to peel back and collect dirt. Conversely, a pad that is too small will compress too quickly under heavy loads, bottoming out and failing to protect the floor.
In Singapore, where many homes feature hard flooring materials such as polished porcelain tiles, vinyl, or engineered laminate, selecting the right bumper pad type is key. Clear polyurethane bumpers or felt-topped adhesive pads are ideal for these smooth surfaces because they glide quietly and absorb impact. If your furniture is exceptionally heavy, or if you have delicate natural stone flooring, always check both the floor manufacturer’s care instructions and the furniture manufacturer’s weight limits before selecting and applying adhesive bumpers.
How to Fix Falling Pads and Remove Adhesive Residue
Over years of heavy use, even the most securely applied bumper pads may eventually wear down or peel off due to constant shear forces. Knowing how to safely replace these pads and clean up old adhesive ensures your furniture remains in pristine condition.
Dealing with Fallen Pads
If a bumper pad falls off, resist the temptation to reattach it using superglue, double-sided tape, or craft glue. The original adhesive layer on the fallen pad is likely contaminated with dust, pet hair, and fibers, meaning any attempt to re-stick it will result in an uneven, weak bond that will quickly fail again. Superglue can also chemically react with the polyurethane pad or permanently damage your furniture’s finish. Instead, discard the old pad, thoroughly clean the surface with isopropyl alcohol, and apply a brand-new 3M bumper pad following the standard step-by-step process.
Removing Adhesive Residue
When you peel off an old bumper pad, it may leave behind a sticky, unsightly patch of acrylic adhesive residue. To remove this residue safely, saturate a clean microfiber cloth with a small amount of isopropyl alcohol and hold it against the sticky spot for 30 to 60 seconds to soften the adhesive. Gently rub the area in a circular motion until the residue rolls up into small balls that can be easily wiped away.
Safety and Finish Protection
Always avoid using harsh chemical solvents such as acetone, nail polish remover, paint thinner, or heavy-duty industrial degreasers on your furniture. These aggressive chemicals can easily strip away varnish, dissolve wood stains, melt plastic laminates, or cloud acrylic surfaces. Before applying any cleaning solvent, perform a spot test in an inconspicuous area—such as the inside of a cabinet door or the back of a chair leg—to ensure it does not discolor or damage the finish. If the surface material is delicate, antique, or unknown, consult the furniture manufacturer’s care guide or seek advice from a professional furniture restorer.
Frequently Asked Questions (FAQ)
Can I reuse a 3M bumper pad if it falls off?
No, 3M bumper pads are strictly designed for single-use applications. Once a pad is peeled away from its original surface, the microscopic structures of the acrylic adhesive are permanently deformed and compromised. Additionally, the exposed adhesive will instantly attract airborne dust and oils from your hands, making it impossible to establish a secure, reliable bond a second time. Always use a fresh, unused bumper pad to ensure proper adhesion and long-term performance.
Will bumper pads damage my wood or laminate finishes?
The high-quality acrylic adhesive used on standard 3M bumper pads is chemically stable and generally safe for fully cured wood finishes, laminates, glass, and metals. Damage typically does not occur from the adhesive itself, but rather from pulling the pad off too aggressively or using harsh chemical solvents during removal. To safely remove a long-standing bumper pad without lifting the underlying finish, apply gentle heat with a hairdryer on a low setting for 15 to 20 seconds to soften the adhesive, then slowly peel the pad off at a shallow angle.
Community discussion
Share your experience or ask a question. Comments are reviewed before publication.