
Transforming your living space to accommodate an active feline companion is one of the most rewarding home improvement projects you can undertake. In compact urban environments, expanding your home vertically is an exceptionally efficient way to give your cat room to climb, play, and map their territory without sacrificing valuable floor area. Installing modular cat wall shelves allows you to customize a climbing path that fits your specific room layout while adapting to your pet’s unique physical needs.
Creating a secure vertical playground requires careful planning, structural assessment, and precise installation. A poorly mounted shelf poses a significant safety risk to both your pet and your household assets. By understanding your wall composition, selecting the correct heavy-duty hardware, and designing an ergonomic layout, you can build a stable, long-lasting climbing system that seamlessly integrates into your home.
Assess Your Wall Structure and Space Constraints
Before purchasing any modular components, you must thoroughly evaluate your available wall space and understand what lies behind the plaster. In typical Singapore apartments, such as Housing & Development Board (HDB) flats or private condominiums, wall construction varies significantly between rooms. Structural walls and structural columns are made of reinforced concrete, which is exceptionally strong but requires specialized drilling equipment. Conversely, internal partition walls between bedrooms are often made of lightweight concrete panels, drywall, or plasterboard, which have much lower load-bearing capacities.
Products mentioned in this guide
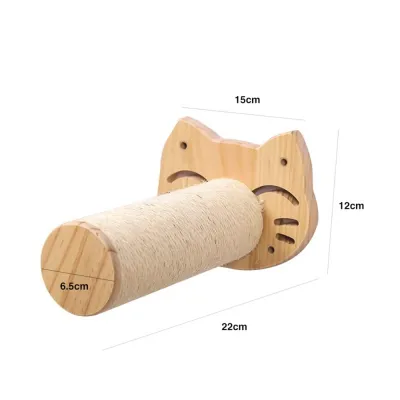
Prices are valid at publication and may change. Please refer to the product page for the latest price.
Your layout must also account for existing household fixtures and daily traffic patterns. Ensure the proposed climbing path does not block major walkways, air conditioning units, window openings, or light switches. In tropical climates where ceiling fans are common, you must maintain a strict safety clearance. Position all shelves far outside the maximum sweep radius of any fan blades to prevent accidental contact when your cat is in motion.
Identifying your wall type is the single most critical factor in determining how you will anchor the shelves. Knocking on the wall is a simple preliminary test: a hollow, echoing sound indicates drywall or a light partition, while a solid, dull thud points to concrete or brick. If you are renting your home, you must consult your tenancy agreement before making any modifications. Many landlords prohibit drilling into walls entirely, or require you to restore the surfaces to their original condition upon moving out. Discussing these hole-patching responsibilities beforehand—and securing written permission—can prevent costly security deposit disputes later.
Design a Safe and Engaging Layout for Your Cat
A successful modular wall system functions as a “cat superhighway”—a continuous elevated pathway that allows your feline to traverse a room without touching the floor. Modular systems are highly advantageous because they let you arrange, expand, and reconfigure individual components over time. When planning this route, your goal is to create a fluid flow of movement that matches your cat’s natural instincts while keeping safety at the forefront.

Spacing between individual elements must be calibrated to your cat’s age, size, and physical condition. For healthy, adult cats, horizontal gaps between shelves should generally range between 30 to 45 centimeters, while vertical steps should be kept around 20 to 30 centimeters. If you are designing for a senior cat, a kitten, or a cat with mobility limitations, these distances must be significantly reduced, and ramps or angled bridges should be used instead of steep vertical leaps.
An engaging layout must balance active zones with dedicated rest areas. Incorporate spacious platforms where your cat can lounge comfortably, preferably near high viewpoints or windows where they can observe their surroundings. Scratching posts or sisal-wrapped columns can be integrated into the vertical path to satisfy natural scratching behaviors. Crucially, ensure the pathway has multiple entry and exit points. A single-path layout with a dead end can trap a cat, which is particularly problematic in multi-cat households where one cat might block the exit and corner another.
To avoid costly mistakes, never drill based on guesswork. Use low-tack painter’s tape or cardboard templates cut to the exact dimensions of your modular shelves to mock up the entire layout directly on the wall. This visual guide allows you to step back and assess the scale, check for clearance around furniture, and simulate your cat’s climbing angles before making any permanent holes.
Gather the Right Tools and Heavy-Duty Hardware
Mounting heavy-duty pet furniture securely requires a specific set of tools and high-quality hardware. Do not rely solely on the basic plastic plugs that may come packaged with generic shelves, as they are often insufficient for the dynamic forces exerted by a jumping cat.
Prepare a toolkit containing a reliable stud finder (essential for locating timber or metal studs behind drywall), a spirit level to ensure every platform is perfectly horizontal, a measuring tape, and a pencil for marking. You will also need a variable-speed power drill. For concrete or brick walls, a hammer drill paired with high-quality masonry drill bits is non-negotiable. For drywall or partition walls, standard wood or metal twist bits are appropriate.
Always check the manufacturer’s weight capacity specifications for each modular shelf component. A cat jumping down from a higher level can exert a dynamic force up to three times its static body weight. Therefore, your wall anchors must be rated to support significantly more than the simple weight of your pet. For concrete walls, high-grade nylon expansion plugs or sleeve anchors are ideal. For drywall, heavy-duty toggle bolts or threaded metal anchors are required to distribute the load across the plasterboard panel.
Step-by-Step Guide to Mounting the Shelves Securely
Before starting the physical installation, check the applied product’s label and the treated item’s manufacturer instructions. If the instructions conflict with your wall type, or if you are unsure of the shelf’s compatibility, stop immediately and consult the manufacturer or a qualified professional installer.
Step 1: Mark the layout. Using your cardboard templates or the physical shelf brackets as a guide, hold them against the wall at your pre-planned positions. Use a spirit level to verify that each bracket is perfectly aligned and level. Mark the exact center of each screw hole onto the wall using a sharp pencil. Double-check your measurements and spacing relative to the adjacent shelves before proceeding.
Step 2: Check for hazards. Before drilling any hole, you must verify that the wall interior is clear of hidden hazards. Use a multi-scanner or stud finder with live-wire and plumbing detection modes over the marked spots. In Singapore apartments, electrical conduits often run vertically or horizontally from switches and outlets, and water pipes may run through walls adjacent to bathrooms or kitchens. Drilling into these can cause catastrophic damage or severe injury.
Step 3: Drill and insert anchors. Select the correct drill bit size matching your wall anchors. For concrete walls, set your drill to hammer mode, hold the tool perfectly perpendicular to the wall, and drill to the depth specified by the anchor manufacturer. For drywall, use standard rotary mode to drill clean holes through the gypsum board. Strict stop condition: If you encounter unexpected resistance, if the wall material begins to crumble excessively, or if you feel the drill bit drop into an unexpected hollow cavity where you expected solid concrete, stop drilling immediately. Do not attempt to force the installation; instead, consult a professional structural engineer or professional handyman to assess the wall integrity. Once the holes are cleanly drilled, vacuum out any dust and insert your heavy-duty wall anchors, ensuring they sit flush with the wall surface.
Step 4: Mount the brackets. Align the shelf brackets over the inserted wall anchors. Hand-thread the screws through the bracket holes into the anchors to prevent cross-threading. Use a manual screwdriver or a power drill with a low clutch setting to tighten the screws. Secure the brackets firmly to the wall, but avoid over-tightening. Excessive force can strip the threads inside plastic anchors, crack drywall, or damage the bracket material itself, severely compromising the structural integrity of the mount.
Step 5: Attach modular components. Once the brackets are securely anchored, mount the shelves, steps, or hammocks onto the brackets according to the modular system’s specific assembly instructions. Ensure all locking pins, secondary screws, or structural joints are fully engaged and tightened. Verify that there is no wobbling or play between the shelf and the wall bracket.
Test the Stability and Adjust for Your Cat's Comfort
Before allowing your cat unsupervised access to the new vertical climbing system, you must conduct a rigorous physical stability test. Apply gradual, heavy downward pressure on each installed shelf using your hands, simulating a load significantly heavier than your cat. Watch for any flexing of the brackets, pulling away of the anchors from the wall, or creaking sounds. If any component moves or feels unstable, dismantle that section and inspect the wall anchors and screws for failure.
Once the system passes your manual safety inspection, introduce your cat to the lower levels of the highway. Use treats, catnip, or favorite toys to encourage them to explore the route naturally. Observe their initial climbs closely. Look for signs of hesitation, awkward landings, or complete avoidance of specific sections. These behaviors often indicate that a jump is too far, a surface is too slippery, or a platform is too unstable for their comfort.
The beauty of a modular system is its inherent adjustability. If you notice your cat struggling with a particular leap, unmount the affected module and reposition it to optimize the spacing. For smooth wooden or laminate surfaces that lack traction, consider adding self-adhesive carpet pads or felt mats to prevent slips during high-speed chases.
Finally, establish a routine maintenance schedule. The repetitive impact of a cat jumping, landing, and launching off wall shelves creates dynamic vibrations that can gradually loosen hardware over time. Every three to six months, inspect the brackets, check for any gaps between the shelf and the wall, and gently tighten any loose screws to ensure the system remains safe for years to come.
Frequently Asked Questions (FAQ)
How much weight should a cat wall shelf hold?
A safe cat wall shelf should be rated to hold at least 15 to 20 kilograms to safely accommodate the dynamic forces of a jumping cat. While your cat may only weigh 4 to 6 kilograms, the impact force of landing after a leap significantly multiplies the load on the wall anchors. Always consult the manufacturer’s product specifications and ensure your wall type and chosen hardware can support this dynamic weight.
Can I install cat shelves on drywall or partition walls?
Yes, you can install cat shelves on drywall or partition walls, but you must take extra structural precautions. You should anchor the primary brackets directly into the wooden or metal wall studs using heavy-duty wood screws. If stud alignment does not match your desired layout, you must use high-quality, heavy-duty hollow wall anchors, such as steel toggle bolts, which spread the load behind the drywall board. Avoid placing high-impact landing zones or very heavy modular units on unsupported hollow sections.
Will my landlord allow me to drill holes for cat shelves?
This depends entirely on your specific tenancy agreement. You should always obtain written permission from your landlord before drilling into any walls. To secure approval, offer to have the holes professionally patched, sanded, and repainted to match the original wall color when your lease ends. If drilling is strictly prohibited by your landlord or building management, consider non-invasive vertical alternatives, such as heavy-duty tension-pole cat trees that wedge securely between the floor and ceiling without requiring screws.
Community discussion
Share your experience or ask a question. Comments are reviewed before publication.