
A kitchen island counter serves as the functional anchor of a modern kitchen, bridging the gap between culinary preparation, storage, and social interaction. Customizing this central feature requires a systematic approach that balances spatial limits, ergonomic comfort, and material durability. By carefully evaluating your floor plan, identifying your primary workflow needs, and selecting materials engineered to withstand daily wear and local humidity, you can design an island that enhances both the utility and value of your home.
Assessing Your Kitchen Space and Clearance Requirements
In highly optimized residential layouts, such as those found in Singapore’s HDB flats and condominiums, floor space must be planned with precision. To maintain a comfortable flow, measure the clearance zones around the proposed island perimeter before committing to a footprint. A standard guideline is to maintain at least 900mm to 1200mm of open walkway space between the island and surrounding countertops, walls, or appliances. This ensures that oven doors, dishwasher trays, and cabinet drawers can open fully without obstructing passage or creating physical safety hazards.
The island should complement, not disrupt, the classic kitchen work triangle—the path between the stove, sink, and refrigerator. If the island blocks this direct path, daily meal preparation becomes inefficient and frustrating. Map out your typical movement patterns to ensure the island acts as a helpful staging point rather than an obstacle. If space is tight, adjusting the island’s shape or opting for a narrower profile can preserve this essential workflow.
Products mentioned in this guide



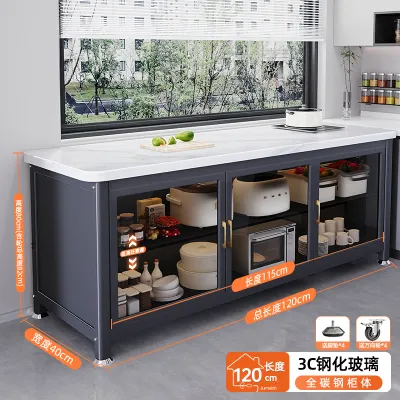

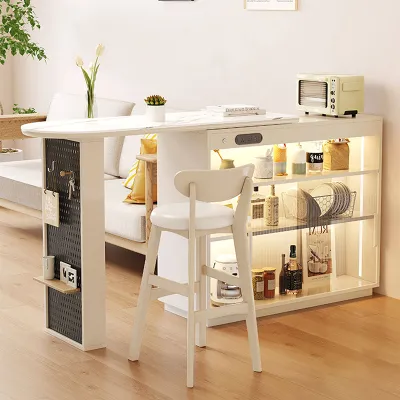

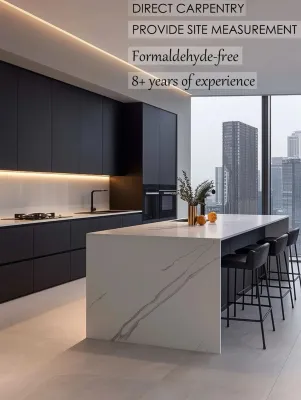
Prices are valid at publication and may change. Please refer to the product page for the latest price.
Before finalizing any design, inspect the physical constraints of your kitchen. Existing plumbing stacks, load-bearing walls, and electrical access points dictate where an island can be placed, especially if you plan to integrate a sink or cooktop. Relocating plumbing lines in concrete subfloors can be highly complex and may require specific structural approvals, so identifying these boundaries early prevents costly design revisions and structural complications.
Defining the Island Layout and Primary Function
The shape of your kitchen island should mirror the proportions of your room to maximize efficiency. Rectangular islands are highly versatile and fit well in long, open-plan spaces, providing a straightforward linear workflow. L-shaped or T-shaped configurations offer distinct zones for food preparation and casual dining but require a larger footprint to avoid crowding the kitchen. Choose a layout that matches your room’s geometry while leaving ample room for movement.

Determine the primary operational zone of your island based on your daily habits. If its primary purpose is food preparation, prioritize an expansive, uninterrupted countertop surface with easy access to trash bins and prep sinks. If it is meant for casual dining or entertaining, design the layout to separate the active cooking zone from the seating area. This separation keeps guests safe from hot surfaces, oil splatters, and prep clutter while allowing you to socialize.
For comfortable dining, integrate a countertop overhang that provides adequate legroom. A standard overhang of 300mm to 450mm is typically recommended to accommodate standard bar stools or counter-height chairs comfortably. Verify that the extended countertop is properly supported by brackets, corbels, or a reinforced sub-structure. This support is crucial to prevent tipping or structural failure under load, especially when using heavy stone materials.
Planning Storage and Utility Integrations
Maximize the island’s base cabinets by tailoring them to your specific storage needs. Deep drawers are highly efficient for heavy pots, pans, and small appliances, as they pull out fully to allow easy access without deep bending. Pull-out shelves, vertical tray organizers, and integrated spice racks can turn awkward corner spaces into highly functional storage zones. Grouping items by frequency of use helps determine the ideal placement of drawers versus open shelving.
Integrating utilities requires careful planning and early coordination. If you plan to install a sink, ensure there is sufficient slope in the waste pipe for proper drainage, which can be challenging in apartments with concrete floors. For electrical integrations, plan for built-in power outlets along the sides of the island to power small appliances or charge devices. Ensure these outlets comply with local safety standards regarding distance from water sources.
Base cabinets must support not only the heavy countertop material but also the stored contents and integrated appliances. Distribute weight evenly across the cabinet carcass to prevent sagging or joint strain over time. Ensure the island is securely anchored to the subfloor to prevent shifting, especially if it features heavy stone countertops, built-in appliances, or cantilevered seating areas.
Selecting Countertop and Cabinet Materials
The countertop material must withstand your daily cooking habits and maintenance preferences. Quartz and sintered stone are popular choices due to their low porosity, stain resistance, and ease of cleaning. If you frequently place hot pots directly on the surface, verify the heat tolerance limits of your chosen material, as some engineered stones can discolor or crack under extreme thermal shock. Solid surfaces offer seamless joints but may require regular polishing to remove fine scratches.
Singapore’s humid tropical climate demands cabinet materials that resist moisture and temperature fluctuations. Marine-grade plywood or high-density moisture-resistant (HDMR) boards are excellent choices for the cabinet carcass, as they are less prone to swelling than standard particleboard. For surface treatments, high-pressure laminates, acrylics, or lacquered finishes provide a protective barrier that is easy to wipe clean and resists daily wear.
Choose edge profiles that match your safety and aesthetic preferences. Rounded edges, such as bullnose or eased profiles, are safer in high-traffic areas and less prone to chipping than sharp, square edges. Inspect the quality of the edge banding on laminate cabinets to ensure it is tightly sealed. A proper seal prevents moisture from penetrating the core material, which can cause unsightly swelling and delamination over time.
Finalizing Dimensions and Installation Conditions
Standard kitchen counter heights range from 850mm to 920mm, which suits most food preparation tasks. If you plan to use the island primarily for baking or heavy prep work, a slightly lower counter may offer better physical leverage. Conversely, if the island features a raised breakfast bar, that section should typically stand at 1050mm to accommodate standard bar stools comfortably. Align these heights with your personal ergonomics and appliance specifications.
Before installation, verify that the kitchen floor is perfectly level. An uneven floor can put uneven stress on the cabinet joints and cause stone countertops to crack during or after installation. Additionally, assess the load-bearing capacity of your subfloor, particularly if you are installing exceptionally heavy materials like solid concrete, thick natural stone slabs, or heavy built-in appliances.
A common oversight is failing to plan the delivery route for your customized components. Measure the clearance of elevators, stairwells, corridors, and entry doorways in your building. Large, pre-assembled island cabinets or single-piece stone countertops may not fit through tight turns or standard lift doors. Confirming these dimensions beforehand ensures that materials can be safely transported and assembled on-site without damage.
Frequently Asked Questions (FAQ)
Can I add a kitchen island to a small or narrow kitchen?
Yes, but you must adapt the scale and design to fit the space. For tight layouts, consider a narrow island profile or a mobile, rolling cart that can be pushed against a wall when not in use. Ensure you maintain an absolute minimum clearance of 900mm on active sides to allow safe passage. Opting for light-colored finishes and open shelving can also reduce the visual weight of the island, making the room feel more spacious.
Do I need professional help for plumbing and electrical integrations?
Yes, routing plumbing and electrical lines strictly requires licensed professionals to ensure safety and compliance with local building regulations. Attempting DIY utility hookups poses severe risks of water leaks, electrical fires, and voided home insurance policies. Always consult a qualified plumber and electrician to assess your kitchen’s structural feasibility before finalizing your island layout.
How do I match the island design with existing kitchen cabinets?
To create a cohesive look, use the exact same cabinet door profile, hardware, and color palette as your perimeter cabinets. Alternatively, you can design the island as an intentional focal point by choosing a contrasting cabinet color or a premium countertop material. If you choose to contrast, keep the hardware style or overall design language consistent to tie the entire kitchen together beautifully.
Community discussion
Share your experience or ask a question. Comments are reviewed before publication.