
Mounting a pegboard in a Housing & Development Board (HDB) flat without drilling is entirely achievable using heavy-duty adhesive systems, floor-to-ceiling tension poles, or freestanding frames. Because HDB walls are typically constructed from solid concrete finished with plaster and paint, traditional drilling requires heavy machinery and leaves permanent holes that must be patched before moving out. By selecting a damage-free mounting method that matches your wall’s surface condition and the weight of your storage items, you can enjoy an organized space without risking your rental deposit or damaging your home’s interior.
Before purchasing any mounting hardware, you must evaluate the specific characteristics of your wall and the physical limits of your pegboard setup. Taking the time to assess these factors beforehand prevents unexpected falls, peeling paint, and damaged items.
Assess Your Wall and Pegboard Setup
The success of any non-drill mounting method depends heavily on the condition of your wall surface. In Singapore’s warm and humid climate, moisture levels inside the home can fluctuate significantly, directly affecting how well adhesives bond to plaster and paint. Check your wall for any signs of flaking, bubbling, or chalky paint residue, as these conditions indicate that the paint layer may peel off under the weight of a mounted board. Matte and flat paints tend to have more texture and can sometimes release adhesives more easily than semi-gloss or glossy finishes, which offer a smoother surface for bonding.
Products mentioned in this guide
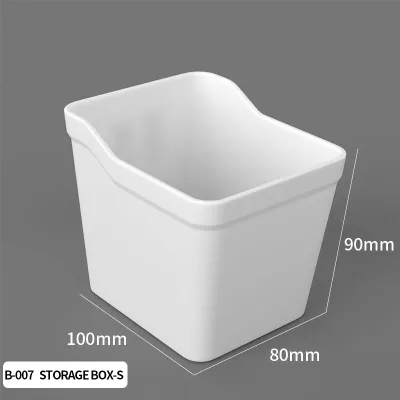
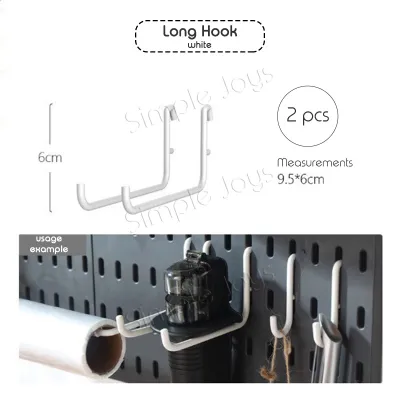
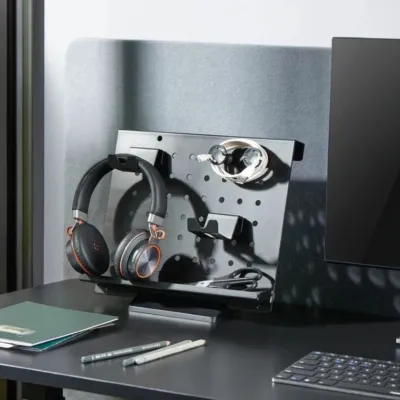
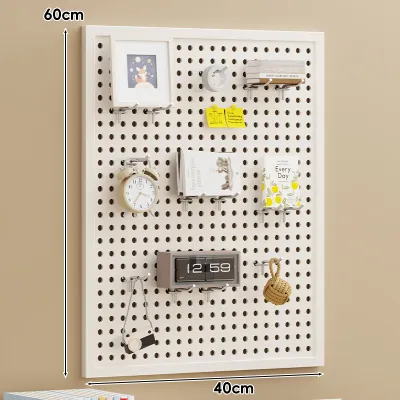
Prices are valid at publication and may change. Please refer to the product page for the latest price.
Next, calculate the total weight of your proposed setup. This calculation must include the weight of the empty pegboard itself, the mounting brackets, all hooks or shelves, and the maximum load of the items you plan to store. It is easy to underestimate the cumulative weight of daily items like keys, tools, kitchen utensils, or craft supplies. Use a small kitchen scale to weigh your items beforehand rather than guessing, as overloading is the primary cause of adhesive failure.
Finally, review the manufacturer’s specifications and care labels for your pegboard. Some boards are made of heavy steel or solid timber, which may be too heavy for adhesive-only methods. Lightweight plastic, acrylic, or medium-density fibreboard (MDF) pegboards are generally much better suited for non-drill wall installations. Always verify if the manufacturer recommends specific mounting brackets or warns against certain types of adhesives that could damage the back of the board.
Choose a Damage-Free Mounting Method
Selecting the right installation approach requires balancing your storage needs with the physical layout of your HDB room. The three primary non-drilling methods—adhesives, tension systems, and freestanding frames—each offer distinct advantages and trade-offs regarding weight capacity, wall contact, and visual footprint.

Adhesive solutions keep the pegboard flush against the wall, preserving precious floor space, but they carry the lowest weight limits and rely entirely on paint strength. Tension-based systems can support significantly heavier loads but require vertical space and have a more industrial look. Freestanding frames offer the ultimate flexibility with zero wall contact, though they occupy a portion of your floor or desk surface. Consider the specific room conditions, such as high humidity in kitchens or bathrooms, when making your choice.
Adhesive Strips and Heavy-Duty Mounting Tape
For lightweight to medium-duty organization, specialized adhesive strips and heavy-duty mounting tapes are highly effective. Look for interlocking adhesive strips or removable foam tapes designed specifically for indoor wall hanging. These products are engineered to distribute weight evenly and release cleanly when pulled correctly, making them ideal for renters.
To ensure a reliable bond, the wall surface must be prepared meticulously to remove any invisible oils, dust, or grease. Even a tiny layer of dust can prevent the adhesive from making full contact with the wall, leading to premature failure. Always check the product labels on your adhesive packaging to verify the exact weight capacity per strip, and distribute the strips evenly across the back of the pegboard to avoid concentrated stress points.
Tension Rods and Floor-to-Ceiling Systems
If you need to store heavier items like potted plants, heavy kitchen pans, or metal tools, a floor-to-ceiling tension pole system is an excellent alternative. These systems use vertical pressure between your floor and ceiling to hold sturdy metal or wooden poles in place, completely bypassing the need for wall adhesion or drilling.
When installing a tension system, use a spirit level to ensure the poles are perfectly vertical, as any tilt will compromise stability. You must also perform routine checks every few months to ensure the tension remains tight, especially during seasonal weather changes. Do not use tension systems against false ceilings, plasterboard ceilings, or delicate decorative cornices, as the intense upward pressure can easily crack or warp these structures.
Freestanding or Leaning Pegboard Frames
For a completely risk-free setup, freestanding or leaning pegboard frames are the preferred choice. These units stand on their own feet or lean securely against the wall, resting their weight directly on the floor or a sturdy tabletop. They are highly mobile, allowing you to rearrange your room layout whenever you wish.
Because leaning frames rely on gravity, they do occupy a small amount of floor space along your baseboards. To ensure safety in busy households, place the frame in a low-traffic area, such as behind a desk or alongside a wardrobe. If you have pets or young children, always implement anti-tip safety measures, such as using adjustable safety straps to anchor the top of the frame to a nearby heavy piece of furniture.
Step-by-Step Installation Guide
Once you have chosen your mounting method, executing the installation in the correct sequence is vital to achieving a secure, long-lasting setup. Follow these steps carefully to ensure your pegboard remains firmly in place.
First, clean the wall surface thoroughly. Dampen a clean microfiber cloth with isopropyl alcohol or a mild degreasing agent and wipe down the entire mounting area. Avoid using standard household spray cleaners, as they often leave behind a thin, slippery residue that prevents adhesives from bonding. Allow the wall to dry completely for at least ten minutes before proceeding.
Second, plan your alignment. Hold the empty pegboard against the wall and use a spirit level to ensure it is perfectly straight. Use a pencil to lightly mark the corners and the exact positions where your adhesive strips or mounting brackets will sit. Once heavy-duty adhesives touch the wall, attempting to peel them off to adjust the alignment will significantly weaken their holding power.
Third, apply the adhesive strips. Remove the backing liners and apply the strips to the back of the pegboard or mounting brackets first, pressing firmly along the entire length of each strip for at least thirty seconds. Next, align the board with your pencil marks on the wall and press the entire assembly firmly against the wall. Apply continuous, heavy pressure with both hands over every adhesive point for another thirty seconds to activate the pressure-sensitive bond.
Fourth, allow the adhesive to cure. This is the most critical step that many homeowners skip. Do not hang any accessories, hooks, or items on the pegboard immediately. Most heavy-duty mounting tapes require a full twenty-four hours to cure and reach their maximum holding strength. Leave the pegboard completely empty during this waiting period.
Fifth, perform a stability and load test. After the curing period, gently pull on the edges of the pegboard to verify that it feels solid and secure. Begin by hanging your lightest accessories first, such as plastic hooks or empty cups. Gradually add your items over the course of a few days, monitoring the setup closely for any signs of peeling, tilting, or pulling away from the wall.
Safe Removal and Wall Restoration
When it is time to move out or rearrange your space, removing your pegboard safely is just as important as installing it correctly. Taking a rushed approach can tear the paint layer or pull away the plaster, resulting in costly repairs.
To remove stretch-release adhesive strips, grip the removal tab firmly and pull it slowly, keeping your hand flat against the wall. Pull the strip straight down in the same direction as the wall, stretching it gradually. Never pull the strip outward or at a ninety-degree angle, as this concentrated force will instantly rip the paint off the plaster.
If you encounter stubborn adhesive residue or tape that does not have a pull-tab, do not use sharp metal scrapers or knives. Instead, apply gentle heat using a hair dryer set to a low medium temperature to soften the adhesive backing. Once warmed, use a plastic scraper, an old credit card, or your fingers to gently roll the adhesive off the wall. Any remaining sticky residue can be cleaned using a soft cloth dampened with a small amount of eucalyptus oil or warm, soapy water.
If you notice the paint beginning to lift or bubble during the removal process, stop immediately. Apply more heat to soften the bond further before trying again. If minor paint damage does occur, sand the edges of the peeled area lightly with fine-grit sandpaper, apply a thin layer of wall putty, let it dry, and apply a matching touch-up paint to restore the wall to its original condition.
Frequently Asked Questions (FAQ)
Can I use standard adhesive hooks to hang a pegboard directly?
Standard adhesive hooks are generally not recommended for hanging flat pegboards directly. These hooks are designed to hold items that hang vertically from a single point, such as picture frames or coats, which puts a pulling force on the hook. A pegboard requires even, flush support across its entire surface to prevent it from bowing, warping, or pulling away from the wall when you add and remove items. If you must use hooks, ensure they are rated for heavy-duty use, and check that your pegboard features dedicated, reinforced hanging loops that distribute the weight evenly across multiple points.
How do I prevent a leaning pegboard from sliding on smooth tiles?
To prevent a leaning pegboard frame from sliding on smooth HDB floor tiles, apply non-slip rubber or silicone pads to the bottom feet of the frame. These pads increase friction and grip the smooth tile surface securely. Additionally, ensure that the heaviest items on your pegboard are stored on the lower sections to keep the center of gravity low. If the frame still feels slightly unstable, you can discreetly secure the top of the leaning frame to a nearby heavy desk, bookshelf, or solid wardrobe using adjustable nylon safety straps.
Community discussion
Share your experience or ask a question. Comments are reviewed before publication.