
Installing a built-in oven into your kitchen cabinetry requires a systematic approach to structural support, ventilation, and electrical safety. Whether you are retrofitting an existing kitchen cabinet oven setup in a Singapore HDB flat or planning a new condominium kitchen layout, you cannot simply slide a heavy appliance onto a standard shelf. You must modify the cabinet’s internal dimensions, reinforce its load-bearing base, carve out dedicated airflow pathways, and position the electrical connections safely. Taking the time to plan these modifications ensures your appliance operates efficiently, protects your surrounding cabinetry from heat damage, and complies with local safety standards.
Before making any cuts or purchasing your appliance, you must verify that your kitchen layout can accommodate the physical and technical demands of a built-in oven. This process involves assessing your available space, understanding the structural limits of your cabinetry materials, and planning the necessary utility routing. By addressing these factors early, you can avoid costly installation mistakes and ensure a seamless, flush finish that enhances both the functionality and aesthetics of your kitchen.
Verifying Cabinet Dimensions and Clearances
To ensure a successful installation, you must first verify that the existing or planned kitchen cabinet oven cavity matches the appliance’s physical requirements. Built-in ovens are designed to fit snugly within a cabinet carcass, but they require precise internal dimensions to slide in smoothly. Always refer to the manufacturer’s technical specification sheet for the exact “cut-out” dimensions, which are different from the oven’s external measurements. The cut-out width, depth, and height must be carved to the exact millimeter specified, leaving a small margin for the front fascia of the oven to overlap and conceal the raw edges of the cabinet opening.
Products mentioned in this guide
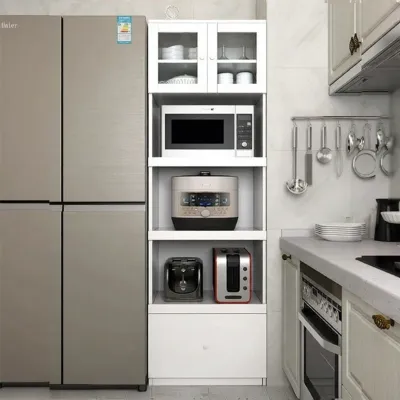
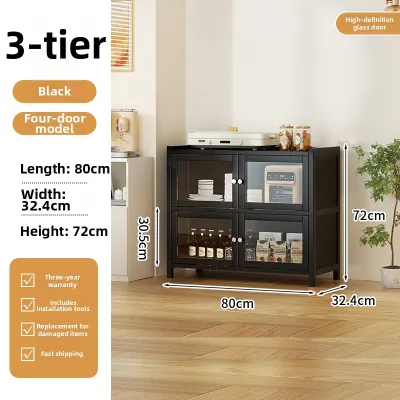
Prices are valid at publication and may change. Please refer to the product page for the latest price.
In addition to the internal cavity, you must evaluate the external clearance gaps around the cabinet. Ensure there is sufficient clearance for the oven door to swing open fully to a 90-degree angle without obstructing adjacent drawers, cabinet handles, or walkways. If your kitchen has a narrow layout, common in many high-rise apartments, measure the clearance space carefully to ensure you can stand comfortably in front of the fully opened oven door. You should also check that the oven handle does not collide with perpendicular countertops or pantry doors when opened.
Ergonomics play a vital role in determining the ideal height for your oven installation. If you are installing the oven under a counter, verify that the available floor-to-counter height allows you to lift heavy dishes in and out without straining your back. For wall-mounted or tall cabinet installations, position the oven cavity so that the main wire racks align between your waist and chest level. This height prevents accidental burns and allows you to monitor your cooking safely. Finally, consider the logistics of delivery; verify that the packaged appliance can easily fit through your home’s doorways, hallways, and lift access before scheduling the installation.
Planning Electrical and Ventilation Provisions
Operating a built-in oven safely within wooden or engineered cabinetry requires careful planning of the electrical supply and airflow pathways. Built-in ovens are high-power appliances that typically require a dedicated electrical circuit rather than a standard domestic plug. In Singapore, these appliances often need to be hardwired to a double-pole isolator switch connected directly to your home’s distribution board. The electrical outlet or connection box must never be placed directly behind the oven, as the extreme heat generated by the appliance can damage the wiring. Instead, position the connection point in an adjacent cabinet, such as under the sink or inside a neighboring drawer unit, where it remains easily accessible for emergency shut-off.

Proper ventilation is critical to prevent the oven’s internal components from overheating and to protect your cabinetry from thermal damage. Built-in ovens rely on a continuous flow of cool air to regulate their temperature. You must plan ventilation pathways strictly based on your specific oven model’s installation manual. This typically involves cutting a ventilation slot in the cabinet’s plinth or kickboard to draw in cool air from the floor, leaving a clear air gap of at least 45mm to 50mm at the rear of the cabinet carcass, and creating an escape route for hot air at the top of the housing unit.
In Singapore’s humid climate, the combination of ambient moisture and localized heat can accelerate the degradation of kitchen cabinets. If your oven is placed adjacent to a refrigerator, pantry, or painted cabinet doors, you must check for heat-resistant barriers. Installing specialized heat-deflector strips on the edges of adjacent cabinet doors can prevent laminate peeling and warping. Ensure that the air gaps specified by the manufacturer are strictly maintained to prevent heat from transferring directly into the surrounding wooden panels.
Reinforcing and Modifying the Cabinet Structure
Standard kitchen cabinets are designed to hold lightweight pantry items or cookware, not the concentrated weight of a heavy cooking appliance. A typical built-in oven can weigh between 30kg and 50kg, which means you must evaluate the load-bearing capacity of the cabinet base, side panels, and back panel before installation. Melamine-faced chipboard (MFC) or medium-density fibreboard (MDF), which are commonly used in kitchen cabinetry, can sag or warp over time under continuous heavy loads if they are not properly reinforced.
To support the weight of the oven, you should add heavy-duty support battens or solid wood cleats along the internal side walls of the cabinet carcass. Secure these battens using sturdy wood screws and metal L-brackets, transferring the weight of the appliance directly to the vertical side panels of the cabinet, which are structurally stronger than a suspended shelf. If the existing shelf is thin or shows signs of wear, replace it with a thicker, moisture-resistant plywood panel, such as 18mm marine-grade plywood, to provide a rigid and stable platform for the oven.
Before making any structural cuts to your cabinet panels, such as removing the back panel for ventilation or drilling holes for electrical conduits, you must conduct a thorough check for hidden utilities. Kitchen walls often house concealed water pipes, gas lines, and electrical wiring. Use a digital wall scanner to verify the path of these utilities behind the cabinet. Never cut into structural joints or load-bearing cabinet supports without confirming that the overall stability of the kitchen island or wall unit will not be compromised.
Evaluating DIY Feasibility vs. Professional Help
Modifying kitchen cabinets for a built-in oven requires a mix of carpentry skills, electrical knowledge, and precise measuring. While handy homeowners can manage basic tasks like cutting wooden shelves or installing support brackets, other aspects of the installation strictly require professional expertise. For instance, any electrical work involving the installation of a new circuit breaker, running heavy-duty cables, or hardwiring the appliance must be performed by a licensed electrical worker to ensure compliance with local safety regulations and to prevent fire hazards.
Attempting complex structural modifications without the proper tools or experience carries significant risks. If you cut into a load-bearing panel incorrectly, you could cause the entire cabinet run to sag or collapse, leading to expensive repairs. Furthermore, improper installation that restricts ventilation or causes electrical faults can void the manufacturer’s warranty on your new oven, leaving you unprotected if the appliance malfunctions. If your cabinet warranty is still active, unauthorized modifications might void that coverage as well.
Knowing when to stop and consult a qualified professional is essential for a safe kitchen renovation. If you encounter conflicting instructions between your cabinet layout and the oven’s installation manual, or if you discover unexpected wall structures or utility lines behind your cabinets, do not guess the next step. Hiring a professional carpenter or kitchen installer ensures that the cabinet modifications are structurally sound, perfectly level, and fully compliant with all safety and warranty requirements.
Conducting Post-Installation Safety Checks
Once the cabinet modifications are complete and the oven is positioned inside the cavity, you must perform a series of safety checks before using the appliance for the first time. Start by testing the physical stability of the oven. Ensure it is securely fastened to the cabinet frame using the retaining screws provided by the manufacturer. The oven should not wobble, slide forward, or tilt when you pull down the heavy glass door. Use a spirit level placed on the oven racks to confirm that the appliance is perfectly level, which is crucial for even baking and proper door sealing.
Next, verify that all planned ventilation pathways remain completely unblocked. Peer into the plinth vent and check behind the cabinet carcass to ensure that no sawdust, packaging materials, or stray electrical wires are obstructing the airflow. A blocked vent can cause the oven’s thermal cut-out switch to trip repeatedly, disrupting your cooking and potentially damaging the appliance’s electronic control board over time.
Finally, conduct an initial test run of the oven at a moderate temperature, following the manufacturer’s instructions for the first-time burn-off cycle. During this run, carefully monitor the surrounding area. Touch the adjacent cabinet doors, drawer fronts, and handles to check for excessive heat transfer. While these surfaces may feel warm, they should never feel hot to the touch. If you notice any localized overheating, smell burning laminate, or observe steam escaping into closed cabinet spaces, turn off the power immediately and re-evaluate your ventilation gaps or heat shielding.
Frequently Asked Questions (FAQ)
Can I install a built-in oven in a standard base cabinet?
Standard base cabinets are typically designed for general storage and usually lack the necessary front-to-back depth, reinforced support structures, and ventilation gaps required for a built-in oven. A standard cabinet often has a solid back panel and a full-depth shelf that blocks the essential vertical airflow loop needed to cool the appliance. While you can retrofit a standard base cabinet, it requires significant modifications, including removing the back panel, reinforcing the supporting shelf with heavy-duty brackets, and cutting ventilation slots in the plinth. Always check your cabinet manufacturer’s technical documentation to confirm if the carcass can be safely modified for appliance housing.
Does a built-in oven need extra heat shielding for wooden cabinets?
Most modern built-in ovens are equipped with internal cooling fans and insulated glass doors designed to keep external surface temperatures within safe limits. However, they still transfer some heat to the surrounding cabinetry, which can affect wooden or engineered board surrounds over time. You must refer to your oven manufacturer’s manual for specific clearance and insulation requirements. In humid environments, installing metal heat-deflector strips on the front edges of adjacent cabinet doors is highly recommended. These strips protect the cabinet’s laminate or veneer finish from peeling due to the warm air expelled when the oven door is opened.
Community discussion
Share your experience or ask a question. Comments are reviewed before publication.