
Replacing worn or outdated drawer hardware is one of the most straightforward ways to refresh your furniture, but finding a replacement that fits perfectly requires precise measurement. To ensure your new drawer knob handle aligns seamlessly with the existing setup, you must measure the exact distance between the mounting holes, determine the thickness of the drawer front, and check the screw thread diameter. Getting these dimensions right beforehand prevents the frustration of buying hardware that is too loose, too tight, or requires drilling unnecessary new holes into your cabinetry.
For a single-hole knob, the process is relatively simple because you only need to match the screw diameter and ensure the base of the new knob covers any footprint left by the old one. For a handle or pull with two mounting points, the critical measurement is the center-to-center distance between the two holes, rather than the overall length of the hardware. Taking a few minutes to measure systematically will save you time and protect your furniture from damage.
Tools You Need Before Measuring
Before you begin removing any hardware, gather the right tools to ensure your measurements are highly accurate. A standard metal tape measure or a rigid precision ruler is essential; avoid flexible sewing tapes as they can stretch over time and lead to inaccurate readings. Because furniture hardware is manufactured globally, having a measuring tool that displays both metric (millimeters) and imperial (inches) units is highly beneficial.
Products mentioned in this guide
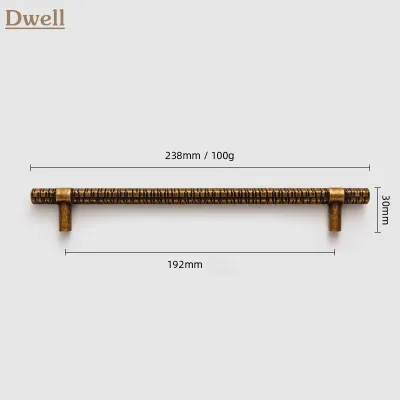
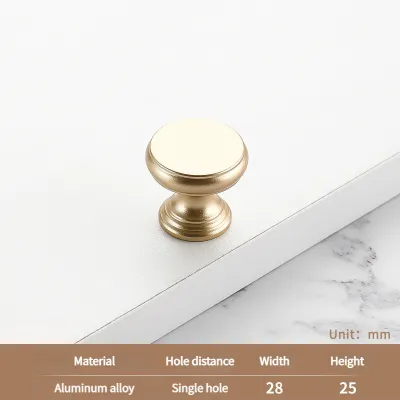
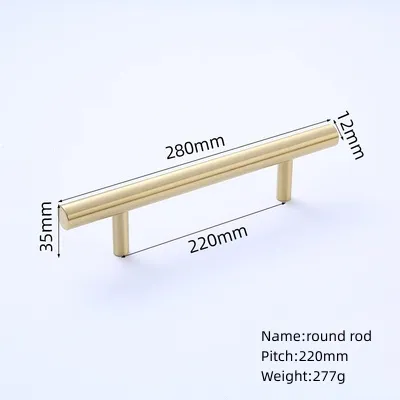
![[SG STOCK] VINOGA Gold Furniture Cupboard Handle Brass Cabinet Handle Solid Golden Drawer Pulls Kitchen Cupboard Hardware|Furniture Knobs and T Bar Handle](https://img.lazcdn.com/g/p/53624969c185093ef1c0ba2a6159d2ed.jpg_400x400q80.jpg_.webp)
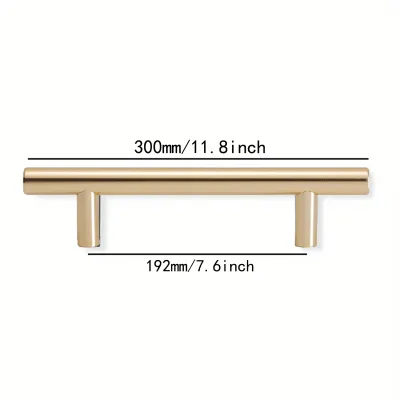
Prices are valid at publication and may change. Please refer to the product page for the latest price.
For the highest level of precision, digital or vernier calipers are incredibly helpful. Calipers allow you to measure the exact diameter of the existing screw holes and the precise thickness of the drawer front down to the millimeter. You will also need a manual screwdriver that matches the head of your existing screws—usually a Phillips or flathead—to safely remove the hardware without stripping the screw heads or scratching the drawer face.
Step 1: Remove the Existing Hardware
To get an unobstructed and accurate measurement of the mounting holes, you must completely remove the existing knob or handle. Start by opening the drawer fully or removing it from the cabinet track entirely and placing it on a flat, stable surface. When loosening the screws from the inside of the drawer, use one hand to support the hardware on the outside. This prevents the handle from dropping suddenly, which could scratch the finished surface or put unnecessary leverage and stress on the wood surrounding the mounting holes.

As you unscrew the hardware, keep the original screws, washers, and any decorative backplates together. Even if you plan to replace them, these original components serve as an invaluable physical reference when shopping for new parts. Store them in a small container so they do not roll away during the process.
Once the hardware is removed, inspect the exposed holes and the surrounding drawer face. Over years of use, dust, grease, and wood fibers can accumulate around the mounting area, which can distort your measurements. Gently wipe the area clean with a damp cloth and let it dry completely. Take this opportunity to check for any structural damage, such as hairline cracks in the wood or stripped wood fibers inside the holes, which might require repair before you install the new hardware.
Step 2: Measure the Hole Spacing (Center-to-Center)
When replacing a two-hole handle, the most critical dimension is the center-to-center (CTC) distance. This is the exact measurement from the center of one screw hole to the center of the other. Do not measure from the outer edges of the handle or from the outer edges of the holes, as this will result in an incorrect size that will not align with standard replacement hardware.
To measure this accurately, place your ruler or tape measure flat against the drawer front. Align the zero mark with the exact center of the left hole, and read the measurement at the exact center of the right hole. If you find it difficult to locate the precise center of the holes, you can measure from the left edge of the first hole to the left edge of the second hole; this geometric shortcut yields the exact same center-to-center distance.
If your drawer currently uses a single-hole knob, center-to-center spacing is not applicable. However, you should still measure the diameter of the single hole and the overall footprint of the old knob’s base. Choosing a replacement knob with a base of equal or greater size ensures that any indentation, discoloration, or wear on the wood finish left by the old hardware remains completely hidden.
To double-check your ruler measurements, use the old handle itself as a physical template. Turn the handle upside down and measure the distance between the centers of its threaded screw holes. Comparing the physical hardware measurement with the drawer front measurement ensures you have not made a parallax error while reading the ruler.
Step 3: Check the Screw Diameter and Length
Selecting the correct screw size is vital to ensure your new drawer knob handle mounts securely without damaging the drawer front or stripping the threads. Start by measuring the thickness of the drawer front itself. Use your calipers or a ruler to measure the wood panel where the screw passes through; keep in mind that some drawers have a double-front construction where the drawer box front is attached to an decorative outer panel, requiring a much longer screw.
Next, determine the thread diameter of your existing screws. In Singapore, furniture hardware commonly uses metric threads, with M4 (4mm diameter) being the standard for most household cabinets and drawers, though some imported pieces may use imperial sizes like 8-32 screws. You can verify this by taking your original screw to a local hardware store to test it on a thread gauge, or by measuring the outer thread diameter carefully with digital calipers.
To calculate the total required screw length for your new hardware, use a simple formula: add the thickness of the drawer front to the depth of the threaded hole inside the new handle’s base, then add an extra millimeter or two if you plan to use a washer. The screw must be long enough to engage securely with the handle’s threads but short enough that it bottoms out tightly against the inside of the drawer front. If the screw is too long, the handle will wobble; if it is too short, it will strip the threads under the tension of daily use.
Step 4: Evaluate Projection and Clearance
Beyond the mounting holes, you must consider how the new hardware interacts with the surrounding space. Projection refers to how far the knob or handle extends outward from the flat surface of the drawer front. Measuring this is crucial for ensuring that the drawer can function properly without obstructing adjacent elements in your room.
In compact living spaces or galley kitchens common in Singapore, even a few extra millimeters of projection can cause issues. Check the clearance of your proposed hardware against adjacent drawers, corner cabinet doors, or overlapping countertop edges. If a drawer is located in a corner, a handle that projects too far might strike the adjacent cabinet handle or door when opened, preventing the drawer from sliding out fully or causing unsightly dents and scratches over time.
Additionally, consider the ergonomic clearance, which is the space available for your fingers between the underside of the handle and the drawer front. A handle with shallow clearance might look sleek but can be difficult to grasp, especially for deep drawers that hold heavy items like pots, pans, or thick linens. Ensure there is comfortable space for your fingers to slip behind the handle to pull the drawer open smoothly without scraping your knuckles against the wood.
Step 5: Verify Measurements Before Purchasing
Before finalizing your purchase online or at a local showroom, compile your measurements into a clear reference checklist. Your list should include the center-to-center distance, the drawer front thickness, the screw diameter, and the maximum allowable projection. Having these numbers written down clearly prevents impulse buys that end up being incompatible with your furniture.
Be aware of standard industry sizes when browsing replacement options. For handles, standard center-to-center measurements often run in specific increments, such as 96mm, 128mm, or 160mm, as well as imperial standards like 3 inches (76.2mm) or 4 inches (101.6mm). If your measurements do not match these standard sizes, you may have custom-drilled furniture, which requires searching for adjustable handles or preparing to drill new holes.
If your drawer front is unusually thick or thin, standard screws included in the retail packaging of the new hardware might not fit. Many manufacturers package their handles with standard 25mm screws, which are ideal for typical 18mm drawer fronts but will not work for thicker double-fronted drawers. In such cases, you will need to purchase longer breakaway screws or standard M4 screws separately to complete your installation successfully.
Frequently Asked Questions (FAQ)
What if my drawer only has one hole but I want to install a handle?
Transitioning from a single-hole knob to a two-hole handle requires drilling a second hole into your drawer front. To do this accurately without ruining the finish, you must use a dedicated cabinet hardware drilling template or jig. Mark the center of the existing hole, align the template, and mark the exact position for the second hole based on your new handle’s center-to-center measurement. If the original hole is centered on the drawer and you want the new handle to be centered as well, you may need to drill two new holes on either side of the original one and fill the center hole with wood putty, sanding and refinishing it to match the surrounding wood.
Can I reuse the old screws for the new drawer knob handle?
You can reuse the old screws only if they are in excellent condition and match the thread type and depth of the new hardware. Inspect the old screws carefully for any signs of thread wear, stripping, or bending, as damaged screws can easily ruin the internal threads of your new handle. You must also verify that the screw length is compatible with the new handle’s mounting depth; if the new handle has shallower thread holes than the old one, reusing the old screws could cause them to bottom out early, leaving the handle loose and unstable.
What should I do if the new handle's hole spacing is slightly off?
If the new handle’s spacing is off by only a millimeter or two, forcing the screws in can strip the threads or crack the drawer front. Check if the new handle features slightly oversized or oval-shaped mounting holes that offer some built-in tolerance for minor adjustments. If the hardware is rigid and does not fit, you can use a small round file to gently enlarge the existing holes in the direction needed, provided the base of the new handle is wide enough to cover the modified hole. If the discrepancy is significant, it is best to return the hardware for the correct size or consult a professional carpenter to plug and redrill the holes properly.
Community discussion
Share your experience or ask a question. Comments are reviewed before publication.