
Why Accurate Measurements for a Desktop Shelf Prevent Workspace Clutter
The excitement of ordering a new desktop shelf online often vanishes the moment the delivery arrives and you realize the unit is far bulkier than it appeared on screen. In Singapore’s compact residential layouts, such as typical HDB flats or cozy condominium study nooks, desk space is premium real estate. A single miscalculated centimeter can easily turn a streamlined home office into a cramped, chaotic environment.
Before purchasing any desk accessory, understanding the physical relationship between your desk, your equipment, and your body is essential. A desktop shelf is not merely a styling piece; it is an active structural element that dictates your keyboard placement, mouse movement, and monitor viewing distance. Choosing the wrong size can force your screen too close to your eyes, push your keyboard off the front edge of the desk, or block essential natural light and wall-mounted electrical outlets. By taking precise measurements beforehand, you can maximize your vertical storage capacity while preserving a comfortable, ergonomic workspace.
How to Measure Your Desk for a Desktop Shelf
To guarantee a flawless fit, you must look beyond the basic length and width of your desk. You will need a rigid steel tape measure, a notepad, and a clear understanding of your current workspace layout. Avoid using soft sewing tapes or smartphone measuring apps, as they lack the structural accuracy required for furniture planning.
Products mentioned in this guide
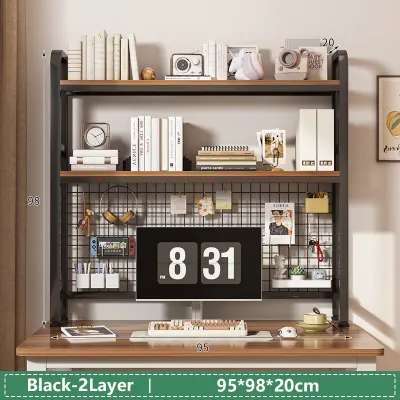
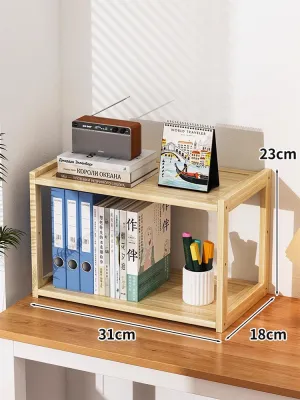
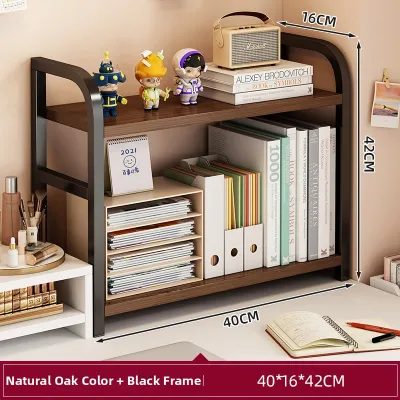
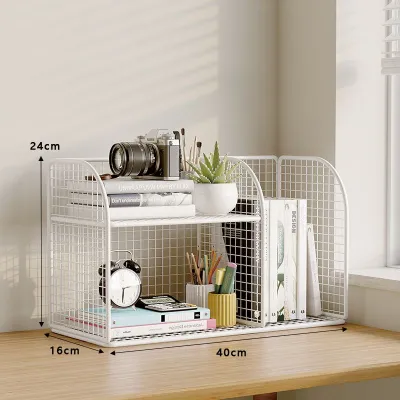
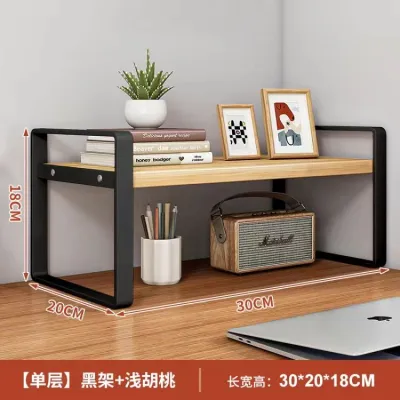
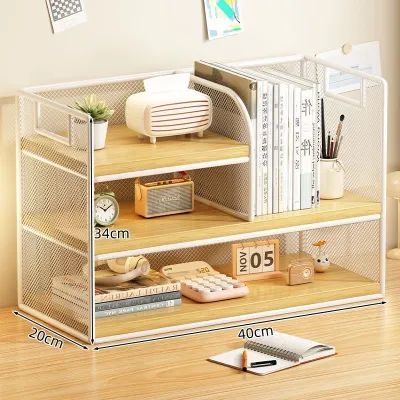
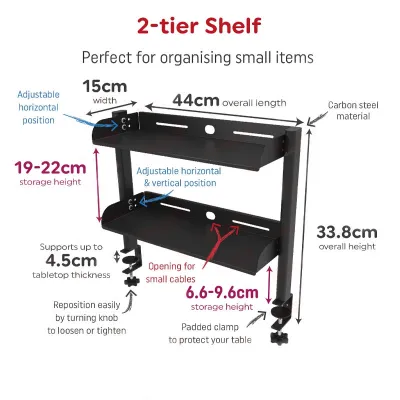
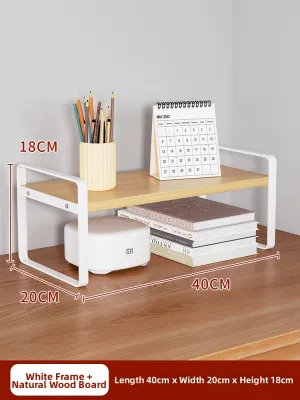
Prices are valid at publication and may change. Please refer to the product page for the latest price.

Mapping the Usable Footprint (Width and Depth)
Begin by measuring the total width and depth of your desk surface. However, the total dimensions do not represent your actual usable space. You must identify and subtract the area occupied by permanent fixtures that cannot be easily moved, such as monitor bases, desk lamps, desktop speakers, or charging stations. The remaining area is your usable footprint.
Next, measure the physical space required for your daily tasks. A standard mechanical keyboard typically requires 15 to 20 cm of depth, and you need at least 10 to 15 cm of clearance in front of it for comfortable wrist rest or forearm support. Additionally, measure your mouse pad or the active sweeping area your mouse requires—typically a minimum of 20 cm by 20 cm. Subtracting these essential task zones from your total desk depth reveals the maximum depth available for your shelf base.
Checking Vertical Clearance and Monitor Heights
Vertical measurements are critical to prevent your shelf from obstructing your view or hitting overhead obstacles. If you plan to place a shelf underneath or around your computer screen, measure the height of the monitor from the desk surface to the bottom of the display bezel. Any shelf tier sitting directly beneath the monitor must be shorter than this measurement to avoid blocking your screen.
Furthermore, check for overhead obstructions. In many Singapore homes, study desks are integrated into built-in wardrobes or positioned beneath floating bookshelves and window sills. Measure the exact clearance from the desk surface to the lowest point of these overhead structures. Finally, measure the height of the tallest items you intend to store on the shelf, such as standard A4 binders (which are roughly 32 cm tall), gaming headsets on stands, or smart speakers, to ensure they will fit comfortably within your vertical limits.
Spotting Hidden Obstacles and Cable Zones
A common pitfall is ignoring the structural design of the desk itself. Examine the back and sides of your desk for any flared legs, support crossbars, or modesty panels that might prevent a desktop shelf from sitting flush against the back edge. If your desk has a chamfered or beveled edge, the usable flat surface area will be slightly smaller than the total physical dimensions.
Additionally, locate all power strips, cable management trays, grommet holes, and wall-mounted outlets. A solid-back shelf placed directly in front of these zones can block access to plugs, pinch power cords, or prevent you from pushing the shelf flush against the wall. Mark these cable zones clearly on your sketch so you can choose a shelf design that accommodates wire routing.
How to Calculate the Ideal Desktop Shelf Dimensions
Once you have recorded your physical measurements, you can translate these numbers into the maximum and optimal dimensions for your new desktop shelf. This step ensures that your chosen unit maintains ergonomic safety and visual harmony.
Finding the Right Depth for Keyboard and Monitor Clearance
To calculate the maximum safe depth for your shelf, use this simple formula: Total Desk Depth minus (Keyboard Depth + Wrist Support Clearance + Mouse Area + Safety Margin). For example, on a standard 60 cm deep desk, if your keyboard and wrist space require 35 cm and you want a 5 cm safety buffer, your shelf depth should not exceed 20 cm.
Choosing a shelf that is too deep introduces severe ergonomic risks. It forces your monitor too close to your eyes, violating the recommended viewing distance of 50 to 100 cm (roughly an arm’s length), which can lead to eye strain and headaches. It also forces you to push your keyboard to the absolute edge of the desk, leaving your wrists hanging unsupported and increasing the risk of repetitive strain injuries. Always leave a 2 to 3 cm buffer zone between the back of the shelf and the wall to allow cables to pass down smoothly without bending.
Determining the Maximum Width for a Balanced Look
While it might be tempting to buy a shelf that spans the entire width of your desk, this often results in a cramped, visually heavy workspace. An edge-to-edge shelf leaves no room for desk mats, clamp-on desk accessories, or items that naturally sit at the periphery of your workspace, such as a cup holder or a headphone hanger.
For an aesthetically balanced and functional setup, aim to leave a visual margin of at least 10 to 15 cm of clear space on both sides of the shelf. If you have a standard 120 cm wide desk, a shelf width of 80 to 100 cm is ideal. This proportion provides ample vertical storage while keeping the desk looking open, organized, and spacious.
Sizing Tier Heights for Your Specific Gear
If you choose a multi-tier desktop shelf, you must ensure the vertical gaps between the tiers can accommodate your belongings. Take the measurements of your tallest items and add a clearance margin of at least 2 to 3 cm. This extra space ensures you can retrieve books or equipment easily without scraping the shelf above or pinching your fingers.
Keep in mind that fixed-tier shelves offer excellent structural stability and a clean look, but they require flawless initial measurements because they cannot be adjusted later. Conversely, adjustable shelves use peg-and-hole systems that allow you to change tier heights over time. While adjustable designs offer more forgiveness, they may have slightly lower weight capacities per tier. Always consult the manufacturer’s care and safety instructions to verify the load capacity of each shelf level.
Choosing the Right Shelf Style for Your Space Constraints
With your calculated dimensions in hand, you can now select a shelf style that matches your specific desk layout and storage requirements. Different designs excel in different spatial scenarios.
Single-Tier Risers vs. Multi-Tier Organizers
Single-tier risers, often referred to as monitor stands, are the best choice for shallow desks (50 cm to 60 cm depth) or workspaces with limited vertical clearance. These units elevate your monitor to an ergonomically correct height while leaving a clear space underneath where you can slide your keyboard and mouse when they are not in use.
Multi-tier organizers, which resemble miniature bookcases, are ideal for deeper desks (70 cm or more) with plenty of vertical clearance. These units allow you to stack books, stationery, and tech gear vertically, making them perfect for students or professionals who handle a high volume of physical paperwork and reference materials.
Corner Shelves for L-Shaped Desks
L-shaped and corner desks often feature a deep, angular “dead zone” where the two desk surfaces meet. This space is usually too far away for comfortable daily tasks, making it the perfect location for a corner-specific desktop shelf.
When selecting a corner shelf, measure the inner corner angle (which is typically a standard 90 degrees) to ensure a flush fit. Additionally, measure the diagonal depth from the corner to your primary seating area. This ensures the shelf will not protrude too far forward and crowd your immediate workspace or interfere with your monitor placement.
Adjustable and Expandable Designs
For those who rent their homes, move frequently, or anticipate upgrading their desk in the future, adjustable or expandable desktop shelves offer excellent versatility. These modular units often feature sliding or interlocking frames that allow you to expand or contract the overall width to fit different desks.
Some expandable designs also allow you to angle the shelves, turning a straight unit into an L-shaped corner shelf. When shopping for these flexible options, always measure both the minimum and maximum expansion limits to ensure the shelf remains stable and fits within your current workspace boundaries.
Common Desktop Shelf Sizing Mistakes to Avoid
Even with careful planning, it is easy to overlook small details that can ruin your setup. Watch out for these common sizing errors:
- Ignoring the Monitor Stand: Many people measure their monitor screen but forget the physical base of the monitor stand. If your monitor stand has a wide, deep footprint, it may not fit on top of a narrow shelf, or it may prevent the shelf from sitting flush against the back wall.
- Overestimating Desk Depth: Purchasing a shelf that is too deep will force your entire workspace forward. This leaves you with no room to rest your forearms on the desk, leading to shoulder and neck fatigue over long working hours.
- Forgetting Cable Management: Placing a solid-back shelf flush against a wall will trap and pinch your cables. Ensure the shelf has a recessed back, built-in cable cut-outs, or that you leave a physical gap of 2 to 3 cm to accommodate cords.
- Neglecting Weight Distribution: Storing heavy textbooks or heavy speakers on a tall, narrow shelf with a small footprint creates a serious tip-over hazard. To ensure stability, always place the heaviest items on the bottom tier and verify that the shelf's base depth is wide enough to support its height safely. Always check the manufacturer's weight limits and assembly guidelines before loading your shelf.
Frequently Asked Questions (FAQ)
Will a desktop shelf interfere with my monitor arm clamp?
Yes, if the shelf is designed to sit flush against the back edge of your desk where the C-clamp of your monitor arm attaches. Before buying, measure the depth of your monitor arm clamp (which usually requires 5 to 10 cm of clearance beneath and behind the desk). To avoid interference, choose a shelf with a recessed back, or leave a sufficient physical gap between the shelf and the desk edge.
Should my desktop shelf be the exact same width as my desk?
Generally, no. A shelf that matches the exact width of your desk can make your workspace feel cramped and visually overwhelming, especially in smaller rooms. Leaving a margin of 10 to 20 cm on either side provides a more balanced look and leaves room for desk accessories, clamp-on lights, or cables.
How do I ensure a tall desktop shelf won't tip over?
To prevent tip-over hazards, always place the heaviest items (like books or printers) on the lowest shelf to keep the center of gravity low. Ensure the shelf’s base depth is proportional to its height (a height-to-depth ratio of no more than 3:1 is a safe guideline for freestanding units). If the shelf is exceptionally tall or top-heavy, check if the manufacturer provides anchoring hardware or safety brackets to secure it to the desk or wall.
Community discussion
Share your experience or ask a question. Comments are reviewed before publication.