
Replacing a damaged or sagging shelf plank is a straightforward home improvement project that restores both the functionality and appearance of your storage systems. To complete this task successfully, you must accurately measure the existing space, select a wood plank that matches your structural and aesthetic needs, and secure it using appropriate hardware. Taking a systematic approach ensures the new shelf fits precisely without compromising the stability of the entire unit.
Whether you are dealing with a built-in bookcase, a floating wall shelf, or a freestanding cabinet, the replacement process relies on precision. A mistake of just a few millimeters can prevent a plank from fitting into its designated slot or cause it to sit unevenly on its supports. By following a clear, step-by-step method, you can confidently restore your shelving unit to its original load-bearing capacity.
Assessing Your Shelf and Measuring for the Replacement Plank
Before purchasing a new wood plank, you must gather precise measurements of the existing shelf space. Begin by clearing the shelf entirely to expose the support structures, brackets, or pins. If the original plank is still intact but simply damaged or warped, use it as your primary template. However, do not rely solely on the old plank, as warping can distort its original dimensions over time.
Products mentioned in this guide
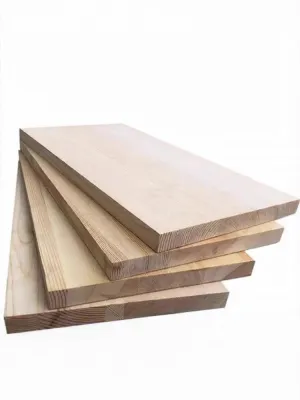
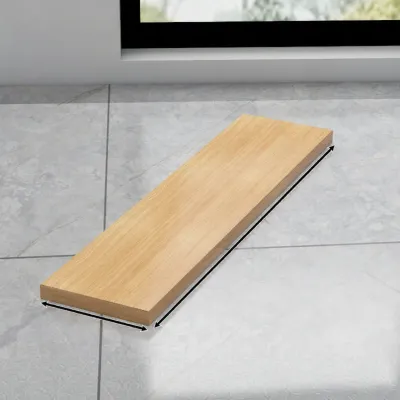
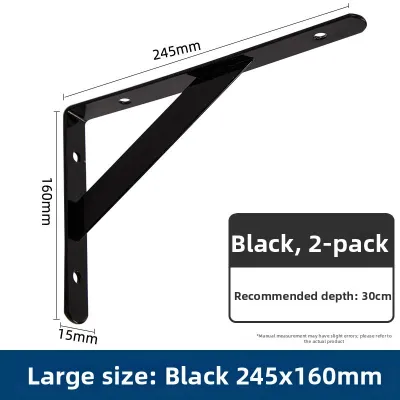

Prices are valid at publication and may change. Please refer to the product page for the latest price.
Measure the length of the shelf space from one inside wall of the cabinet or support frame to the other. When taking this measurement, use a high-quality steel tape measure and record the distance at both the front and the back of the shelf opening. Walls and cabinet interiors are rarely completely square, and a slight variance in width can affect how the replacement plank slides into place. If you find a discrepancy between the front and back measurements, use the smaller dimension to ensure the plank does not bind during installation.
Next, measure the depth of the shelf from the back wall or cabinet backing to the front edge of the support structure. If your shelf sits inside a cabinet with doors, ensure you account for the clearance required for the doors to close completely without hitting the front edge of the plank. For open wall shelves, the depth of the plank should match the reach of the supporting brackets to prevent tipping or overhang issues.
Determine the thickness of the plank by measuring the original shelf or checking the clearance of the existing support brackets or side grooves. If your shelving unit uses pre-drilled holes with support pins, the thickness of the plank must align with the vertical spacing of the holes to maintain a uniform look. Note any specific hardware footprints, such as recessed grooves on the underside of the plank where support pins or brackets are meant to sit flush.
Always record your measurements in millimeters for maximum accuracy, and subtract a small tolerance—typically one to two millimeters—to allow for easy insertion and natural wood expansion. If available, cross-reference your recorded dimensions with the manufacturer’s original documentation or product specifications to verify the standard sizing for your specific shelving model.
Choosing the Right Wood Plank and Hardware
Selecting the correct wood plank requires balancing structural integrity with visual harmony. Start by verifying the load capacity requirements of your shelving unit. Different wood types and engineered wood products offer varying levels of resistance to bending and sagging. Check any existing labels, tags, or manufacturer guidelines on your furniture to identify the recommended material density and thickness for the intended weight load.

Inspect the surface treatments and edge profiles of the surrounding shelves to ensure your replacement plank blends in seamlessly. If the existing shelves have rounded, beveled, or square edges, you will want to match this profile on the new plank to maintain a cohesive look. Pay close attention to the wood grain direction; for structural strength, the grain must run lengthwise across the span of the shelf rather than front to back, as grain running the short way will easily snap under load.
The choice of material also dictates how the shelf behaves in its environment. Solid hardwoods offer excellent durability and resistance to sagging over long spans, while softwood planks or veneered medium-density fibreboard (MDF) may be suitable for lighter decorative items or shorter spans. If the shelf is located in a high-humidity area, such as a kitchen or bathroom, check that the wood is sealed with a moisture-resistant finish to prevent warping and swelling.
Equally important is selecting the appropriate support hardware. If you are reusing the existing mounting style, inspect the hardware for signs of wear, bending, or rust. Replace any compromised support pins, L-brackets, or floating shelf brackets with new hardware that matches the original specifications. Ensure the weight rating of the hardware matches or exceeds the load capacity of the wood plank itself, as weak supports are a common cause of shelf failure.
Preparing the Workspace and Tools
A successful installation depends on proper preparation and having the right tools on hand. Gather a reliable tape measure, a spirit level, a drill or screwdriver, a pencil for marking, and appropriate safety gear, including protective eyewear and a dust mask if you plan to sand or trim the wood. Having these items ready prevents interruptions and ensures a smoother workflow.
Clear the entire work area around the shelving unit to give yourself ample room to maneuver. Protect your flooring, nearby furniture, and any lower shelves by laying down a drop cloth or protective sheeting to catch dust, wood shavings, or accidental debris. Removing fragile items from the vicinity minimizes the risk of accidental damage while you handle heavy tools and materials.
Before mounting any hardware or placing the new plank, inspect the supporting structure for stability. If you are mounting a shelf directly to a wall, use a stud finder to locate the wall studs, as securing brackets into solid wood is essential for load-bearing shelves. For cabinet-mounted shelves, check that the cabinet walls are sturdy, free of cracks, and capable of supporting the weight of the new plank and its intended contents.
Step-by-Step Installation of the Wood Plank
With your workspace prepared and tools ready, begin the installation by marking the precise locations for your support hardware. If you are installing new brackets, hold them against the wall or cabinet frame and use a spirit level to ensure they are level. Mark the screw holes lightly with a pencil, double-checking the alignment across both sides of the shelf span to prevent a slanted installation.
Next, install the brackets or support pins into the marked locations. If you are mounting brackets to a drywall surface without a stud, drill pilot holes and insert high-quality wall anchors designed for the weight of your shelf. For solid wood or stud installations, drive the screws directly into the wood, ensuring they are tight and flush against the bracket surface. If your system uses support pins, insert them firmly into the pre-drilled cabinet holes, making sure they sit at identical heights on all four corners.
Carefully place the replacement wood plank onto the installed supports. Slide it gently into position, checking for a flush fit against the back wall or cabinet interior. If the plank is designed to be secured to the brackets from underneath, pre-drill shallow pilot holes into the bottom of the wood to prevent splitting. Drive the appropriate fasteners through the bracket holes into the plank, taking care not to use screws that are longer than the thickness of the wood.
Once the plank is secured, perform a final stability check. Place your spirit level on top of the shelf, checking both left-to-right and front-to-back alignment. Apply gradual, manual pressure to the center of the shelf to test for any flexing, wobbling, or shifting in the hardware. If the shelf remains stable and level, begin loading your items onto it gradually, placing heavier items near the supported ends rather than concentrating weight in the middle.
Troubleshooting Common Installation Issues
Even with careful planning, you may encounter minor issues during the installation process. If you notice the replacement plank wobbles or does not sit flat on its supports, the cause is often an uneven wall or slightly misaligned hardware. You can resolve minor wobbles by placing thin, non-slip shims or adhesive felt pads on top of the low support pins or brackets to level the surface without reinstalling the hardware.
If the wood plank is slightly too tight to fit into the cabinet or wall opening, do not force it, as this can damage the surrounding structure. Instead, identify the tight spots and use a fine-grit sandpaper or a hand plane to shave a small amount of wood from the edges of the plank. Work slowly, removing only a millimeter at a time, and test the fit frequently to avoid removing too much material and creating a loose gap.
There are certain situations where you must stop the installation and seek professional assistance. If you encounter hidden electrical wiring, plumbing pipes, or crumbling masonry while drilling into a wall, stop immediately. Additionally, if you discover severe structural damage to the cabinet frame or wall studs, such as rot or deep cracks, consult a qualified professional or the manufacturer to address the underlying structural integrity before proceeding with the shelf replacement.
Frequently Asked Questions (FAQ)
Can I use a thicker wood plank than the original shelf?
Yes, you can use a thicker wood plank, but you must first verify that the existing support hardware and surrounding space can accommodate the change. Check the vertical clearance between shelves to ensure the thicker plank does not restrict access to the items you plan to store. Additionally, confirm that your support brackets or pins are compatible with the increased thickness and that the added weight of the heavier plank does not exceed the overall load capacity of the shelving unit or wall anchors.
How do I ensure the replacement plank matches the existing finish?
To achieve a close visual match, start by checking the manufacturer’s documentation for exact replacement part numbers or wood species details. If you are sourcing the wood independently, bring a small piece of the damaged shelf or a drawer front to a local supplier to compare wood species and stain samples under natural light. If an exact match is unavailable due to aging or unique finishes, you may want to paint or refinish the entire shelving unit to create a uniform, cohesive appearance.
Community discussion
Share your experience or ask a question. Comments are reviewed before publication.