
Replacing the handles on your cabinets, wardrobes, or drawers is one of the most straightforward and cost-effective ways to refresh your home’s interior. Whether you are updating a built-in kitchen in a Singapore condominium or reviving a vintage chest of drawers, a simple hardware swap can completely transform the space. However, the success of this quick home improvement project relies entirely on one critical factor: obtaining highly accurate measurements of your existing hardware.
Purchasing replacement handles without verifying their precise dimensions often leads to misaligned fits, returned items, or the frustrating need to drill new holes into your furniture. To achieve a seamless, professional-looking installation that requires no structural modifications, you must measure the exact distance between the mounting holes, evaluate the overall dimensions, and check the thickness of your cabinet panels. By following a systematic measurement process, you can confidently source replacement hardware that aligns perfectly with your existing setup.
Tools Required for Measuring Cabinet and Furniture Handles
Before you begin removing any hardware, gathering the correct tools will ensure your measurements are precise and protect your furniture’s finish from accidental scratches or dents. Using the wrong tool can easily strip screw heads or crack delicate laminate surfaces.
Products mentioned in this guide
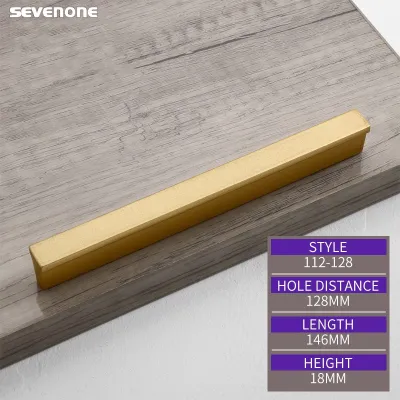
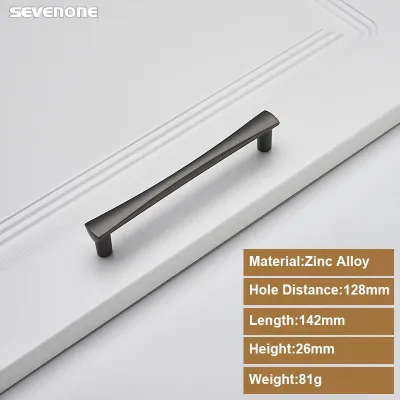
![[Factory Direct]Modern Metal Wardrobe Cabinet Drawer Handle For Home Room Furniture Hardware Kitchen Cupboard Dresser Closet Handle Single Hole 96-192mm](https://img.lazcdn.com/g/p/522d1221bfa2ad183a011ad2b296797a.jpg_webp_400x400q80.jpg_.webp)
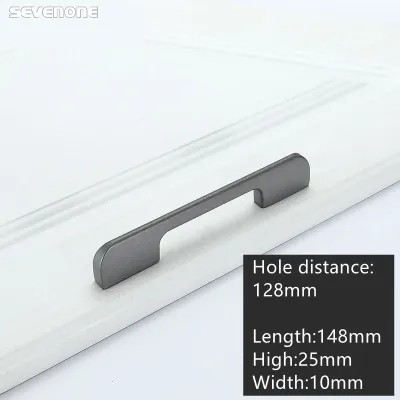
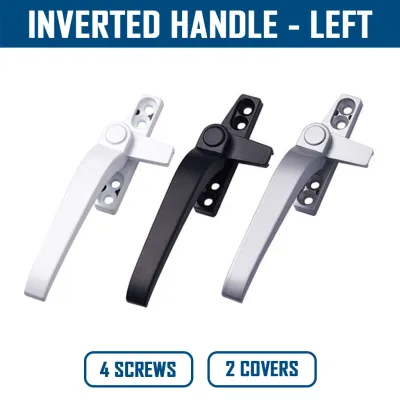
Prices are valid at publication and may change. Please refer to the product page for the latest price.
A high-quality steel tape measure is essential for recording the general dimensions of your cabinets and drawers. However, for the level of precision required for hardware mounting, a digital caliper is highly recommended. Digital calipers allow you to measure hole diameters and screw threads down to a fraction of a millimeter, eliminating the guesswork that often occurs when trying to align a standard tape measure over an open hole.
You will also need a manual screwdriver that matches the head of your existing screws—typically a Phillips or Pozidriv bit. Avoid using power drills or electric drivers during both the removal and installation phases. Power tools deliver high torque that can easily strip screw threads, slip and gouge the wood, or crack the surrounding paint or laminate finish.
Additionally, keep a roll of low-tack masking tape nearby. You can apply this tape directly to the furniture surface to mark center points safely without leaving sticky residue or peeling off paint. Finally, have a notepad or a smartphone handy to record each measurement immediately in millimeters, which is the standard unit of measurement used by hardware manufacturers globally.
Step 1: Safely Remove the Existing Handle
To measure your existing hardware with absolute accuracy, you must first remove at least one of the original handles. Attempting to measure a handle while it is still tightly fastened to a cabinet door or drawer front introduces physical obstructions that can skew your readings.

Begin by fully clearing out the contents of the drawer or cabinet. This step is crucial because it gives you unobstructed physical and visual access to the mounting screws located on the interior side of the panel. It also prevents any items from falling out or getting damaged while you work.
When loosening the screws from the inside, always support the handle from the outside with your free hand. If you do not hold the handle, it can suddenly drop as the final threads disengage. A falling metal handle can easily chip laminate edges, scratch painted surfaces, or dent solid wood doors. If you are working on a vertical cabinet door, consider asking another person to hold the handle while you work the screwdriver from the inside.
Once the handle is removed, you will often find a buildup of dust, grease, or adhesive residue around the mounting area, particularly on kitchen cabinets. Use a damp microfiber cloth and a mild, non-abrasive cleaner to gently clean this area. Removing this debris ensures that your measuring tools can sit completely flat against the cabinet face, which prevents minor alignment errors.
In some cases, especially on older or repainted furniture, the mounting screws or the handle base may be stuck or painted over. Forcing them can tear the paint or splinter the wood. To prevent this, take a sharp utility knife and carefully score the paint line around the perimeter of the handle base and the screw heads before attempting to turn them. This breaks the paint bond and allows for a clean, damage-free removal.
Step 2: Measure the Hole Spacing (Center-to-Center)
The most critical measurement for any two-hole handle replacement is the center-to-center (CTC) distance. This is the precise physical distance from the exact center of one screw hole to the exact center of the other. Because manufacturers design and catalog handles based on this specific dimension, matching your existing CTC measurement is non-negotiable if you want a direct-fit replacement that requires no new drilling.
While it sounds simple, finding the exact center point of an empty circular hole with the naked eye can be challenging and often leads to slight errors. A highly reliable, professional method to overcome this is to measure from the left edge of the first hole to the left edge of the second hole. Because both holes are drilled to the same diameter, the distance from left-edge-to-left-edge is mathematically identical to the distance from center-to-center. This technique gives you two distinct, solid edges to align your tape measure or digital caliper against, eliminating visual estimation.
In Singapore and most international markets, cabinet hardware is manufactured to standard metric dimensions. The most common standard center-to-center spacings include 96mm, 128mm, 160mm, 192mm, and 224mm. You may occasionally encounter older or imported furniture that uses imperial measurements (such as 3 inches, which is approximately 76.2mm).
Never rely on visual guessing or a quick glance to determine these sizes. A difference of just two millimeters—such as mistaking a 96mm spacing for a 98mm spacing—will prevent the new handle’s posts from aligning with your cabinet holes. Always measure twice, record the exact value in millimeters, and use this figure as your primary search filter when browsing hardware catalogs or online marketplaces.
Step 3: Measure Overall Dimensions and Projection
While the center-to-center measurement ensures the handle will physically mount to your cabinet, you must also measure the overall dimensions and projection to guarantee the new hardware fits the space visually and functionally.
First, measure the overall length and width of your existing handle. This is particularly important if your old hardware has been installed for several years. Over time, exposure to sunlight can fade cabinet finishes, and grease or dirt can accumulate around the edges of the handle base, leaving a distinct outline or “shadow” on the door. If your new handle is shorter or narrower than the original, these faded areas, indentations, or marks will remain visible. Selecting a replacement handle with an equal or slightly larger footprint ensures these aesthetic imperfections are completely covered.
Next, you must measure the projection, which is the distance the handle extends outward from the face of the cabinet door. To measure this, place a ruler flat against the cabinet door surface and measure to the outermost point of the handle.
Projection is a vital functional consideration, especially in compact living spaces or galley kitchens common in Singapore apartments. If a handle projects too far, it can collide with adjacent walls, overlapping cabinet doors, or drawer fronts when opened at a 90-degree angle. Conversely, if the projection is too shallow, there will not be enough clearance for your fingers to grip the handle comfortably. Ensure there is adequate finger clearance—typically at least 20mm to 25mm—for daily ease of use.
Step 4: Verify Screw Size and Panel Thickness
A successful handle replacement also requires matching the mounting hardware to your cabinet doors. Even if you find a handle with the perfect hole spacing, it will be unusable if the included screws do not fit your door’s thickness or thread size.
Start by measuring the diameter of your original screws. In Singapore, the vast majority of modern cabinet handles use standard metric M4 screws, which have a thread diameter of approximately 4mm. However, some older, imported, or heavy-duty furniture may utilize M5 or imperial thread sizes. Using a digital caliper to check the screw diameter will prevent you from stripping the threads of your new handle by forcing an incorrect screw size.
Next, measure the exact thickness of your cabinet door or drawer front panel. Standard cabinet doors are typically between 16mm and 19mm thick, but drawer fronts can be significantly thicker because they often consist of a drawer box front joined to a decorative outer panel.
While replacement handles usually come packaged with standard-length screws (often 25mm), these may be too short for thick drawer fronts or too long for thin panels. If your panel thickness requires non-standard fasteners, you will need to purchase separate machine screws. Calculate the required screw length by adding the thickness of your cabinet panel to the depth of the threaded hole in the handle base, allowing a few extra millimeters for a washer. You can easily source these alternative lengths at local neighborhood hardware shops.
How to Select a Compatible Replacement Handle
Once you have compiled your measurements, you can begin searching for your new hardware. To make the process efficient and avoid purchasing incompatible items, use your gathered data systematically.
Treat the center-to-center measurement as your primary, non-negotiable filter. When browsing online marketplaces or visiting specialty hardware showrooms in Singapore, filter the product listings by this exact millimeter dimension first. If a handle does not match your CTC measurement, do not purchase it expecting to force a fit.
After filtering by CTC, consult the product specification tables provided by the manufacturer. Verify the overall length to ensure it covers any old footprint marks, and check the projection to ensure it fits within your physical clearance boundaries.
Always check the product description to see what is included in the package. Confirm whether mounting screws are provided and verify their length against your measured panel thickness. If the product listing does not specify the screw length or thread size, contact the seller to clarify before placing an order.
Finally, consider how the material and finish will perform in your specific home environment. Singapore’s high relative humidity can accelerate the tarnishing or rusting of low-grade metals. For long-term durability, look for handles with robust protective finishes, or opt for solid brass, stainless steel, or high-quality aluminum. Keep in mind that metal finishes can look different under different lighting conditions; a satin brass handle may appear warm under warm LED lighting but look significantly cooler under daylight bulbs.
What to Do If Your Hole Spacing Is Non-Standard
If your furniture features custom, vintage, or non-standard hole spacing, finding a direct-fit replacement handle can be exceptionally difficult. Fortunately, you do not have to settle for poorly fitting hardware; several practical solutions can help you resolve this issue.
One elegant solution is to use a backplate, also known as an escutcheon. A backplate is a flat metal plate that sits between the handle and the cabinet door. By installing a backplate, you can completely cover the old, non-standard holes while mounting a new handle with a standard CTC spacing over it. This allows you to update your hardware without undergoing extensive carpentry work.
If you prefer a clean look without a backplate, you can fill, sand, and refinish the old holes. This process involves filling the existing holes with a high-quality wood filler or epoxy putty, sanding the surface flat once cured, and applying matching paint or lacquer to blend the repair with the rest of the cabinet. Once the surface is fully restored, you can drill new holes at any standard spacing you desire. Note that this is a permanent modification that requires careful color-matching to look seamless.
Alternatively, you can switch from a two-hole handle to a single-hole knob. This transition only requires you to fill one of the original holes, while the other hole can often be reused or widened slightly to accommodate the new knob.
Before undertaking any permanent modifications, evaluate the material and value of your furniture. If your cabinets are made of highly valuable antiques, delicate veneers, or difficult-to-modify materials like glass, metal, or stone, avoid DIY drilling. In these scenarios, it is highly recommended to consult a professional carpenter to prevent costly and irreversible damage to your furniture.
Frequently Asked Questions (FAQ)
Can I replace a two-hole handle with a single-hole knob?
Yes, you can replace a two-hole handle with a single-hole knob, but it requires some minor modifications to maintain a clean appearance. Because a knob only uses one mounting hole, the second hole from your old handle will remain exposed. You will need to fill this vacant hole with a suitable wood filler or acrylic putty, sand it smooth once dry, and touch it up with paint or laminate repair compound to match your cabinet’s finish. Alternatively, you can install a decorative backplate designed for knobs to cover the second hole without the need for filling and painting.
What if the screws included with the new handle are too short?
If the screws included with your new handle are too short to pass through your cabinet door or drawer panel, you will need to purchase longer machine screws separately. To determine the correct length, measure the thickness of your cabinet panel and add the depth of the threaded hole in the handle base, ensuring the screw penetrates deep enough for secure engagement without bottoming out. Take one of the original screws to a local hardware store in Singapore to match the exact metric thread pitch—which is almost always M4—to ensure the new, longer screws thread smoothly into your new handle.
Community discussion
Share your experience or ask a question. Comments are reviewed before publication.