
Replacing a damaged or outdated table top with new wood planks is a rewarding project that can completely transform your furniture. Whether you are restoring a cherished family heirloom or customizing a standard desk frame, success depends on careful planning, precise measurements, and selecting the right materials. By understanding how to evaluate your existing table base, calculate the correct plank dimensions, and install the wood to accommodate natural movement, you can create a beautiful, durable surface that lasts for years.
Assessing Your Existing Table Base and Frame
Before purchasing any wood planks, you must thoroughly inspect the foundation of your table. The base dictates the maximum weight, dimensions, and mounting style of your new top. Begin by clearing the table and turning it over to examine the frame structure. Look closely at the support beams, aprons, and legs to determine if they are structurally sound and free from cracks or loose joints.
Measure the spacing between the existing support beams. If the gaps between supports are too wide, a new wood top might sag over time under its own weight or when carrying heavy items. Note whether the frame has a central support rail or cross-bracing, which significantly increases the load-bearing capacity.
Products mentioned in this guide
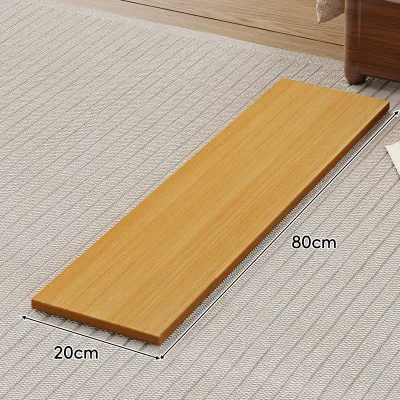
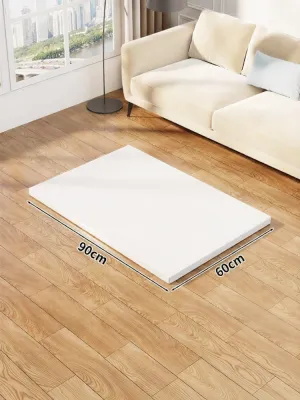
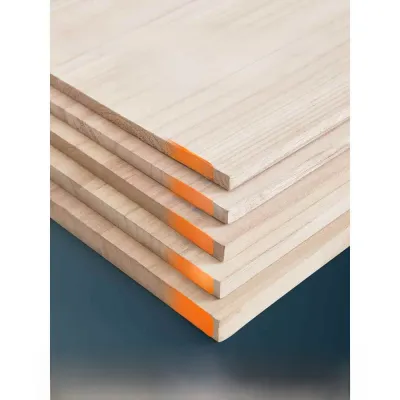
Prices are valid at publication and may change. Please refer to the product page for the latest price.
Identify the existing mounting hardware and connection points. Most manufactured tables use specific fasteners like corner brackets, Z-clips, pocket screws, or pre-drilled holes through the aprons. Take note of these locations, as they will guide how you attach your new wood planks. If the existing hardware is damaged or rusted, plan to replace it with fresh, heavy-duty furniture fasteners.
Consider the weight of your chosen wood planks. Solid wood, especially dense hardwood, can be significantly heavier than the original engineered wood or veneer top. Check if your table base requires reinforcement, such as adding corner blocks, sistering support beams, or installing additional cross-braces, to handle the increased load without wobbling or collapsing.
Finally, verify the physical constraints of your space. Ensure that the fully assembled table, with its new dimensions, can easily clear your doorways, hallways, and lift access if you ever need to move it. A beautiful new table top is of little use if it cannot be transported into your dining room or study.
Determining the Correct Thickness for Stability
Selecting the right thickness for your wood planks is crucial for both aesthetic appeal and structural integrity. A top that is too thin will flex and sag under pressure, while an excessively thick top adds unnecessary weight and cost. The ideal thickness depends heavily on the unsupported span—the distance between the legs or support rails of your table base.

For shorter spans, such as small side tables or coffee tables, thinner planks are generally sufficient. However, for larger dining tables or work desks with long unsupported spans, thicker planks are necessary to maintain a flat, stable surface. As a general rule of thumb, look for standard lumber thicknesses that match your frame’s span, and consult woodworking guidelines or local timber suppliers to verify the recommended thickness for your specific table length.
If you prefer the look of a thick, substantial table top but want to avoid the weight and expense of solid thick planks, you can use structural aprons or edge banding. Adding a supportive wooden apron around the perimeter of the underside increases the rigidity of thinner planks, effectively preventing sag. Alternatively, applying a thicker edge band around the perimeter of a thinner top creates the visual illusion of a massive solid slab while keeping the center lightweight.
Always check the manufacturer specifications of your table base if you are using a pre-made metal or wooden frame. Manufacturers often specify a maximum weight limit and recommended top thickness to ensure the assembly remains stable and safe during daily use.
Calculating Length and Width for Proper Overhang
To determine the final dimensions of your new table top, start by measuring the outer dimensions of your existing table base. Use a high-quality tape measure to record the exact length and width of the frame, measuring from the outermost edges of the legs or aprons.
Once you have the base measurements, you must factor in the overhang—the portion of the table top that extends past the frame. Overhang is essential for user comfort, as it provides necessary legroom and knee clearance when people are seated. For standard dining and work tables, an overhang of 5 to 10 centimeters on all sides is common, though you can adjust this based on your seating arrangements and available room space.
While a larger overhang offers more legroom, it also shifts the center of gravity of the table. You must carefully balance the overhang to prevent tipping hazards. This is especially critical for pedestal tables or single-column bases, where an excessive overhang on one side can cause the entire table to flip if someone leans heavily on the edge. Ensure the weight of the top remains centered over the footprint of the base.
Calculate the total length and width by adding twice the desired overhang to the base dimensions. For example, if your table base is 120 centimeters long and you want a 7-centimeter overhang on each end, your final plank length should be 134 centimeters. Double-check all calculations before ordering or cutting your wood planks to avoid costly mistakes.
Selecting the Wood Material and Surface Finish
The choice of wood species and surface finish directly impacts the durability, appearance, and maintenance requirements of your new table top. Wood planks are broadly categorized into hardwoods and softwoods, each offering distinct characteristics.
Hardwoods, such as oak, walnut, maple, and teak, are highly prized for dining tables and high-traffic work surfaces. They feature dense grain structures that make them naturally more resistant to dents and scratches. Softwoods, like pine or fir, are lighter and easier to work with, making them popular for rustic or farmhouse-style tables, though they are more prone to marking under heavy use. Remember that a wood’s name alone does not guarantee performance; the quality of the cut, moisture content, and final finish play vital roles.
To protect your wood planks from spills, moisture, and stains, you must apply a suitable surface treatment. Polyurethane finishes provide a thick, durable protective barrier that is highly resistant to water and household chemicals, making it ideal for busy dining areas. Hard wax oils offer a more natural, matte appearance that highlights the wood grain while providing decent moisture resistance, though they may require more frequent reapplication.
Before finalizing your choice, read the product care labels and maintenance instructions for both the wood and the finish. Some finishes require periodic sanding and recoating, while others can be easily spot-repaired. Choose a combination that aligns with your willingness to perform regular maintenance to keep the table looking its best.
Step-by-Step Installation and Alignment
Installing your new wood planks requires careful execution to ensure a flat, secure, and long-lasting table top. Because wood is an organic material, it naturally expands and contracts with changes in indoor humidity and temperature. Your installation method must accommodate this movement to prevent the wood from warping, cracking, or splitting.
Begin by aligning your wood planks on a flat, clean surface, ensuring the grain patterns and joints look cohesive. If you are using multiple planks, secure them together according to your design. Once the top is assembled, position your table base upside down on the underside of the new top, centering it precisely according to your calculated overhang measurements.
Mark the mounting locations through the existing holes in your table frame. Before driving any screws, always pre-drill clearance holes in the underside of the wood planks. Pre-drilling removes wood material and prevents the planks from splitting when the fasteners are inserted. Be extremely careful to set a drill stop so you do not accidentally drill completely through your new table top.
To allow for seasonal wood movement, do not glue the top directly to the frame or use rigid, unyielding fasteners. Instead, use specialized tabletop fasteners such as figure-8 fasteners, Z-clips, or expansion brackets in slotted holes. These fasteners secure the top firmly to the base while allowing the wood to slide slightly side-to-side as it expands and contracts.
Once the fasteners are in place, carefully flip the table upright. Perform a final level and stability check on a flat floor. Tighten all hardware evenly, but avoid over-torquing the screws, which can strip the wood threads or restrict the natural movement of the planks.
Frequently Asked Questions (FAQ)
Can I join multiple narrower planks to create a wide table top?
Yes, joining multiple narrower planks is a common and effective way to build a wide table top. To achieve a strong, seamless joint, the edges of the planks must be perfectly straight and square, a process known as jointing. Use high-quality wood glue along the edges and secure the planks tightly with bar clamps until the glue cures completely. When arranging the planks, alternate the direction of the wood’s growth rings (visible on the end grain) to minimize the risk of the entire top cupping or warping as the wood ages.
How do I prevent the new wood top from warping over time?
Preventing wood warp requires managing moisture exposure and environmental conditions. Always apply your chosen protective finish to all surfaces of the wood planks, including the underside and the edges; sealing only the top surface causes uneven moisture absorption, leading to warping. Additionally, try to maintain consistent indoor humidity levels in your home, keeping the table away from direct heat sources, air conditioning vents, and prolonged direct sunlight.
Community discussion
Share your experience or ask a question. Comments are reviewed before publication.