
Replacing a damaged wooden board in a piece of furniture—whether it is a sagging bookshelf, a cracked drawer bottom, or a weathered tabletop—requires a systematic approach to measurement and material selection. To achieve a seamless repair, you must measure the exact actual dimensions of the existing component rather than relying on standard nominal wood sizes, account for any hidden joinery or grooves, and select a wood species or engineered panel that matches both the structural load and the environmental conditions of your home.
By taking the time to plan your measurements and understand the physical characteristics of your replacement timber, you can restore both the structural integrity and aesthetic appeal of your furniture. This process saves you the cost of replacing the entire furniture piece while ensuring the repaired item remains safe and functional.
Tools and Preparation for Measuring Wood Boards
Before you pick up a saw or purchase a replacement board, gathering the correct tools and preparing your workspace is essential for an accurate repair. Standard household measuring tapes are useful for rough estimates, but furniture repair demands a higher level of precision to ensure new parts slide or fit into place without binding.
Products mentioned in this guide
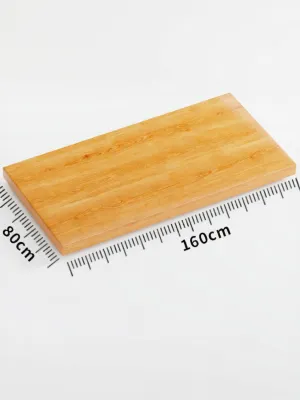
Prices are valid at publication and may change. Please refer to the product page for the latest price.
The primary tool for this task is a high-quality steel tape measure, which provides a rigid edge that does not stretch or sag over long spans. For measuring thickness, a digital caliper is indispensable; it measures down to fractions of a millimeter, allowing you to identify the exact thickness of old, worn, or non-standard panels. A carpenter’s square is also necessary to verify whether the existing frame and the corners of the damaged board are perfectly perpendicular. Finally, keep a notepad and pencil nearby to sketch the board’s shape and record every dimension immediately, as relying on memory often leads to cutting errors.
Safety must be your top priority during the preparation and disassembly phases. Old or damaged furniture boards can split unexpectedly, exposing sharp splinters, rusted screws, or bent nails. Always wear heavy-duty work gloves and protective eyewear before handling the damaged component or attempting to pry it loose. Before using any adhesives, wood finishes, or power tools, always check the applied product’s label and the treated item’s manufacturer instructions. If instructions conflict, the item is unidentified, or the use is not covered, stop and consult the manufacturer or a qualified professional.
Before removing the damaged board, carefully inspect how it is integrated into the surrounding furniture frame. Wood boards are rarely held in place by friction alone; they are typically secured using mechanical fasteners like screws and dowels, or joinery techniques such as dado grooves, rabbet joints, or high-strength wood adhesives. Take time to locate and remove all hidden fasteners. Forcing a board out without releasing these connection points can easily crack the surrounding frame, turning a simple board replacement into a complex structural failure.
Knowing when to stop and seek professional help is a crucial aspect of DIY furniture repair. If you inspect the piece and find that the main structural frame is cracked, warped beyond alignment, or severely compromised by rot or pests, a simple board replacement will not restore its safety. Additionally, if the board is secured with advanced joinery—such as blind mortise-and-tenon joints or complex interlocking miters that require specialized machinery to replicate—it is best to consult a professional carpenter or furniture restoration specialist to avoid destroying the heirloom.
Step-by-Step Guide to Measuring the Replacement Area
To obtain a replacement board that fits perfectly, you must measure the physical space the board will occupy, rather than just measuring the damaged board itself, which may have warped, shrunk, or lost pieces over time.

Measuring Length and Width
When measuring the length and width of the replacement area, you must differentiate between the visible surface area of the board and its total physical dimensions. Many furniture panels do not simply sit flat against a frame; instead, their edges are often housed inside recessed channels, such as dado grooves in cabinet walls or rabbets along the back of a chest of drawers. To find the true length and width, you must measure the visible span and then add the depth of the grooves on both sides. Failing to account for these hidden margins will result in a replacement board that is too short to reach its supporting slots.
Older furniture frames rarely remain perfectly square over their lifespan due to shifting joints, heavy loads, and environmental changes. Therefore, you should never take a single measurement and assume it applies to the entire board. Take three separate measurements for the length (at the top, middle, and bottom of the frame) and three for the width (at the left, center, and right).
Once you have recorded these six measurements, use the smallest recorded dimension as your guide for the replacement board. If you cut the new board to match the largest measurement of a warped frame, you will struggle to force the board into place during assembly. Forcing a tight board into an out-of-square frame puts immense outward pressure on the joints, which can easily split the surrounding wood or cause the entire piece of furniture to wobble.
Measuring Thickness and Depth
Thickness is the most critical dimension when matching a replacement board to adjacent panels, as even a difference of one millimeter can leave an unsightly ridge or prevent drawers from sliding smoothly. Use your digital calipers to measure the exact thickness of the original board. It is important to understand that lumber sold in retail stores is often categorized by “nominal” sizes (such as a 1-inch board), but the “actual” milled size is significantly smaller (often around 0.75 inches). Always buy your wood based on actual, measured decimal or millimeter dimensions rather than nominal commercial labels.
Because wood is an organic material, its thickness can vary across its surface after years of use. Measure the thickness at multiple points along the edges and near the center of the old board. In areas near joints or support brackets, the wood may have compressed under weight or swollen due to localized moisture exposure. By checking multiple spots, you can determine the original intended thickness before wear and tear altered the board’s shape.
If the replacement board slots into a groove or sits on a recessed ledge, you must also measure the exact depth of these channels. Insert the depth probe of your digital caliper or a small steel ruler into the groove to find its exact limit. If the groove is packed with old glue, dirt, or wood debris, clean it out thoroughly with a small chisel or utility knife before measuring. This ensures that the new board’s edges will seat fully into the recesses, allowing the entire assembly to sit flush and square.
Selecting the Right Wood Board Specifications
Choosing the right material involves balancing aesthetic preferences with structural requirements and environmental conditions. The wrong type of wood can sag under weight, warp in high humidity, or fail to accept the paint or stain used on the rest of the piece.
Matching Wood Type and Structural Grade
The first decision is whether to use solid wood or an engineered alternative. Solid hardwood, such as oak, teak, or mahogany, is the premier choice for visible, load-bearing parts, or components that will receive a clear stain or varnish. Hardwoods offer exceptional strength and beautiful natural grain patterns. Softwoods, like pine or cedar, are easier to cut and work with, making them suitable for rustic furniture or lightweight interior components, though they are more susceptible to denting and scratching.
For hidden structural panels, cabinet backs, or painted surfaces, engineered wood boards like plywood, Medium-Density Fiberboard (MDF), or particle board are often superior to solid wood. Plywood consists of cross-laminated veneers, which make it incredibly stable and resistant to splitting, making it perfect for drawer bottoms and cabinet sides. MDF has a completely flat, grain-free surface that takes paint beautifully, making it an excellent choice for painted cabinet doors or shelving, provided it is properly supported.
When selecting solid wood, always inspect the grain direction and the structural grade of the timber. Wood is an anisotropic material, meaning its physical properties differ depending on the direction of the grain. For structural components, choose boards with straight, tight grain patterns that run parallel to the length of the board, and avoid pieces with large knots, splits, or checks, as these natural defects act as stress points where the wood is likely to snap under load. Additionally, try to match the species of the replacement board to the original furniture material; mixing different wood species can lead to uneven movement, as different woods expand and contract at different rates when environmental conditions change.
Considering Environmental and Load Factors
Environmental conditions play a massive role in the longevity of your furniture repair, especially in tropical climates like Singapore, where indoor relative humidity levels can fluctuate significantly between air-conditioned spaces and naturally ventilated rooms. High humidity causes wood to absorb moisture and swell, while dry, air-conditioned air causes it to release moisture and shrink. When purchasing wood, check the manufacturer’s moisture resistance labels or specifications. For humid environments, select highly stable wood species or moisture-resistant engineered boards (such as marine-grade plywood or moisture-resistant MDF) to prevent warping, bowing, or mold growth.
You must also evaluate the specific load-bearing requirements of the replacement board. A shelf designed to hold heavy books requires a much stiffer material and a greater thickness than a decorative drawer divider or a lightweight cabinet back. If you use a board that is too thin or lacks the structural stiffness required for the span, it will experience “creep”—a permanent, irreversible sagging that occurs over time under a constant load.
To prevent sagging, ensure the core material and thickness are rated for the intended weight. Avoid using non-structural decorative panels, such as thin hardboard or low-density fiberboard, for any application that must support weight. These materials lack the internal fiber cohesion necessary to span distances without bending, and using them in load-bearing scenarios can lead to sudden structural collapse.
Adjusting for Joinery, Edges, and Hardware
Once you have the raw replacement board cut to the basic length, width, and thickness, you must make precise adjustments to ensure it integrates seamlessly with the existing furniture frame and hardware.
Wood is constantly moving in response to atmospheric moisture, expanding across its grain when the air is damp and contracting when it is dry. When fitting a solid wood replacement panel into a frame or groove, you must leave a small expansion gap—typically about 1 to 2 millimeters—along the edges. If you fit a solid wood board tightly into a rigid frame during a dry spell, it will expand during the next humid period, exerting immense pressure that can blow out the frame’s joints or cause the panel itself to buckle.
If the original board was secured with screws, hinges, or other hardware, you must transfer these hole locations to the new board with absolute precision. Place the old board directly over the new one to use as a template, marking the center of each hole with an awl or a sharp pencil. When installing the hardware, never force screws directly into raw wood, as this creates intense internal pressure that can easily split the board along its grain. Always drill pilot holes first, choosing a drill bit that matches the inner shaft diameter of the screw (excluding the threads), which allows the threads to grip the wood firmly while preventing the wood fibers from wedging apart and splitting.
The edges of your replacement board must also be treated to match the aesthetic of the original piece. If the original furniture has decorative, rounded, or beveled edges, you can replicate these profiles using a handheld router equipped with the appropriate profiling bit (such as a bullnose or chamfer bit). For engineered boards like plywood or MDF, the raw, exposed edges reveal the internal layers or fibers, which look unfinished and absorb paint or moisture rapidly. Apply iron-on edge banding—a thin strip of real wood veneer with a heat-activated adhesive backing—to these exposed edges, heating it with a household iron and trimming the excess with a utility knife for a clean, professional finish.
Before applying any finishes or glues, sand the edges and surfaces of the replacement board thoroughly. Start with a medium-grit sandpaper (such as 120-grit) to remove any saw marks or rough spots, and finish with a fine-grit sandpaper (such as 220-grit) to create a smooth surface. Pay close attention to the corners and edges, rounding them slightly to break any sharp, fragile points that could easily chip during daily use.
Final Verification and Dry Fitting
The dry fit is a mandatory step in the furniture repair process that should never be skipped. A dry fit involves fully assembling the replacement board into the furniture frame without applying any wood glue, nails, or permanent fasteners. This allows you to verify the fit, alignment, and function of the repair in a completely reversible state, ensuring that any minor errors can be corrected before they become permanent.
During the dry fit, systematically run through a series of structural and visual checkpoints:
- Flush Alignment: Run your fingers across the joints where the replacement board meets the original frame. The transition should be smooth and flush, without any protruding edges or deep recesses.
- Structural Stability: Place the furniture piece on a flat, level surface and check for any wobble or twisting. A poorly sized replacement board can twist the frame, causing the furniture to sit unevenly.
- Clearance and Movement: If the replacement board is near drawers, doors, or sliding components, operate them multiple times. Ensure there is adequate clearance and that nothing rubs, binds, or catches on the new wood.
- Gap Inspection: Look closely for any unintended gaps between the replacement board and the frame. While small expansion gaps are necessary for solid wood, large, uneven gaps indicate that the board was cut out of square or measured incorrectly.
If you discover any issues during the dry fit, remove the board and make the necessary adjustments. You can shave down slightly oversized edges with a hand plane, sand down tight spots, or adjust the depth of pilot holes.
Once the dry fit is completely successful and the board fits perfectly, you can proceed to permanent assembly. Apply a thin, even layer of high-quality polyvinyl acetate (PVA) wood glue to the joints, clamp the pieces together firmly to ensure maximum bond strength, and drive in your screws or fasteners. Wipe away any squeezed-out glue immediately with a damp cloth, as dried glue blocks wood stain and paint, leaving unsightly pale spots on your finished piece. After the glue has cured according to the manufacturer’s instructions, your replacement board is ready for staining, painting, or sealing to match the rest of your beautiful furniture.
Frequently Asked Questions (FAQ)
What should I do if I cannot find a wood board with the exact thickness?
If you cannot find a replacement board that matches your required thickness, buy a board that is slightly thicker than needed. You can then use a hand plane, a power planer, or a belt sander to shave the board down to the exact millimeter dimension. Alternatively, if the board is only slightly thinner than the original, you can pad the mounting area using thin wooden shims or layers of wood veneer tape. Note that padding a board with shims is only suitable for non-structural, hidden, or low-stress components, as it can compromise the stability of load-bearing shelves or table surfaces.
Does the wood grain direction matter when replacing a furniture board?
Yes, wood grain direction is critical for both structural strength and visual harmony. Wood is significantly stronger along its grain than across it. For shelves, benches, or any load-bearing span, the wood grain must run parallel to the longest dimension (from support to support) to prevent the board from sagging or snapping under weight. For visible replacement parts, you must also align the grain pattern and direction with the surrounding panels. Misaligned grain directions look disjointed and unprofessional, and they can cause uneven wood movement that stresses the joints over time.
Community discussion
Share your experience or ask a question. Comments are reviewed before publication.