
Replacing a broken furniture shelf or panel is a highly practical way to extend the lifespan of your favorite household pieces. Instead of replacing an entire cabinet or bookshelf, sourcing a new timber plank allows you to restore structural integrity while preserving the furniture’s character. Sourcing a custom-cut timber plank locally might cost around S$20 to S$50 depending on the species, which is far more economical than replacing the entire unit. However, successful furniture repair requires more than just buying a generic piece of wood. The core process involves accurately measuring the internal opening, accounting for hidden joinery clearances, calculating the required thickness to prevent sagging, and matching the original structural connections. This guide walks you through the precise measurements and selection criteria needed to restore your furniture safely and effectively.
Assess the Damage and Prepare the Workspace
Before purchasing any replacement timber plank, you must thoroughly inspect the failed component to understand why it broke. Look closely at the fracture points, warping, or sagging. If the shelf bowed severely before cracking, it indicates that the span was too long for the thickness, or the load exceeded the material’s capacity.
Check for signs of environmental damage, especially in humid climates where moisture can cause wood to swell, rot, or delaminate. If you notice mold, soft spots, or discoloration, the failure is likely due to moisture exposure, which means your replacement plank will require a more robust protective finish.
Products mentioned in this guide
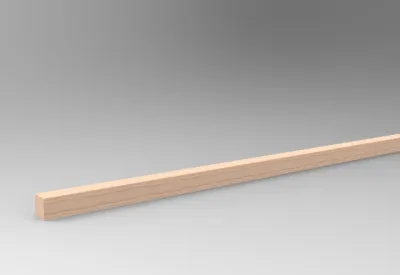
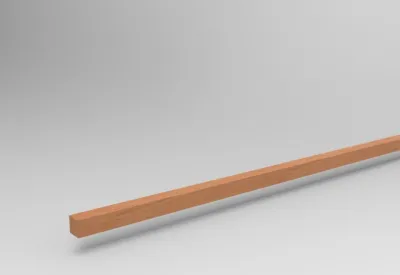
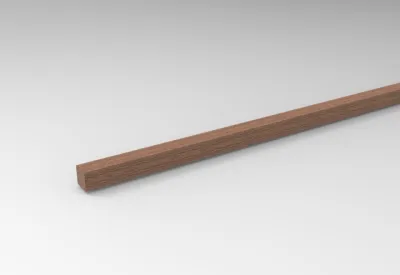

Prices are valid at publication and may change. Please refer to the product page for the latest price.
Examine the overall structural integrity of the furniture piece. Ensure the main frame is still square and stable. If the outer carcass is wobbly or out of alignment, installing a new shelf will not fix the underlying issue; you must stabilize the frame first.
Gather your tools before starting. You will need a high-quality steel tape measure, a carpenter’s square to check corners, and digital calipers to measure the exact thickness of the existing wood or joinery slots. Keep a notepad handy to record your dimensions immediately.
Measure the Opening for the New Timber Plank
Accurate measurement is the foundation of a successful furniture repair. Do not rely on measuring the broken piece alone, as it may have warped, shrunk, or lost fragments during the break. Instead, measure the actual physical opening inside the furniture frame where the new timber plank will sit.

Take width and depth measurements at three distinct points: the front, the middle, and the back of the opening. For vertical panels, measure at the top, middle, and bottom. Furniture frames often bow outward or warp over time, and these multiple readings will reveal if the carcass is out of square.
If your measurements differ across these points, use the smallest recorded dimension as your baseline. A plank cut to the largest measurement will bind during installation, potentially forcing the furniture joints apart and causing structural damage to the outer frame.
Identify the joinery method used to support the plank. If the shelf rests on adjustable shelf pins, measure the distance between the inner walls and subtract a small clearance (typically 1 to 2 millimeters) so the shelf can be inserted easily without scratching the interior veneer.
If the timber plank slides into a dado groove or rebate cut into the side panels, you must measure the depth of these grooves. Use the depth gauge on your digital calipers to find the exact depth of the slot on both sides. Add twice this groove depth to your clear internal width measurement to find the total length of the replacement plank.
For fixed panels secured with corner brackets, pocket screws, or dowels, ensure you measure the exact face-to-face distance. Account for any face frames or decorative trim that might block the path of the replacement plank during installation, planning how you will maneuver the piece into position.
Determine the Required Thickness and Load Capacity
Selecting the correct thickness for your timber plank is critical to ensure structural safety and prevent future sagging. Use your digital calipers to measure the thickness of the original broken panel or the width of the existing dado grooves. The replacement plank must match this thickness to fit securely into the existing joinery.
If you are replacing a shelf that will carry heavy items like books, kitchenware, or decorative objects, you must evaluate the unsupported span. A longer span requires a thicker timber plank to resist bending under gravity. For standard shelving, a thickness of 18mm to 20mm is typically recommended for spans up to 800mm, while longer spans may require 25mm or more.
Consider the physical differences between solid timber and engineered wood products. Solid timber planks offer excellent natural strength along the grain but can warp if exposed to fluctuating humidity. Engineered options like plywood or blockboard are highly stable and resist warping, but their edges must be covered with edge banding to match the aesthetic of solid wood.
Check the load capacity limits of your shelf supports. Even a thick, sturdy timber plank will fail if the shelf pins, brackets, or wooden cleats supporting it are worn, bent, or loosely fitted into their holes. Inspect these hardware components and replace them if they show signs of fatigue.
Select the Appropriate Timber Type and Finish
The choice of timber species affects both the durability and the appearance of your repaired furniture. For indoor furniture in living areas, hardwoods like oak, teak, or mahogany offer excellent strength, beautiful grain patterns, and high resistance to indentation. Softwoods like pine are easier to cut and work with, but they are more prone to denting and may sag more easily over long spans.
If you are sourcing a timber plank in a tropical or high-humidity environment, such as a kitchen, bathroom, or semi-outdoor balcony, select species known for their natural stability or ensure they are thoroughly sealed. Moisture can cause untreated timber to warp, twist, or expand, which can ruin the fit of your replacement panel.
Examine the finish of the surrounding furniture to plan your surface treatment. You will need to sand the new timber plank progressively with medium to fine-grit sandpaper to prepare the surface. To match the existing look, test stains and clear topcoats on a scrap piece of the same timber before applying them to your final replacement plank.
Decide whether to use a polyurethane varnish, a natural oil, or a wax finish. Polyurethane provides a durable, water-resistant barrier ideal for high-use surfaces like tabletops and kitchen shelves. Natural oils penetrate the wood to highlight the grain but require periodic reapplication to maintain protection.
Cut, Fit, and Secure the Replacement Plank
Once you have selected and prepared your timber plank, it is time to cut it to the final dimensions. Always mark your cut lines clearly using a sharp pencil and a carpenter’s square to ensure perfectly 90-degree angles. If you are cutting the wood yourself, use a fine-tooth saw blade to minimize splintering along the edges.
After cutting, use a sanding block to gently ease the sharp edges and corners of the plank. This slight chamfer prevents the wood from splintering when you slide it into tight dado grooves or place it onto shelf pins, and it makes the finished piece safer to handle.
Perform a dry fit before applying any glue, fasteners, or final finishes. Carefully slide the timber plank into its designated position. Check for any binding, gaps, or misalignment. The plank should fit snugly without requiring excessive force; if you have to hammer it into place, it is too tight and needs to be trimmed or sanded down.
If the dry fit is successful, secure the replacement plank using the original mounting method. For fixed shelves, apply a thin, even layer of wood glue to the joints or grooves, slide the panel into place, and secure it with clamps or screws. Wipe away any squeezed-out glue immediately with a damp cloth, as dried glue will block wood stain and ruin the final finish.
Establish a clear stop condition during assembly. If the furniture frame begins to bow outward, or if the joints do not close smoothly under moderate clamp pressure, stop immediately. Do not force the components together. Remove the plank, re-verify your measurements, and trim the wood as needed to prevent damaging the structural integrity of your furniture.
Frequently Asked Questions (FAQ)
Can I use a slightly thinner timber plank if the exact thickness is unavailable?
Using an undersized timber plank in existing joinery introduces several structural risks. If a shelf is too thin for a dado groove, it will rattle, tilt, or slide out of place, leading to uneven load distribution and potential joint failure. If you must use a slightly thinner plank, you can compensate by gluing thin wooden shims or veneer strips into the groove to create a snug fit. Alternatively, apply matching edge banding to the front and sides of the plank to visually and physically increase its thickness at the contact points. If the thickness difference is significant, stop and seek custom milling to avoid compromising safety.
How do I prevent the new timber shelf from sagging over time?
Preventing a timber shelf from sagging requires balancing the unsupported span length with the density of the timber species and the expected weight of your items. For long spans, choose high-density hardwoods or high-quality plywood rather than softwoods. You can significantly reinforce a shelf by installing a solid timber stiffening batten underneath the front or back edge of the plank; this vertical support greatly increases resistance to bending. Alternatively, you can reduce the unsupported span by adding a central vertical partition or installing an extra shelf support pin or bracket at the midpoint of the back wall.
Community discussion
Share your experience or ask a question. Comments are reviewed before publication.