
To replace a damaged wood plank in your furniture, you must measure its actual physical dimensions—not its nominal commercial size—and match its material properties to ensure structural safety. Accurate measurement requires capturing the exact length, width, and thickness down to the millimeter, accounting for hidden insertion depths in tracks or grooves. Finding a proper match involves evaluating the original piece’s load capacity, material composition, and how it responds to environmental conditions.
Assess the Damage and Gather Measuring Tools
Before ordering a new wood plank, determine if a full replacement is truly necessary. Surface-level issues like minor scratches, shallow water rings, or localized paint chips can often be resolved without discarding the wood. You can typically sand down, fill, or patch minor blemishes using wood putty and a fresh coat of sealant.
Structural failures, however, demand a complete replacement to prevent furniture collapse. Inspect the plank for deep cracks that run along the grain, severe warping that prevents drawers or doors from closing, rot from high humidity, or sagging under weight. If a structural component like a bed slat, dining table leaf, or heavy bookshelf shelf exhibits these signs, replacing the entire board is the only safe option.
Products mentioned in this guide
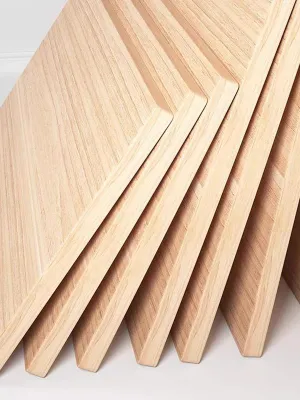
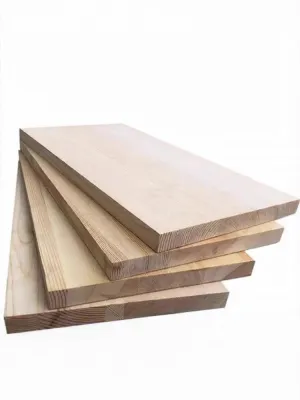
Prices are valid at publication and may change. Please refer to the product page for the latest price.
To obtain accurate measurements, gather a specific set of tools before you begin. A high-quality steel tape measure is essential for length and width, as fabric tapes can stretch and introduce errors. For thickness, a digital caliper is highly recommended because even a single millimeter of difference can prevent a replacement plank from sliding into its designated slot.
Keep a pencil and notepad nearby to record your measurements immediately, rather than relying on memory. You will also need basic hand tools—such as a screwdriver, a rubber mallet, or a pry bar—to safely remove the damaged plank from the furniture frame without cracking the surrounding structure.
Step-by-Step Guide to Measuring the Existing Plank
Measuring Length and Width
To get an accurate measurement, you must measure the entire physical wood plank, not just the portion that is visible when the furniture is assembled. The visible area, often called the ‘reveal’, is frequently smaller than the actual board because the edges may be hidden inside joints or supports. If possible, always remove the damaged plank from the furniture frame before taking your measurements.

When measuring the length and width of the removed plank, lay it flat on a level surface. Run your steel tape measure from one outer edge to the absolute opposite edge. If the board is warped, press it flat against the surface as much as possible to avoid underestimating the actual length.
If the plank cannot be removed easily without damaging the rest of the piece, you must calculate the hidden insertion depth. Look closely at how the wood plank meets the frame. It may slide into a dado groove, rest on shelf pins, or sit on top of corner cleats.
Measure the visible span first, then use a thin ruler or depth gauge to measure how deep the groove or support channel is on both sides. Add these depth measurements to your visible span calculation to find the total required length or width of the replacement board. For example, if a shelf has a visible span of 800 mm and slides into a 10 mm groove on each side, your replacement wood plank must be exactly 820 mm long.
To ensure the original piece was perfectly square, measure diagonally from the top-left corner to the bottom-right corner, and then from the top-right corner to the bottom-left corner. If these two diagonal measurements are identical, the board is square. If they differ significantly, the board has warped or racked, and you should use the dimensions of the furniture cavity itself to guide your replacement.
Determining the Exact Thickness
When sourcing a replacement wood plank, understanding the difference between nominal size and actual size is critical. In the timber industry, a board sold as ‘1-inch’ (nominal) is actually finished down to roughly 0.75 inches (actual physical thickness) during manufacturing. Relying on nominal retail labels will almost certainly result in a replacement board that is too thick or too thin for your furniture’s pre-cut slots.
Use digital calipers to measure the exact thickness of your existing plank in millimeters. Calipers provide a precise, high-resolution reading that a standard tape measure cannot match. This precision is especially important for furniture parts that slide into tracks, such as drawer bottoms or cabinet back panels.
Take thickness measurements at multiple points along the edges of the old plank. Wood is a natural material that swells, warps, or shrinks depending on moisture exposure, which is a common occurrence in Singapore’s humid tropical climate. Measuring multiple spots allows you to identify if the wood has swollen over time, helping you determine the original, unswollen thickness needed for the new piece to slide in smoothly.
Checking Edge Profiles and Cutouts
A standard rectangular wood plank may not fit your furniture if the original piece featured custom edge treatments or structural cutouts. Examine the edges of your old board closely to see if they are flat, beveled, rounded (bullnose), or rabbeted. A rabbeted edge has a step-like groove cut into it, which allows it to recess into an adjacent frame.
Note any back notches or corner cutouts designed to clear cabinet backings, vertical supports, or electrical cords. If your replacement board lacks these precise cutouts, it will not sit flush against the furniture frame, leaving unstable gaps or throwing off the alignment of the entire piece.
Finally, check for pre-drilled holes on the face or edges of the plank. These holes are often engineered for specific hardware, such as cam locks, wooden dowels, shelf support pins, or mounting screws. Mark the exact center-point locations of these holes on your measurement diagram so they can be accurately replicated on the new plank.
Match the Material, Grade, and Load Capacity
Selecting the right material for your replacement wood plank requires balancing structural integrity, moisture resistance, and aesthetics. Common furniture boards include solid wood, plywood, medium-density fiberboard (MDF), and particleboard, each behaving differently under environmental stress. In Singapore’s high-humidity climate, raw MDF and particleboard are highly susceptible to swelling and sagging if they are not fully sealed, whereas solid wood and high-quality marine or exterior-grade plywood offer better structural stability.
Always check the manufacturer’s care instructions and the specific use environment of your furniture before selecting a material. For instance, if you are replacing a shelf in a damp bathroom or an outdoor balcony, using unsealed solid wood or standard interior plywood will likely lead to rapid warping and rot. Ensure the replacement material has an appropriate protective finish or moisture-resistant rating suitable for where the furniture will sit.
Matching the load capacity of the original plank is a critical safety requirement. Replacing a structural component—such as a bed slat, a dining table support rail, or a heavy-duty bookshelf layer—with a weaker material or a thinner grade of wood poses a severe risk of structural collapse and injury. If you are replacing a load-bearing board, ensure the new wood species or engineered wood grade meets or exceeds the structural strength of the original piece.
For visible furniture parts, you must also match the aesthetic characteristics to maintain a cohesive look. Pay close attention to the wood grain direction; wood planks are significantly stronger along the grain than across it, and matching the grain direction is essential for both strength and visual harmony. If the original furniture has a wood veneer or a specific stain, look for a replacement plank with a matching veneer species (such as oak, teak, or walnut) and test your wood stains on a hidden scrap piece first to ensure a proper color match.
Source and Order the Custom or Standard Replacement
Once you have your exact measurements, you can source your replacement wood plank from local timber yards, hardware stores, or online custom-cutting services. When communicating your dimensions, always specify your measurements in order of length, width, and thickness, and clearly state whether you are providing the ‘actual’ physical dimensions rather than nominal sizes.
If you are ordering a custom-cut piece, you must account for the saw blade kerf, which is the width of the material turned into sawdust by the blade during a cut (typically 2 mm to 4 mm). If you need multiple pieces cut from a single larger board, ensure your cutting plan includes enough margin to accommodate these kerf losses so your final planks do not end up too short.
When ordering large replacement planks, also consider your home’s doorway and lift access to ensure the raw materials can be easily transported to your workspace. Before applying any permanent finishes, paint, or adhesives, always perform a dry-fit test with the newly delivered plank. Slide the raw wood plank into its designated position within the furniture frame to verify that it fits snugly without forcing, binding, or leaving excessive gaps. If the board is slightly too large, a dry fit allows you to sand down the tight spots before you invest time in staining or sealing.
Install the New Plank and Verify the Fit
Begin the installation process by cleaning the receiving slots, tracks, or support cleats on your furniture frame. Remove any accumulated dust, old wood glue, or loose debris that might prevent the new wood plank from seating fully. If the original plank was held in place by screws or brackets, inspect these hardware pieces to ensure they are not bent or stripped.
Carefully position the new plank, checking for any binding or friction along the edges. If the plank slides into a groove, it should do so smoothly with just a tiny amount of clearance to allow for natural seasonal expansion. Secure the plank using the original hardware, brackets, or high-quality wood glue, ensuring all fasteners are tightened evenly to prevent twisting the frame.
To prevent splitting the new wood, always pre-drill pilot holes before inserting screws, especially near the edges of the plank. Choose a drill bit that matches the inner core diameter of the screw, excluding the threads, to ensure a secure grip without placing excessive outward pressure on the wood grain.
Perform a final safety and stability check once the installation is complete, especially for weight-bearing furniture like beds, chairs, or shelving units. Press down firmly on various areas of the replaced plank to verify that it does not wobble, creak, or deflect excessively. Ensure the entire furniture piece remains level and stable on the floor, and verify that nearby moving parts, like drawers or doors, still open and close without interference.
Frequently Asked Questions (FAQ)
Can I use a slightly thinner wood plank if the exact thickness is unavailable?
Avoid using a thinner wood plank for structural slots, dado grooves, or weight-bearing applications. A thin board will slide loosely in its tracks, leading to racking, joint instability, and a high risk of structural failure under load. For non-structural, cosmetic applications where the plank rests flat on support pins, you may use a slightly thinner board if you apply wooden shims or thick edge banding to bridge the physical gap and prevent the shelf from sliding around.
How do I measure a wood plank that is broken into multiple pieces?
To reconstruct the dimensions of a shattered or broken wood plank, carefully gather all the fragments and align them on a flat work surface like a jigsaw puzzle. Press the broken edges tightly together without forcing them, and use a steel tape measure to capture the overall outer boundaries of the reconstructed board. Always cross-reference these measurements by measuring the empty cavity or support rails of the furniture frame to confirm that your reconstructed length and width will fit perfectly.
Community discussion
Share your experience or ask a question. Comments are reviewed before publication.