
Replacing worn, unstable, or outdated table legs is a practical way to refresh your furniture, customize its height, and improve overall stability. Whether you are salvaging a beautiful solid wood slab or updating an existing dining table, the success of this project relies on careful preparation. The process involves evaluating the structural integrity of your table top, taking precise measurements, selecting compatible hardware, and executing a systematic installation. By following a structured approach, you can ensure your table remains stable, safe, and functional for daily use.
Assessing Your Table Top and Clearance
Before purchasing new metal table legs, you must thoroughly evaluate the underside of your table top. The material of the table top dictates how well it can hold fasteners. Solid wood tops, such as oak, teak, or walnut, offer excellent screw retention and structural strength, allowing for direct fastening. In contrast, engineered wood products like medium-density fiberboard (MDF) or particle board are softer and more prone to stripping or crumbling under tension. If your table top is made of engineered wood, you may need to use specialized fasteners, such as threaded inserts, to prevent the wood fibers from failing under load.
The thickness of the table top is another critical factor to verify. A table top should ideally be at least 20mm thick to provide enough depth for mounting screws to grip securely. If the top is too thin, standard screws may not have enough material to bite into, risking a weak connection or, worse, puncturing through the finished top surface. For thinner tops, you might need to reinforce the mounting areas by gluing and screwing a wooden cleat or backing board to the underside before attempting to attach new metal legs.
Products mentioned in this guide
![[SG In Stock]Metal Adjustable Table Leg 8-42CM Height Table Leg Sofa Leg Support Cabinet Foot Coffee Table Leg Bed Leg](https://img.lazcdn.com/g/p/e78187956e5e275d0c3db08ff12669b7.jpg_400x400q80.jpg_.webp)
Prices are valid at publication and may change. Please refer to the product page for the latest price.
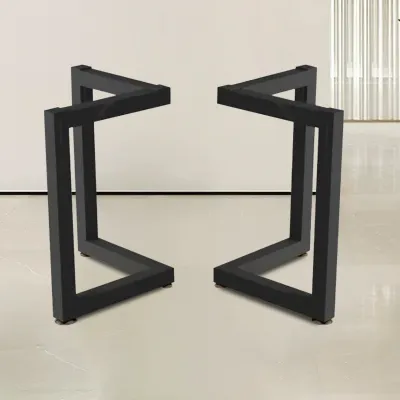
Weight capacity and structural load must also be calculated. Consider the weight of the table top itself plus the maximum load the table will bear during daily use. Dining tables must support heavy tableware, serving dishes, and the occasional leaning weight of guests, while work desks must support computer monitors, books, and office equipment. Ensure the metal legs you select are rated for the total anticipated weight. Look for legs with robust mounting plates and thick steel or iron construction to prevent flexing under heavy loads.
Finally, assess the spatial clearance and floor layout of your room. The placement of the legs affects both the visual balance of the furniture and the physical comfort of those using it. Measure the available floor space to ensure the new leg configuration does not obstruct walkways or nearby doors. Consider how chairs will slide under the table; legs that are set too far inward may restrict legroom, while legs set too close to the corners might interfere with chair placement. If you are choosing angled or splayed metal legs, account for the wider footprint at the base to avoid tripping hazards in tight dining areas.
Measuring Mounting Patterns and Leg Dimensions
Accurate measurements are the foundation of a successful table leg replacement. If you are planning to reuse existing mounting points, such as pre-installed threaded brass inserts, you must measure the mounting pattern with precision. Use a high-quality tape measure or a digital caliper to measure the center-to-center distance between the existing holes. Write down these dimensions and compare them carefully with the technical drawings of the replacement metal legs. Even a millimeter of deviation can prevent the bolts from aligning correctly, forcing you to drill new holes.

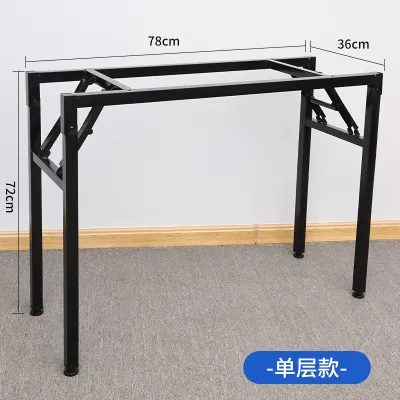
Determining the correct leg height requires a simple mathematical calculation. First, identify your desired final table height. For a standard dining table or writing desk, the comfortable finished height typically ranges between 73cm and 76cm. For a coffee table, the standard height is usually between 40cm and 45cm. Once you have established this target, measure the exact thickness of your table top. Subtract the table top thickness from your desired final height to find the precise height of the metal legs you need to purchase. For example, if you want a 75cm dining table and your wood slab is 4cm thick, you will need to source legs that are exactly 71cm tall.
Calculating the setback distance from the edges of the table top is crucial for both structural stability and aesthetics. If the legs are positioned too close to the outer edges, the table may look visually heavy, and the mounting hardware might be visible from standing angles. Conversely, if the legs are positioned too far toward the center, the table top may overhang excessively, creating a cantilever effect that makes the table prone to tipping when weight is applied to the edges. A standard guideline is to position the mounting plates between 5cm and 10cm inward from the table edges, adjusting slightly based on the overall length and width of the table.
Selecting Compatible Screws and Mounting Hardware
Choosing the right fasteners is just as important as selecting the legs themselves. The screws must be long enough to penetrate deeply into the wood to provide maximum holding power, yet short enough to guarantee they will not pierce through the finished top surface. To determine the safe screw length, measure the thickness of the table top and subtract 5mm. Then, add the thickness of the metal mounting plate on the leg. This total represents the maximum allowable screw length. Using screws that are even slightly too long can ruin a beautiful tabletop finish, while screws that are too short will strip out under pressure.
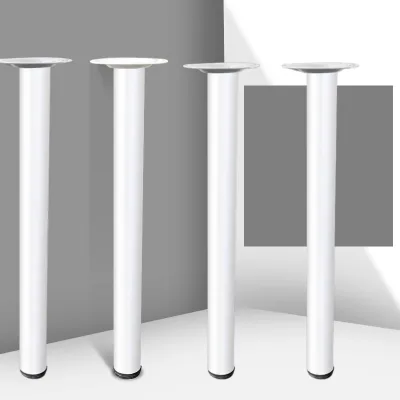
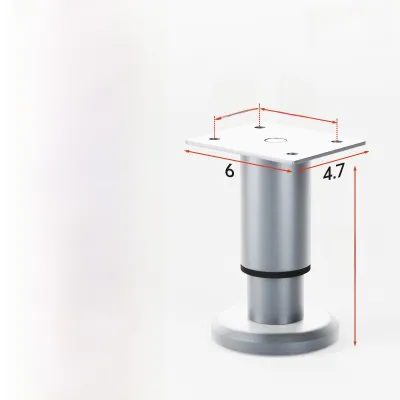
The type of mounting plate on the metal legs determines how they interface with the table top. Flat top plates are the most common, providing a broad surface area that distributes the weight and lateral forces evenly across the wood. Side-mount brackets or angled plates are alternative options that can create specific design aesthetics, but they require careful alignment to ensure the legs remain perpendicular to the floor. Ensure the mounting plates have multiple screw holes; a plate with four to six mounting points distributes tension much better than one with only two.
You must also match the screw thread type and diameter to your specific installation method. If you are screwing directly into solid wood, use high-quality wood screws with deep, aggressive threads that bite firmly into the wood fibers. If your table top features pre-installed metal threaded inserts, you must use matching machine screws or bolts, typically M6 or M8 threads. Verify that the screw heads are larger than the holes in the metal mounting plates, or use flat washers to prevent the screw heads from slipping through the bracket holes under tension.
Step-by-Step Installation Process
To begin the physical installation, prepare a clean, spacious work area. Lay down a soft protective barrier, such as a thick moving blanket, clean cardboard, or foam padding, on a flat floor. Carefully lift the table top and place it face down on the protective surface. This prevents the finished top from getting scratched, dented, or dirty while you work on the underside. If the table top is exceptionally heavy or awkward, enlist the help of a second person to lift and flip it safely, avoiding personal injury or damage to the wood.
Next, remove any existing legs, brackets, or old hardware. Use the appropriate screwdriver or wrench to back out old screws carefully. Once the old hardware is removed, inspect the mounting areas. Clean away any accumulated dust, old adhesive residue, or loose wood fibers using a dry cloth or a vacuum cleaner. If the previous installation left rough patches or raised wood fibers around the old screw holes, gently sand the area flat with fine-grit sandpaper to ensure the new metal mounting plates sit completely flush against the wood.
With the underside clean, use a tape measure, a straightedge, and a carpenter’s square to mark the exact placement for the new metal legs. Measure from the edges of the table top to establish your calculated setback distance. Mark the positions of the mounting plate corners with a pencil. To ensure the legs are aligned and square with each other, measure diagonally from the outer corner of one leg plate to the outer corner of the opposite leg plate. The two diagonal measurements must be identical; if they are not, adjust the positions until the layout is symmetrical.
Once the alignment is verified, mark the center of each screw hole on the wood. If you are installing screws into solid wood or dense engineered wood, pre-drilling pilot holes is a mandatory step to prevent the wood from splitting. Select a drill bit that matches the inner shank diameter of your screws, excluding the threads. Wrap a piece of colored painter’s tape around the drill bit at the exact depth of the screw penetration to act as a visual depth stop. Carefully drill straight down into each marked spot, stopping immediately when the tape reaches the wood surface.
Position the metal legs over the pre-drilled pilot holes. Insert the screws by hand first to ensure they are threading correctly. Use a manual screwdriver or a power drill set to a low-torque clutch setting to drive the screws into the wood. Tighten the screws in a cross-pattern—similar to tightening lug nuts on a car wheel—to distribute the clamping force evenly across the mounting plate. Avoid over-tightening the screws, as this can strip the wood threads or snap the screw heads, especially when working with softer woods or power tools.
Testing Stability and Final Adjustments
Once all the screws are securely tightened, it is time to flip the table back onto its feet. This step requires care; do not pivot the table on two legs, as the lateral force can bend the metal brackets or tear the screws out of the wood. Instead, lift the entire table completely off the floor, rotate it upright, and set all four legs down simultaneously. If the table is large or heavy, always perform this lift with assistance to ensure safety.
With the table standing on its new legs, place it in its final location and conduct a thorough stability test. Apply gentle downward pressure on various areas of the table top, particularly near the corners and edges. Shake the table gently from side to side and front to back to check for any lateral movement, flexing, or structural instability. The table should feel solid and rigid. If you notice any flexing, inspect the metal legs to see if the metal itself is bending or if the movement is occurring at the connection point between the plate and the wood.
If the table wobbles, the cause is often an uneven floor rather than faulty installation. Most high-quality metal table legs come equipped with adjustable leveling feet or threaded plastic glides at the bottom. Rotate these adjustable feet clockwise or counterclockwise to extend or retract them until all four legs make firm, even contact with the floor. Use a spirit level placed on the table top to ensure the surface is completely level in both directions.
Finally, crawl underneath the table one last time to perform a post-installation inspection. Check every single screw to ensure it remains fully tightened and has not backed out during the flipping process. The mounting plates must sit completely flush against the underside of the table top with no visible gaps. If you detect any loose screws, tighten them gently with a hand screwdriver. Regular checks every few months are recommended, as wood naturally expands and contracts with seasonal humidity changes, which can occasionally loosen fasteners over time.
Frequently Asked Questions (FAQ)
Can I install metal legs on a glass or stone table top?
Standard wood screws cannot penetrate glass, marble, granite, or quartz. Attempting to drill into these materials without specialized equipment will cause them to shatter or crack. For glass tables, metal legs are typically attached using specialized structural adhesives that bond metal mounting disks directly to the glass surface. For stone tables, threaded metal inserts must be professionally drilled into the underside of the slab using diamond-tipped core bits and secured with epoxy. Because of the high risk of cracking expensive materials, it is highly recommended to consult a professional glazier or stone fabricator to handle the drilling and mounting process.
How do I prevent the metal legs from scratching my floor?
Metal table legs can easily scratch, gouge, or scuff flooring materials like hardwood, laminate, vinyl, or tile. Before installing the legs, check the bottom of each leg for pre-installed protective glides or threaded inserts. If the legs have bare metal bottoms, you must add protection. For hard surfaces like wood or vinyl, heavy-duty adhesive felt pads are highly effective at preventing scratches and allowing the table to slide quietly. For tiled or uneven floors, adjustable leveling feet with non-marking rubber or plastic bases are the ideal choice, as they provide grip, prevent sliding, and protect the grout lines from damage.
What should I do if the new mounting holes overlap with the old ones?
If the mounting holes of your new metal legs align too closely with the existing, stripped holes in your table top, the new screws will not find enough solid wood to grip. To resolve this, you must repair the damaged wood. Clean out the old holes, pack them tightly with high-quality wood glue, and drive in tight-fitting wooden dowels or toothpicks. Once the glue has cured completely, cut the dowels flush with the table surface using a flush-cut saw and sand the area smooth. You can then safely drill new pilot holes directly into the repaired wood. Alternatively, if the design allows, you can shift the leg placement slightly to anchor into fresh, undamaged wood, or use a larger mounting plate to bypass the old holes entirely.
Community discussion
Share your experience or ask a question. Comments are reviewed before publication.