
Replacing a worn, torn, or sagging dust cover on the underside of your furniture is a highly effective way to restore its structural integrity and protect its interior components. This fabric barrier, often referred to as cambric, keeps dust, pet dander, and pests out of the inner springs and webbing while preventing loose stuffing from falling onto your floor. By taking precise measurements of the furniture base, selecting a breathable and durable replacement fabric, and securing it with the correct fastening techniques, you can achieve a clean, professional finish that extends the lifespan of your chairs, sofas, or cabinets.
Tools and Materials You Will Need
Gathering the correct tools before starting ensures a smooth workflow and prevents frame damage. You will need basic hand tools to remove the existing fabric and fasteners, including a dedicated upholstery staple remover or a sturdy flathead screwdriver, along with a pair of needle-nose pliers to extract stubborn or broken staples. For measuring and cutting, keep a flexible measuring tape, a fabric marker or tailor’s chalk, and a pair of sharp fabric shears on hand to ensure clean, fray-free edges.
A manual, electric, or pneumatic staple gun is the primary tool for securing the new fabric. You should select staples with a compatible leg length—typically between 6mm and 10mm—and a wide crown to hold the fabric securely without tearing through it. Wear work gloves to protect your hands from sharp, rusted staples and safety glasses to shield your eyes from flying debris. If you are working inside a typical apartment or home, laying down a clean drop cloth or a large sheet of cardboard will protect your tiled, vinyl, or hardwood floors from scratches.
Products mentioned in this guide

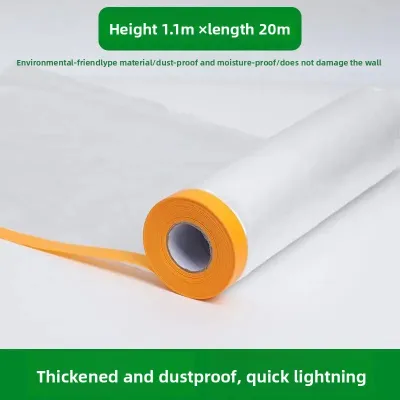
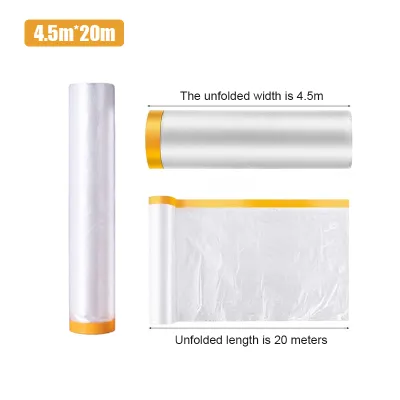
![[2-3 Days Delivery] 4.5m x 20m Plastic Dust Cover Protective Plastic Sheet Disposable Furniture Dustproof Cover Protective Cover Plastic Cover Plastic Film for Home Improvement CNY Gift Present](https://img.lazcdn.com/g/p/37fceab8fc43d4b3b58593d55aae9bcb.jpg_400x400q80.jpg_.webp)
![[SG SELLER]Plastic Dust Cover Dust Prevention Renovation Drop Sheet Protective Plastic Film Furniture Dustproof Cover Paintproof Waterproof Cover Sheet Rolls](https://img.lazcdn.com/g/p/d2c82f6cde5eed649a28d487364fc7d2.png_400x400q80.png_.webp)
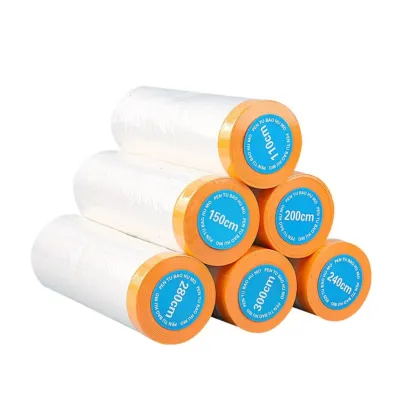
Prices are valid at publication and may change. Please refer to the product page for the latest price.
How to Measure the Furniture Base Accurately
Precise measurements of the furniture frame prevent the replacement dust cover from sagging or pulling too tight. Start by measuring the maximum length and width of the wooden base from the outermost edges. Add a standard folding allowance of 5 to 10 centimeters to all sides; this extra fabric provides a margin for a clean, folded seam and allows you to grip and pull the material taut.

Next, inspect the base for any irregular shapes, protruding legs, corner brackets, or center support posts. Unscrew removable legs before measuring; for integrated legs, plan for precise cutouts or diagonal slits in the fabric. Take note of any cross-braces or recessed areas that might require a slightly different tension to prevent the fabric from flapping or rubbing against internal springs.
Verify the physical condition of the wooden frame before purchasing material, checking for soft spots, cracks, or extensive old staple holes. If the wood is split or crumbling, it will not hold new staples securely, and you will need to address these structural issues before proceeding with the measurement and installation.
Selecting the Right Dust Cover Material and Fasteners
Choosing the replacement fabric depends on the furniture type, usage, and environment. Non-woven polypropylene is highly breathable, lightweight, and resistant to moisture and tearing. Traditional cambric offers a premium look, while heavy-duty canvas provides extra protection against wear. Ensure the material you select is breathable to prevent moisture buildup and mold growth, especially in humid climates.
Match the staple size to the fabric weight and wood density. Short staples pull out under tension, while overly long staples may bend in hard woods. Check the thickness of the frame to ensure the staples will not pierce completely through the wood and damage the visible exterior upholstery or cushioning on the other side.
For delicate or antique frames where staples might split the wood, consider alternative attachment methods. Upholstery tacks offer a classic, decorative look and can be tapped in gently with a lightweight mallet. Alternatively, heavy-duty fabric adhesives or hook-and-loop tape can be used for lighter applications, though you should verify the adhesive’s compatibility with both the fabric and the wood finish to ensure a lasting bond.
Step-by-Step Installation Process
Replacing a dust cover requires patience and systematic steps to achieve a sag-free result. The workflow consists of three phases: removing the old material, preparing the frame, and securing the new fabric. To prevent any accidental damage to the visible parts of your furniture, always work on a clean, flat, and elevated surface, such as a large workbench or a protected floor area.
Removing the Old Dust Cover and Fasteners
Flip the furniture upside down, ensuring the upper cushions are protected from dirty surfaces. Pry up old staples slowly with a staple remover or flathead screwdriver to avoid gouging the wood. If a staple breaks, use needle-nose pliers to grip the remaining metal leg and pull it straight out of the wood.
Once the old fabric is removed, clean the exposed frame thoroughly. Vacuum away accumulated dust, loose threads, and wood shavings from inside the base. Wipe down the wooden rails with a dry or slightly damp microfiber cloth to ensure a clean surface for the new installation.
Inspect the exposed internal springs, webbing, and corner blocks before proceeding. Check for loose joints, sagging webbing, or broken springs that may require repair or reinforcement. Addressing these internal structural issues now is highly recommended, as they will be inaccessible once the new dust cover is permanently secured.
Cutting and Positioning the New Fabric
Lay the replacement fabric flat on a clean, wrinkle-free surface. If the furniture is light, place it upside down on the fabric to trace the perimeter, adding the folding allowance. For larger or heavier pieces, transfer your recorded measurements directly onto the fabric using a straightedge.
Cut the fabric with sharp shears to prevent the edges from fraying. If your fabric has a distinct grain or pattern, align it parallel to the front rail of the furniture to maintain a professional appearance.
Center the cut fabric over the base so the folding allowance overlaps evenly. To keep the fabric from shifting while you work, temporarily secure the corners using painter’s tape, masking tape, or pushpins. This temporary alignment allows you to adjust the tension evenly before committing to permanent fasteners.
Securing the Dust Cover to the Frame
Follow a specific fastening sequence to achieve a tight, wrinkle-free finish. Fold the raw edge under by 1 to 2 centimeters to create a clean seam, then staple the center of one side. Pull the fabric taut on the opposite side, fold the edge, and staple the center.
Repeat this centering process for the remaining two sides, creating an even, cross-shaped tension across the fabric. Work outward from the centers toward the corners, spacing staples 2 to 5 centimeters apart. Keep the fabric smooth and maintain consistent tension as you progress to prevent puckering or diagonal wrinkles.
Fold excess fabric neatly at the corners to eliminate bulk. A diagonal fold or a neat “hospital corner” fold works best, ensuring the fabric lies completely flat against the frame. Secure the corner with closely spaced staples, ensuring no sharp metal or loose fabric protrudes.
Post-Installation Checks and Maintenance
Inspect the entire underside to ensure quality and safety. Run your hand carefully along the perimeter of the frame to check for any loose, bent, or partially driven staples. If you find any protruding staples, tap them flush with a small hammer or remove them entirely and replace them.
Reattach any removed legs securely, ensuring the furniture sits level without wobbling. Ensure that the new dust cover fabric does not interfere with the leg attachments or block any mounting holes.
Incorporate the dust cover into your routine household cleaning. Gently vacuum the underside with a soft brush attachment to remove dust without snagging. Periodically inspect the cover for signs of sagging, moisture damage, or pest activity, especially if the furniture is placed in a humid environment or near an exterior wall.
Frequently Asked Questions (FAQ)
Can I install a dust cover without a staple gun?
Yes, you can install a replacement dust cover using alternative fastening methods if you do not own a staple gun. Upholstery tacks are a traditional and highly durable option; they can be tapped into the wooden frame with a small hammer, though they require more time and precision to install evenly. Heavy-duty fabric adhesives or specialized upholstery glue can also be used to bond the fabric directly to the wood, which is ideal for delicate or thin frames that might split under the impact of staples. However, adhesives may degrade over time in humid conditions, and they make future removal and repairs significantly more difficult.
What should I do if the wooden frame is too damaged to hold staples?
If the wooden frame of your furniture is soft, cracked, or riddled with old staple holes, it will not provide the grip necessary to hold new fasteners securely. For minor damage, you can apply a high-quality wood filler to the affected areas, allowing it to cure completely and sanding it smooth before attempting to drive new staples. If the wood is severely split or rotting, the best solution is to attach a thin, fresh wooden batten or cleat along the inside of the damaged rail using wood glue and screws. This provides a clean, solid surface for securing the new dust cover. If the structural damage is widespread or affects the main load-bearing joints of the furniture, consult a professional furniture restorer to ensure the piece remains safe to use.
Community discussion
Share your experience or ask a question. Comments are reviewed before publication.