
Protecting your furniture from spills, scratches, and daily wear is a practical way to extend its lifespan, especially in humid climates like Singapore where moisture and heat can easily damage exposed wood or veneer. Using a high-quality plastic sheet roll allows you to create a custom-fit barrier for dining tables, study desks, and shelving units. To achieve a flawless, professional-looking fit, you must follow a systematic process: select the right cutting tools, measure the surface at multiple points, score and cut the material with controlled precision, and apply it carefully to eliminate trapped air bubbles.
Essential Tools for Measuring and Cutting Plastic Sheets
To prevent jagged edges and material waste, gather these essential tools before unrolling your plastic sheet roll. A flexible measuring tape is necessary for capturing the initial dimensions of your furniture, while a rigid metal straight edge or heavy-duty steel ruler is vital for guiding your blade during the cutting process. Avoid plastic or wooden rulers, as a sharp utility knife can easily shave off their edges, leading to crooked cuts.
For the cutting instrument, a brand-new, sharp utility knife or a specialized plastic scoring tool is mandatory. Dull blades are the primary cause of tearing, jagged edges, and shattering in rigid plastics. You will also need a self-healing cutting mat to protect your floors or worktables from deep cuts. Masking tape or painter’s tape is highly useful for securing the plastic sheet temporarily to prevent shifting.
Products mentioned in this guide
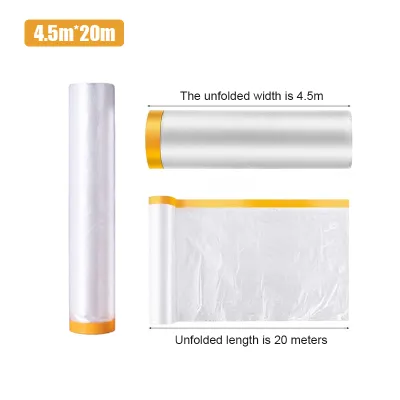
![[SG local] Plastic Sheet / Plastic cover for Dust Prevention HIP renovation drop sheet for painting/ plastic cloth for renovation / drop sheet / plastic sheet for painting / dust cover / plastic sheet roll for dust prevention](https://img.lazcdn.com/g/p/d04ea0a31232fb487a2017f8d1ea476f.jpg_400x400q80.jpg_.webp)
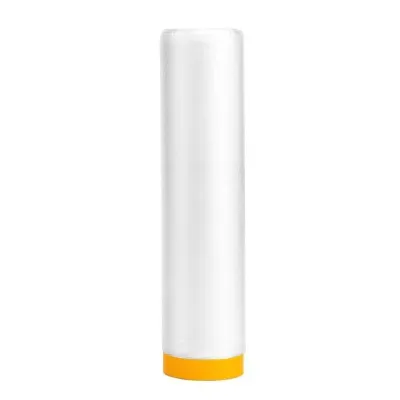
![[SG SELLER]Plastic Dust Cover Dust Prevention Renovation Drop Sheet Protective Plastic Film Furniture Dustproof Cover Paintproof Waterproof Cover Sheet Rolls](https://img.lazcdn.com/g/p/d2c82f6cde5eed649a28d487364fc7d2.png_400x400q80.png_.webp)
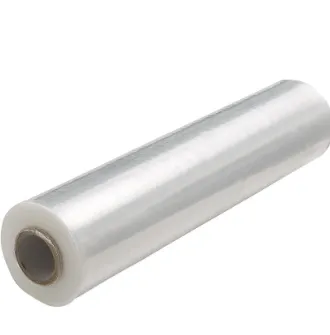
![[SG Ready Stock]Masking Film with Tape 240cm/300cm/400cm Painting Protection Covering for Plastic Drop Cloth Sheet Spraying Dust Cover Furniture Dustproof Cover](https://img.lazcdn.com/g/p/cf8629ee8572f06e3fbb5012fda44aa3.png_400x400q80.png_.webp)
Prices are valid at publication and may change. Please refer to the product page for the latest price.
To mark your cutting lines, use a grease pencil or a non-permanent, fine-tip marker that can be easily wiped away with a damp cloth afterward. Finally, keep a soft microfiber cloth and a mild surface cleaner nearby to prepare the furniture before application.
How to Measure Furniture for a Seamless Fit
Before you make a single cut on your plastic sheet roll, you must obtain precise measurements of the flat surface. Do not rely on the manufacturer’s stated dimensions of your furniture, as slight warping, edge rounding, or manufacturing tolerances can result in a cover that is too small or misaligned.

Measuring Flat Surfaces
To measure accurately, stretch your flexible measuring tape across the length and width of the surface at three different points: the left edge, the center, and the right edge. Record each measurement carefully. If there are any discrepancies, always use the largest dimension as your baseline. It is much easier to trim away a few millimeters of excess plastic during the final fitting than to stretch a piece that has been cut too short. For round or oval tables, measure the widest diameter across the center from multiple angles to find the true center point before drafting your cut.
Accounting for Edges and Overhangs
How you handle the edges of your furniture depends on the aesthetic and level of protection you want to achieve. You must decide whether the plastic sheet will sit perfectly flush with the flat top surface or wrap slightly over the sides to protect the edges from impact and moisture.
If you prefer a flush fit, measure exactly to the point where the flat surface begins to curve downward. If you choose a wrapped edge or a slight overhang to protect the table’s lip, you must add an extra allowance to your base measurements. Typically, adding 5 to 10 millimeters to each side is sufficient for a subtle wrap.
Before deciding to wrap or cover any wooden furniture, check the manufacturer’s care instructions. In high-humidity environments, trapping moisture beneath a non-breathable plastic sheet can cloud the wood’s finish or encourage mold growth. Ensure the furniture is completely dry and the finish is fully cured before proceeding.
Techniques for Scoring and Cutting the Plastic Roll
Cutting a plastic sheet roll requires a steady hand and a methodical approach to ensure clean lines and prevent splitting.
Marking and Scoring the Plastic
Once you have your measurements, clear a large, flat workspace. Unroll the plastic sheet roll onto your self-healing cutting mat. Because plastic rolls retain memory and tend to curl upward, secure all four corners firmly to the mat using masking tape or painter’s tape. This keeps the material flat and prevents it from shifting while you work.
Using your grease pencil or non-permanent marker, mark your measured dimensions directly onto the plastic sheet. Place marks at several points along the line to ensure absolute straightness. Next, align your rigid metal straight edge with these marks. Press down firmly on the metal ruler with your non-dominant hand to lock it in place.
To score the plastic, hold your utility knife or scoring tool at a 45-degree angle against the metal straight edge. Draw the blade along the ruler using moderate, even pressure to create a shallow guide groove. Do not try to cut through the entire thickness of the sheet on this first pass; the goal is simply to establish a straight, clean track for subsequent cuts.
Making Clean, Straight Cuts
Achieving a smooth, factory-grade edge requires patience and the correct physical technique. Instead of attempting to slice through the plastic sheet roll in a single heavy stroke, make multiple light, controlled passes with your utility knife along the scored guide groove. Each pass will deepen the cut without tearing the material or causing the blade to slip.
For thicker, more rigid plastic sheets, use the “score and snap” method. Once you have scored a deep groove (approximately halfway through the thickness of the material), carefully slide the sheet so that the scored line aligns perfectly with the sharp edge of a sturdy worktable. Secure the sheet on the table side, then apply quick, even downward pressure on the overhanging section. The plastic will snap cleanly along the scored line.
Always prioritize safety during this step. Keep your non-dominant hand well away from the path of the blade, cut in a direction moving away from your body, and wear protective gloves to prevent accidental cuts or scrapes from sharp plastic edges.
Applying the Sheet Without Trapping Air Bubbles
Before laying down your custom-cut plastic sheet, prepare the furniture surface. Use a mild, surface-safe cleaner and a microfiber cloth to remove all traces of dust, lint, grease, and fingerprints. Any debris left on the surface will create unsightly bumps and prevent the plastic from adhering smoothly. Let the surface dry completely.
If you are using an adhesive-backed plastic sheet, employ the “hinge method” to prevent misalignment. Peel back only a small strip (about 5 centimeters) of the protective backing from one end. Align this exposed adhesive edge perfectly with the starting edge of your furniture. Once aligned, press it down firmly.
For non-adhesive plastic sheets, position the entire cut piece over the furniture until it sits exactly where you want it, then use a few pieces of masking tape on the corners to hold it temporarily in place.
To apply the rest of the sheet without trapping air bubbles, use a soft squeegee or a flat edge wrapped in a clean microfiber cloth. Starting from the center of the secured edge, swipe outward toward the sides in a fan-like motion. Slowly peel away more of the backing paper (or release the temporary tape) with one hand while smoothing the plastic with the squeegee in your other hand. This systematic, center-to-edge movement pushes air out before it can become trapped.
Trimming and Finishing the Edges for a Professional Look
Even with meticulous planning, you may find small areas of excess plastic along the edges after application. To clean these up, use a fresh, razor-sharp blade in your utility knife. Guide the blade slowly along the edge of the furniture, using the side of the table or shelf as a natural guide to trim the excess plastic completely flush.
If you opted for wrapped edges and need to mold the plastic over a curved lip, you can use a household hairdryer. Set the hairdryer to a low, warm setting and hold it about 15 centimeters away from the plastic. Gently heat the edge for a few seconds to soften the material, making it pliable enough to bend smoothly over the curve. Always test this heating technique on a scrap piece of your plastic sheet roll first. Excess heat can melt, warp, or discolor the plastic, and can also damage sensitive furniture glues or finishes.
Finally, run your hand carefully along the cut edges. If you notice any sharp corners or rough spots, use a fine-grit sandpaper or a small hand file to lightly smooth them down. This prevents painful scratches when people brush past the furniture and keeps the edges from catching on clothing.
Frequently Asked Questions (FAQ)
How do I remove air bubbles trapped under the plastic sheet?
If you discover a trapped air bubble after application, do not try to peel the entire sheet back up, as this can stretch the plastic and ruin the fit. Instead, take a very fine sewing needle and gently prick the center of the bubble. Use your microfiber cloth or squeegee to press the trapped air firmly toward the tiny puncture hole. The air will escape, and the plastic will flatten out smoothly against the surface, leaving the microscopic hole virtually invisible.
Can I use a plastic sheet roll on glass tables?
Yes, a plastic sheet roll can be used on glass tables to protect them from scratches and impact. However, because glass is extremely smooth, non-adhesive plastic sheets tend to slide around easily. To prevent this, place small pieces of clear, double-sided tape at the extreme corners of the table. Alternatively, look for a static-cling plastic sheet roll designed specifically for glass surfaces, which uses static electricity to hold itself firmly in place without any sticky adhesive.
Community discussion
Share your experience or ask a question. Comments are reviewed before publication.