
Finding the perfect knob handle for your cabinets requires balancing visual scale with precise physical measurements. To choose the correct size, you must measure the distance between the center points of any existing screw holes, calculate the necessary projection for comfortable finger clearance, and scale the handle’s overall length to match the proportions of your cabinet doors or drawers. Getting these dimensions right ensures your new hardware functions smoothly without hitting adjacent walls or blocking nearby drawers in compact layouts.
Whether you are updating a kitchen in a modern apartment or refreshing built-in wardrobes, hardware selection is a subtle detail that defines both the utility and style of your space. Even a minor measurement error of a few millimeters can lead to misaligned installations, visible drill holes, or handles that catch on clothing. By taking a systematic approach to measuring and sizing, you can confidently select hardware that enhances your cabinetry and stands up to daily use.
Understanding Knob Handle Dimensions and Cabinet Fit
Before purchasing any hardware, it is essential to understand the core dimensions that dictate how a knob handle fits onto a cabinet panel. The most critical dimension for replacement projects is the hole centre distance, often abbreviated as C-C or center-to-center. This measurement represents the exact distance between the centers of the two screw holes drilled into the cabinet door or drawer front. If you are replacing existing handles, your new hardware must match this distance perfectly to avoid the need for patching and redrilling.
Products mentioned in this guide
![[SG STOCK] VINOGA Gold Furniture Cupboard Handle Brass Cabinet Handle Solid Golden Drawer Pulls Kitchen Cupboard Hardware|Furniture Knobs and T Bar Handle](https://img.lazcdn.com/g/p/53624969c185093ef1c0ba2a6159d2ed.jpg_400x400q80.jpg_.webp)
![[SG STOCK] VINOGA Brass Cabinet Handle and Knobs Furniture Pulls Wardrobe Kitchen Cabinet Handles and Knobs Cabinet Cupboard Hardware|Furniture Knobs and Handle](https://img.lazcdn.com/g/p/7d11d2833fa4164a2cea71a24a1daeb3.jpg_400x400q80.jpg_.webp)
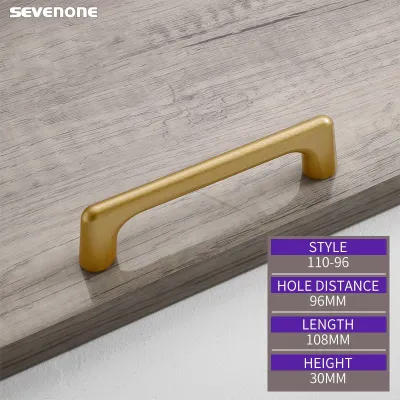
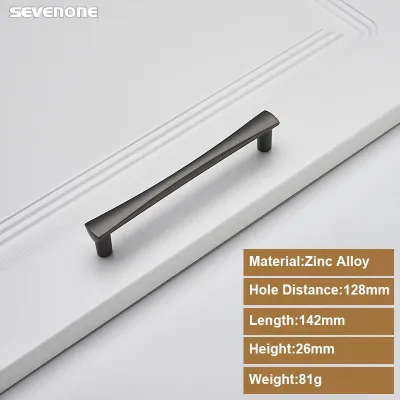
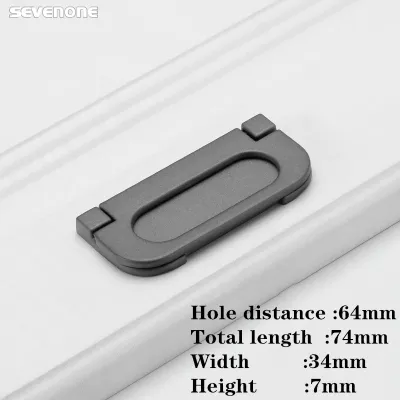
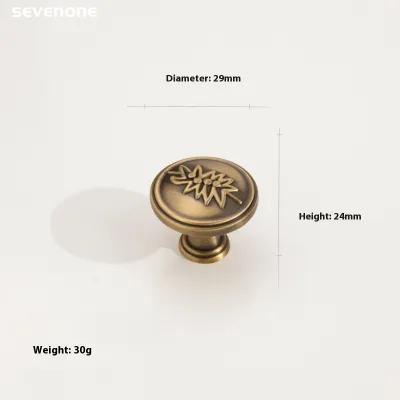

Prices are valid at publication and may change. Please refer to the product page for the latest price.
Another vital dimension is the projection, which is the distance the handle extends outward from the face of the cabinet door. A handle with a shallow projection sits close to the panel, offering a sleek, minimalist appearance that works well in tight spaces. However, if the projection is too shallow, it can make the handle difficult to grip, particularly for individuals with larger hands or limited hand mobility. Conversely, a deep projection provides ample space for a comfortable grip but increases the risk of the handle colliding with adjacent walls or catching on passing clothing.
Overall length or diameter refers to the total footprint of the hardware. For a traditional single-hole knob, this is typically the diameter of the knob face. For a pull handle, the overall length is usually greater than the hole centre distance because the ends of the handle extend past the screw posts. Understanding the relationship between these dimensions helps you plan the visual balance of your cabinetry, ensuring that the hardware neither looks lost on a large panel nor overwhelms a small drawer.
It is also important to distinguish between single-hole knobs and multi-hole pull handles. Single-hole knobs are highly versatile and require only a single screw, making them easier to align and install. Multi-hole pull handles, on the other hand, offer a more secure grip and distribute pulling forces across two points, which is highly beneficial for heavy drawers or pantry doors. Deciding between these two styles early in your planning process will determine the measurement steps you need to follow.
Step-by-Step Guide to Measuring Existing Cabinet Holes
To measure existing cabinet holes accurately, you must use the right tools and follow a precise technique. A high-quality steel tape measure is suitable for most projects, but a digital caliper offers the highest level of precision, especially when dealing with metric hardware where a single millimeter matters. Avoid using flexible sewing tapes or plastic rulers, as these tools can stretch or warp, leading to inaccurate readings that could ruin your installation.

When measuring the hole centre distance, always measure from the exact center of the first hole to the exact center of the second hole. A common mistake is measuring from the outer edge of one hole to the outer edge of the next, or measuring the existing handle itself. To get an accurate reading, open the cabinet door or drawer and measure the holes from the backside of the panel, where the drill entry points are cleanest and free from any decorative hardware bases that might obscure your view.
Unit conversion is another area where errors frequently occur. Most modern cabinet hardware manufactured globally conforms to metric standards, typically utilizing the 32mm system, which results in standard sizes like 96mm, 128mm, and 160mm. However, older cabinets or hardware sourced from regions using imperial measurements may use sizes like 3 inches (76.2mm) or 4 inches (101.6mm). Because a 128mm pull is very close to but not exactly equal to a 5-inch pull (127mm), you must verify the manufacturer’s specifications in millimeters to ensure a perfect fit.
If you discover that your existing holes do not match any standard replacement sizes, you have a few practical options. One solution is to use a decorative backplate, which sits between the new handle and the cabinet face, physically covering the old holes while allowing you to mount a handle with a different spacing. Alternatively, you can fill the old holes with a high-quality wood filler or epoxy putty, sand the surface completely smooth, apply a matching paint or laminate touch-up, and then drill new holes at the correct spacing.
Choosing the Right Size for New Cabinet Installations
When installing hardware on brand-new cabinets without pre-drilled holes, you have the freedom to choose any size, but you must guide your choice using visual proportion and ergonomic principles. A reliable design guideline is the “rule of thirds,” which suggests that the overall length of a pull handle should be approximately one-third of the total width of a drawer front or one-third of the height of a cabinet door. This ratio creates a balanced, cohesive look that prevents the hardware from appearing disproportionately small or excessively bulky.
Different cabinet types and locations within your home demand different handle sizes and configurations. Wall cabinets, which sit at eye level, are highly visible and are typically opened with less physical effort, making them ideal candidates for smaller knobs or short, elegant pulls. Base cabinets and heavy pantry doors require more substantial hardware that allows for a full-hand grip to overcome the resistance of soft-close hinges or heavy magnetic latches. Wide drawers, particularly those designed to hold heavy cookware, benefit from longer pulls that allow you to use both hands, or two smaller handles spaced evenly across the drawer face.
To help you determine the appropriate handle length ranges based on your specific panel dimensions, consider the following conditional sizing matrix:
- For small drawers or doors under 300mm wide, select single-hole knobs or short pulls with a hole centre distance of 96mm or less.
- For medium drawers or doors between 300mm and 600mm wide, opt for pulls with a hole centre distance between 128mm and 192mm.
- For large drawers or doors over 600mm wide, choose pulls with a hole centre distance of 224mm or larger, or install two smaller handles spaced at the outer thirds of the panel.
Before committing to batch drilling your new cabinets, always conduct visual and ergonomic tests. You can easily create cardboard templates cut to the exact dimensions of your prospective handles and tape them to the cabinet faces. Step back to evaluate how the scale looks from different angles in the room, and mimic the motion of opening the doors to ensure the placement feels natural. If possible, purchase a single physical sample of your preferred handle to test the grip comfort and material finish in your actual living space before ordering the full set.
Checking Clearance, Projection, and Interference Risks
Beyond aesthetics, you must evaluate how the physical projection and profile of your chosen handle will interact with the surrounding environment. Adequate finger clearance—the space between the underside of the handle and the cabinet face—is essential for comfortable daily use. In warm, humid climates like Singapore, where hands may frequently be damp during cooking or cleaning, a handle with insufficient clearance can lead to slips, frustration, and unnecessary strain on the fingers.
Interference risks are particularly high in compact kitchen layouts, L-shaped counter configurations, or tight hallways. If a drawer near a corner has a handle with a high projection, it may physically block the adjacent cabinet door from opening fully, or scratch the neighboring panel when pulled out. Before finalizing your hardware choice, measure the distance between the cabinet face and any nearby walls, door frames, or appliances to ensure that the handle will not strike these surfaces when the cabinet door is swung open to its maximum angle.
Household safety and usage habits should also influence your handle selection. If you have young children, active pets, or elderly family members living in the home, avoid handles with sharp, protruding edges or wings that extend past the screw posts, as these can easily catch on clothing or cause painful bumps. For high-traffic areas, rounded knobs, flush pulls, or handles with curved profiles are much safer choices that minimize the risk of accidental snags and injuries.
To prevent post-installation operational blockages, perform a quick physical clearance checklist before drilling:
- Do adjacent corner doors and drawers open to at least 90 degrees without their handles colliding?
- Is there at least 25mm of clearance between the handle and any adjacent walls or door frames when the cabinet is fully open?
- Does the handle clear the control panels or doors of integrated appliances, such as ovens or dishwashers, during operation?
Verifying Hardware Compatibility Before Installation
Before you begin the final mounting process, it is crucial to verify that your mounting hardware is fully compatible with your cabinet panels. Start by cross-checking the length of the screws provided with your new handles against the actual thickness of your cabinet doors or drawer fronts. Standard cabinet doors are typically 18mm to 20mm thick, and the standard 25mm screws included in most hardware packages are designed for this thickness. However, drawer fronts often feature a double-panel construction that can exceed 35mm, requiring much longer screws to secure the handle properly.
If you find that the provided screws are too short or too long, you must make the necessary adjustments before attempting installation. For thick drawer panels, you can purchase longer breakaway screws, which feature threaded segments that can be easily cut to the exact length you need using pliers. If the screws are slightly too long and bottom out inside the handle before it sits flush against the cabinet face, you can add small metal washers to the backside of the panel to take up the slack and ensure a tight, wobble-free fit.
Always perform a trial installation on a single, inconspicuous cabinet door first. This test run allows you to verify that the screw threads smoothly into the handle without binding, that the handle sits perfectly square and flush against the panel, and that your drilling template is accurate. It is far better to identify a minor alignment or screw length issue on one hidden door than to repeat the same mistake across dozens of highly visible panels.
During the installation process, pay close attention to potential warning signs that indicate you should stop and re-evaluate. If you experience extreme resistance while turning the screw, stop immediately to avoid stripping the threads inside the handle or snapping the screw head off. If the pre-drilled holes are slightly misaligned, forcing the screw can cause the cabinet laminate or wood veneer to crack and split around the hole. If you encounter any of these issues, or if you feel unsure about drilling into expensive custom cabinetry, consult a professional carpenter to ensure a flawless, damage-free installation.
Frequently Asked Questions (FAQ)
Can I use a single-hole knob on a cabinet door drilled for a pull handle?
Yes, you can transition from a two-hole pull handle to a single-hole knob, but you will need to address the exposed second hole. The most seamless solution is to install a decorative backplate (also known as an escutcheon plate) behind the new knob. The backplate mounts using the single knob screw but is long enough to physically cover the second pre-drilled hole. Alternatively, you can fill the unused hole with a matching wood putty or acrylic filler, sand it flush, and touch up the paint or laminate finish, though this requires careful color matching to remain invisible.
What is the standard hole centre distance for cabinet handles?
While there is no single universal standard, the vast majority of modern cabinet hardware follows the metric system in increments of 32mm. The most common standard hole centre distances are 96mm, 128mm, and 160mm. For older or imported furniture, you may also encounter imperial standards such as 3 inches (76.2mm) or 4 inches (101.6mm). Because variations exist across different brands and manufacturing regions, you should never assume a standard size; always physically measure your existing holes or check the manufacturer’s technical drawing before purchasing new hardware.
Community discussion
Share your experience or ask a question. Comments are reviewed before publication.