
To find the right replacement table leg size and mounting type, you must measure the overall table height, individual leg length, and seating clearance, then identify the specific mounting mechanism—such as top plates, hanger bolts, or corner brackets—and measure its precise dimensions. Getting these measurements right ensures your table remains level, structurally stable, and comfortable to use, while preventing costly return shipping and installation headaches.
Whether you are restoring a cherished solid teak dining table in a Singapore apartment, upgrading a study desk to match a new interior design theme, or repairing a wobbling piece of furniture, selecting compatible parts requires precise preparation. Taking time to map out your table’s dimensions and hardware specifications before shopping ensures a seamless installation and long-term durability.
Tools and Preparation for Measuring Table Legs
Before taking any measurements, gathering the correct tools prevents errors and protects your furniture from accidental damage. Standard measuring tapes are suitable for overall height, but smaller hardware components require more precise instruments.
Products mentioned in this guide
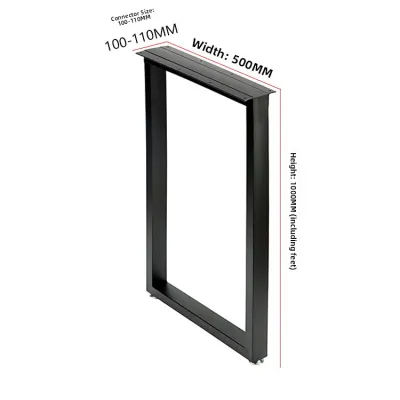
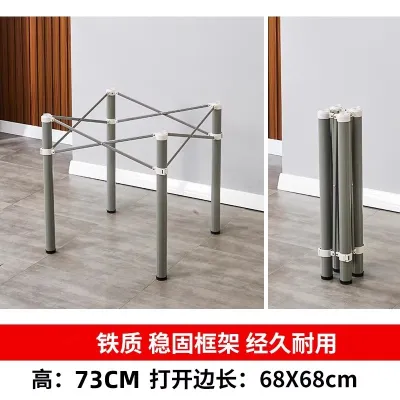
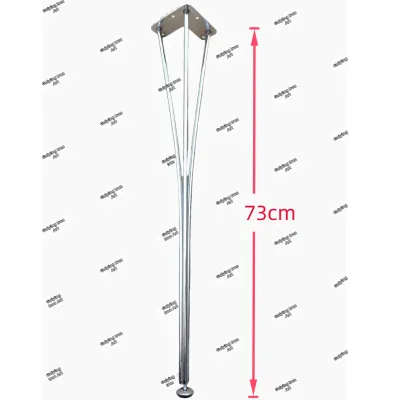
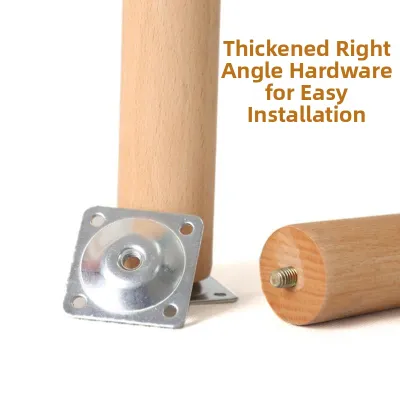
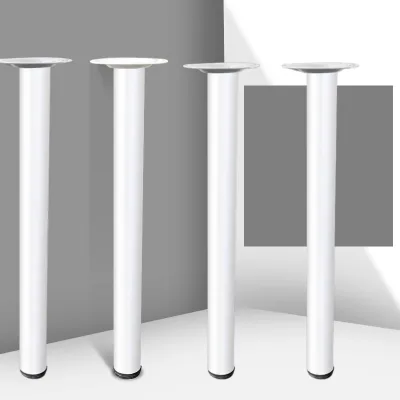
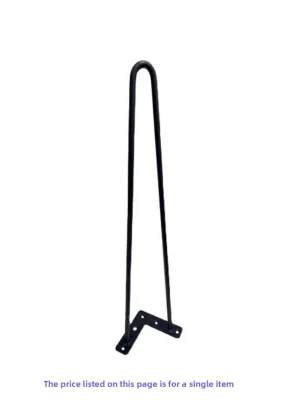
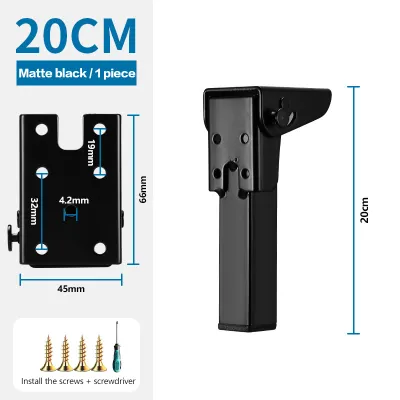
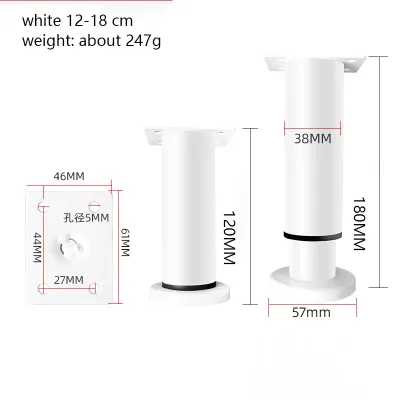
Prices are valid at publication and may change. Please refer to the product page for the latest price.
To ensure complete accuracy, prepare the following tools:
- A standard steel tape measure: Best for measuring overall leg length, table height, and clearance.
- A digital caliper: Essential for measuring small hardware components, such as bolt diameters, thread pitches, and screw gauges, where a tape measure is too imprecise.
- A bright flashlight: Helps you clearly see the underside of the table, screw heads, and recessed mounting brackets.
- A notepad or smartphone: Used to immediately record each measurement, preventing reliance on memory.
To measure safely, you must clear the tabletop of all items and flip the table upside down. Attempting to measure or remove legs while the table is upright can lead to inaccurate readings, stripped screw threads, or physical injury if the table shifts unexpectedly.
Protect both your table and your flooring during this process. Lay down a thick moving blanket, clean heavy cardboard, or a yoga mat on the floor before flipping the table. This is especially important in Singapore homes with sensitive flooring like vinyl, laminate, or polished parquet, as well as for protecting veneered or lacquered tabletops from scratches. Always enlist a second person to help lift and flip heavy solid wood, marble, or tempered glass tables to prevent injury and structural breakage.
How to Measure Table Leg Dimensions
Capturing the physical size and profile of your existing legs ensures that your replacements maintain the correct ergonomic height and look visually balanced.

Measuring Height and Clearance
To determine the correct height for your replacement table leg, you must distinguish between overall table height and the physical length of the leg itself. Overall table height is measured from the floor to the very top of the table’s finished surface. Standard dining tables typically stand between 73 and 76 centimeters high, while bar tables or kitchen counters are significantly taller.
To find the exact length of the leg, measure from the floor (including any built-in glides, levelers, or feet) directly to the point where the top of the leg meets the underside of the tabletop or mounting plate. If your table uses angled or splayed legs, measure along the angle of the leg rather than straight down to the floor, as replacing an angled leg with a straight one of the same vertical height will throw off the table’s balance.
Seating clearance is another vital measurement. Measure the distance from the floor to the lowest point of the table’s undercarriage, which is usually the bottom edge of the apron (the wooden frame running directly beneath the tabletop). This clearance determines if your dining chairs, particularly those with armrests, can slide comfortably under the table. Standard dining chairs require at least 25 to 30 centimeters of space between the seat cushion and the underside of the table apron for comfortable leg movement.
Measuring Width, Diameter, and Taper
To preserve the visual proportions of your furniture and ensure the new legs fit within the structural boundaries of the table, you must measure the leg’s profile. Use your tape measure or digital caliper to find the width and depth of square or rectangular legs, or the diameter of round legs.
Take this measurement at two distinct points:
- The very top of the leg: Where it interfaces with the tabletop or mounting plate.
- The bottom foot: Where the leg rests on the floor.
If the top measurement is larger than the bottom, the leg is tapered. Recording the exact top dimension is critical because a replacement leg with a top profile that is too wide may overhang the table’s edge or spill over the sides of the apron, ruining the clean lines of your furniture. It also ensures the top of the leg aligns perfectly with your chosen mounting plate.
Identifying and Measuring the Mounting Type
How a leg attaches to your table is the single most important factor in determining compatibility. Choosing the wrong mounting type makes installation impossible without extensive modifications to the tabletop.
Top Plate (Surface Mount) Legs
Top plate mounting is highly common in modern furniture. This system uses a flat metal or wooden plate attached to the top of the leg, which is then screwed directly into the underside of the tabletop or the inside corners of the apron.
To measure for a top plate replacement, follow these steps:
- Measure the plate's footprint: Record the overall length and width of the plate to ensure it fits within the designated mounting area under your table.
- Measure hole spacing: Measure the distance from the center of one screw hole to the center of the adjacent hole. Matching this spacing allows you to reuse the existing pilot holes, preserving the wood's strength.
- Measure the screws: Back out one screw and use your digital caliper to measure its overall length and thread gauge. This prevents you from using replacement screws that are too wide or too long.
Hanger Bolt and Threaded Insert Mounts
Hanger bolt mounts are common on mid-century modern and Scandinavian-style tables. This system features a dual-threaded metal stud (the hanger bolt) protruding from the center of the leg. The coarse wood-threaded end is permanently embedded in the leg, while the exposed fine machine-threaded end screws directly into a metal threaded insert installed inside the table.
To ensure a replacement leg fits, you must identify the exact thread specification of the hanger bolt. Use a digital caliper to measure the outer diameter of the machine-threaded portion. In Singapore and international markets, these are typically metric sizes like M8 (8mm) or M10 (10mm), though older or Western-imported furniture may use imperial sizes like 5/16-inch.
Next, determine the thread pitch, which is the distance between the thread ridges. Trying to force an M8 bolt into a 5/16-inch insert, or mismatching thread pitches, will strip the threads and ruin the insert. Finally, measure the length of the exposed bolt and the depth of the receiving hole in the table. If the replacement bolt is longer than the hole depth, the leg will not tighten flush against the tabletop.
Direct Screw or Bracket Attachments
Many traditional or heavy-duty tables secure their legs using corner brackets or angled wooden cleats. In these setups, the leg is often bolted laterally into a diagonal brace that spans the inside corner of the table apron.
To measure this configuration, note the dimensions of the bracket and the size of the machine bolts or lag screws holding the leg in place. If your table features splayed or angled legs, you must also measure the angle of the mounting surface. Replacing an angled leg requires finding a replacement with the exact same pre-drilled angle, as a standard straight leg will not align with the corner bracket and will compromise the table’s stability and weight distribution.
Checking Tabletop Thickness and Weight Capacity
Once you have determined the size and mounting type, you must evaluate the structural limits of your tabletop to ensure a safe and secure installation.
Measuring Tabletop Thickness
Measure the exact thickness of your tabletop at the specific points where the legs will mount. If your table has a perimeter apron, measure both the tabletop thickness alone and the combined thickness of the tabletop and the apron.
This measurement is critical for the screw length safety rule: any screw used to secure a mounting plate must be shorter than the tabletop thickness minus a safety margin of at least 3 to 5 millimeters. For example, if your tabletop is 20mm thick, your mounting screws must not penetrate deeper than 15mm. Using screws that are too long will cause them to pierce, bulge, or blister the finished top surface, causing permanent, irreversible damage to your furniture.
Estimating Weight Capacity
Your replacement legs must be rated to support the total weight of the table and its typical contents. To estimate this, consider the following factors:
- Tabletop material: Dense hardwoods like teak or oak, as well as marble, granite, and tempered glass, are exceptionally heavy compared to hollow-core MDF or plywood.
- Typical usage loads: Factor in the weight of heavy dining dishes, laptops, books, monitor mounts, or the physical weight of people leaning on the table edges.
Compare this estimated total weight against the manufacturer-stated load capacity of the replacement legs. Always select legs with a combined weight rating that exceeds your estimate by a safe margin to prevent bowing, wobbling, or catastrophic structural failure over time.
Verifying Measurements and Selecting Replacements
Before finalizing your purchase of a new table leg, double-checking your data saves time and prevents shipping errors.
Use this quick verification checklist to confirm your specifications:
- [ ] Overall Height: Does the leg height match your seating and ergonomic needs?
- [ ] Top Width/Diameter: Will the top of the leg fit flush within the apron or tabletop boundaries without overhanging?
- [ ] Mounting Type: Have you confirmed whether you need a top plate, hanger bolt, or corner bracket?
- [ ] Hole Spacing / Bolt Thread: Do the screw holes or hanger bolt threads match your table's existing inserts?
- [ ] Screw Length: Are your mounting screws safely shorter than your tabletop thickness?
To make shopping easier, take clear, well-lit photos of the underside of your table, the existing mounting plates, and any removed hardware placed next to a ruler or digital caliper. Showing these photos to retail staff at local Singapore hardware shops or uploading them to online furniture accessory stores helps verify compatibility.
Keep in mind that minor measurement tolerances are normal. If you find replacement legs with the perfect height and aesthetic but slightly different mounting plate hole spacing, you can still use them by drilling new pilot holes. Always review the seller’s return policy and structural warranties before purchasing to ensure you are covered if the parts do not fit as expected.
Frequently Asked Questions (FAQ)
Can I install replacement legs on a table that has no pre-drilled holes?
Yes, you can install replacement legs on a table without pre-drilled holes by using surface-mount top plates or installing threaded inserts. First, carefully measure and mark the mounting locations on the underside of the table, ensuring they are perfectly symmetrical and aligned with the corners. Use a drill bit that matches the manufacturer’s recommended size for your screws or inserts, and always use a drill stop or a piece of tape wrapped around the drill bit to prevent drilling too deep. If your tabletop is made of fragile, brittle, or exceptionally hard materials like glass, stone, or high-end veneered wood, do not attempt to drill without consulting a professional furniture technician.
What should I do if the new leg mounting plate has different hole spacing?
If the new mounting plate’s holes do not align with the existing holes in your tabletop, you must fill the old holes to maintain structural integrity. Clean out the old holes, fill them completely with a high-quality wood filler or wooden dowels coated in wood glue, and allow them to cure fully according to the manufacturer’s instructions. Once cured, sand the surface flush, position the new mounting plate, mark the new hole locations, and drill fresh pilot holes. For heavy-duty tables where maximum stability is required, avoid drilling too close to filled holes, as this can weaken the wood; instead, consider using a custom wooden adapter block bolted securely to the original holes to bridge the gap safely.
Community discussion
Share your experience or ask a question. Comments are reviewed before publication.