
Maximizing the storage potential of a wardrobe often comes down to how effectively you utilize vertical space. Standard closet shelving frequently leaves large, unused gaps above each row of shoes, leading to cluttered floors or disorganized piles. Integrating a shoe shelf stacker into your wardrobe configuration is one of the most practical ways to double your storage capacity without requiring major structural renovations. By elevating individual pairs or creating structured tiers, these organizers transform underutilized vertical zones into highly functional storage compartments.
Selecting the right organizer requires a careful balance between your wardrobe’s physical layout and the specific demands of your footwear collection. A system that works perfectly in a deep, built-in wardrobe may prove highly inefficient in a shallow closet or an open walk-in nook. To help you navigate these choices, this guide explores how to assess your available space, compares the primary stacker designs on the market, and outlines how to match them to your specific wardrobe configuration for a seamless, organized result.
Assessing Your Wardrobe Space and Shoe Collection
Before purchasing any organization system, you must conduct a thorough physical assessment of your wardrobe’s interior. Start by measuring the exact internal width, depth, and height clearance of the specific shelf or floor nook where you plan to place the stackers. It is crucial to measure the clear opening space, taking into account any door hinges, sliding track protrusions, or wardrobe frame lips that could restrict entry or block a drawer from pulling out. Write down these dimensions in millimeters or centimeters to ensure precision when comparing them against product specifications.
Products mentioned in this guide
![[SG Stock] Adjustable Shoes Rack Shoe Stacker Shoe Slots Shoe Storage Rack Anti Slip Footwear Holder Space Saving Shoe Box Shoe Organiser](https://img.lazcdn.com/g/p/fc7a332836062dc07720aa078b592af6.jpg_400x400q80.jpg_.webp)
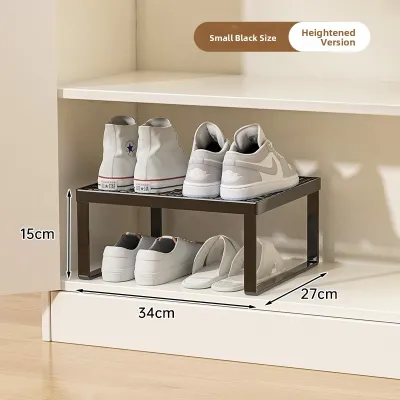
Prices are valid at publication and may change. Please refer to the product page for the latest price.
Next, categorize your footwear collection by type and physical profile. Different shoes require vastly different vertical clearances; for instance, flat sandals and loafers might only need 8 to 10 centimeters of height, whereas high-top sneakers, heels, and ankle boots often require 15 to 25 centimeters. Taller boots may need dedicated tall compartments or separate storage altogether. Grouping your shoes by height allows you to calculate the exact vertical clearance needed for each tier of your proposed stacker system, preventing situations where taller shoes are crushed or flat shoes leave excessive wasted space above them.
Finally, evaluate the total number of pairs you need to store to estimate the required capacity and overall footprint of the organizers. If you have twenty pairs of shoes but only have space for a stacker that holds ten, you will need to decide whether to rotate your collection seasonally, purge unused pairs, or look for a more space-efficient design like ultra-slim individual shoe slots. Calculating this capacity beforehand prevents over-purchasing and ensures that the weight of your entire collection remains well within the safe load-bearing limits of your existing wardrobe shelves.
Comparing Shoe Shelf Stacker Designs
The market offers several distinct categories of shoe shelf stackers, each designed with unique structural features, space efficiencies, and accessibility profiles. Understanding the mechanical differences between these designs is essential for choosing a system that aligns with your daily routine and spatial constraints.

Stackable Trays and Drop-Front Organizers
Stackable trays and drop-front organizers are individual, modular units designed to be piled vertically on top of one another. These systems are highly favored for their ability to provide excellent dust protection, making them ideal for preserving delicate materials like suede, leather, or embellished evening shoes. When evaluating these units, it is critical to check the manufacturer’s specified weight limits for stacking height. Piling too many loaded boxes on top of one another can cause the lower units to bow, warp, or crack, potentially damaging the shoes inside or causing the entire column to become unstable.
Accessibility is another vital factor to consider. Standard stackable trays often require you to unstack the upper units to reach the shoes at the bottom, which can quickly become a tedious chore in daily use. To avoid this, look for drop-front or magnetic door mechanisms that allow you to open the front panel of any individual box without disturbing the units stacked above it. These doors should operate smoothly and latch securely to maintain structural integrity.
Additionally, pay close attention to ventilation. Enclosed plastic boxes can trap moisture, especially in humid climates, which can lead to mold growth or the deterioration of shoe adhesives. Opt for drop-front organizers that feature integrated ventilation slots or breathable rear panels to ensure continuous airflow around your leather or damp footwear.
Tiered and Expandable Freestanding Racks
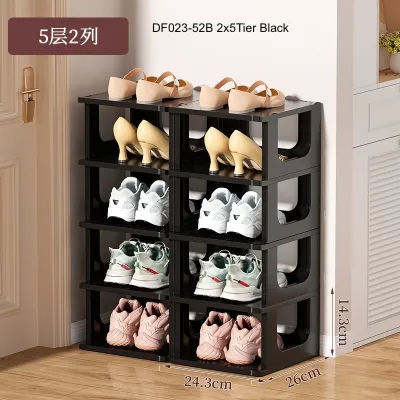
Tiered and expandable freestanding racks offer a highly flexible solution for horizontal and vertical space utilization. These racks typically feature two or more horizontal shelves supported by a rigid frame, and many models offer expandable widths that can be adjusted to span the exact width of your wardrobe shelf. When selecting a tiered rack, verify the adjustability of the tier heights. Racks with adjustable peg systems or removable shelves allow you to customize the clearance of each level, accommodating flat sandals on one tier and chunky sneakers on another.
Stability is paramount for freestanding units, particularly when they are fully loaded with heavy footwear. Check the base footprint of the rack to ensure it sits flat on your wardrobe floor or shelf without wobbling. Look for models equipped with anti-slip rubber feet or anti-tip wall anchors if you plan to stack them high. A stable base prevents the rack from shifting when you quickly pull a pair of shoes off the shelf in the morning.
The material finish of the rack also plays a significant role in long-term maintenance. Metal frames with powder-coated finishes or high-quality plastic shelves are highly resistant to scuffs, moisture, and dirt transfer from dirty outsoles. Avoid unfinished wood or porous materials that can absorb moisture and stains, making them difficult to clean over time.
Pull-Out Shelves and Sliding Track Systems
For deep wardrobes or built-in closet systems, pull-out shelves and sliding track systems represent the pinnacle of accessibility. These systems utilize metal drawer slides or tracks mounted to the bottom or sides of a wardrobe compartment, allowing you to pull the entire shoe shelf forward to view and access pairs stored at the very back. Before purchasing, you must confirm track compatibility with your existing wardrobe rails, side panels, or shelf thicknesses. Some systems require specific pre-drilled holes or standard cabinet widths to mount correctly.
The weight capacity and smooth operation of the sliding mechanisms are critical safety and usability considerations. High-quality ball-bearing slides ensure that the shelf glides effortlessly even when fully loaded with heavy boots or sneakers. Check the manufacturer’s load rating to ensure the tracks can handle the combined weight of the shelf and your shoes without sagging or binding.
Furthermore, carefully evaluate the clearance requirements for the pulling action. Ensure there is sufficient space in front of the wardrobe for the shelf to extend fully without hitting doors, walls, or other furniture. You must also account for any handle protrusions or decorative trim on the wardrobe doors that could obstruct the path of the sliding shelf.
Matching Stacker Designs to Your Wardrobe Configuration
Once you understand the strengths of each design, you can match them to your specific wardrobe layout to maximize efficiency and ease of use.
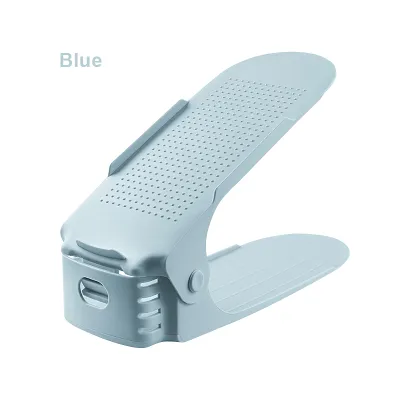
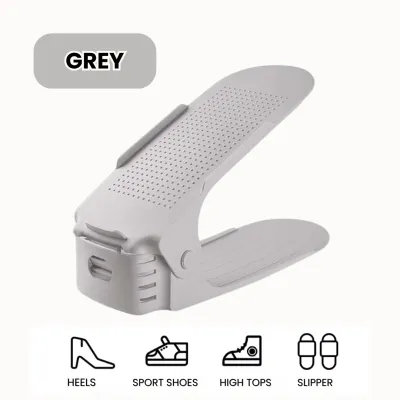
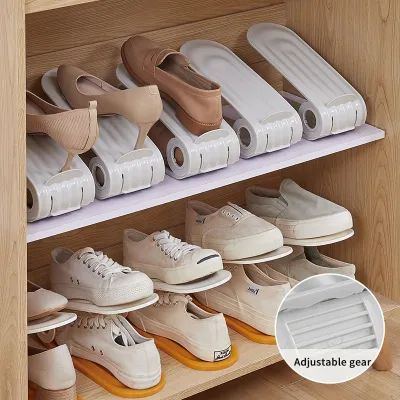
For narrow or shallow closets, where depth is highly restricted, prioritizing expandable tiered racks or slim, individual stackable trays is often the best approach. Shallow closets typically measure less than 35 centimeters in depth, which rules out many deep drawer systems. A slim, low-profile tiered rack can sit flush against the back wall, keeping your shoes organized without protruding past the door frame. Alternatively, individual shoe slots—which stack one shoe directly above its partner on a single angled ramp—can cut the horizontal footprint of each pair in half, making them perfect for tight spaces.
Deep built-in wardrobes present the opposite challenge: items stored at the back are easily forgotten and difficult to reach. In these configurations, utilizing pull-out shelves or sliding track systems is highly advantageous. By bringing the back of the shelf to the front, you eliminate the need to bend down and reach into dark corners. If installing tracks is not feasible, you can achieve a similar effect by placing deep, lightweight plastic baskets or trays on the shelves, allowing you to pull the entire tray out like a drawer to access the shoes at the rear.
If your wardrobe features high vertical clearance with limited floor space, such as a tall closet with only one or two fixed shelves, you should focus on maximizing stackable drop-front organizers. These modular boxes allow you to build a stable, vertical tower of shoes that reaches all the way to the top of the closet. Because each box has its own structural frame, they protect the shoes below from being crushed, allowing you to safely utilize vertical space that would otherwise go to waste.
For open closet nooks or walk-in wardrobes where visual aesthetics are a priority, freestanding tiered racks are an excellent choice. These racks keep your footwear collection visible and easily accessible, turning your shoes into an organized display. Choosing racks with clean lines and matching finishes—such as matte black metal or natural bamboo—creates a cohesive, boutique-like feel while keeping your daily footwear organized and within arm’s reach.
Installation, Stability, and Safety Checks
Before installing or loading your new shoe stackers, performing several physical and safety checks is essential to prevent damage to your wardrobe and ensure a stable setup. First, verify the load-bearing capacity of your wardrobe’s existing shelves. Adding multiple stackable units or heavy metal racks can significantly increase the weight on a single shelf. If your shelves are made of thin particleboard or are supported by small plastic pegs, they may sag or collapse under the cumulative weight of the stackers and shoes. Consider reinforcing the shelf supports or placing the heaviest units on the wardrobe floor.
Ensure that all freestanding racks and stacked boxes are perfectly level. An uneven wardrobe floor or a slightly sloped shelf can cause tall stackable towers to lean, increasing the risk of a tip-over. Use a spirit level to check the alignment, and use shim pads or adjustable leveling feet if necessary. If you are stacking drop-front boxes higher than chest level, it is highly recommended to anchor the top units to the back wall or the wardrobe frame using safety straps or brackets.
Inspect the stackers for any sharp edges, rough plastic seams, or protruding hardware before placing them inside your wardrobe. Sharp metal corners or exposed screws can easily scratch the interior laminate of your closet or snag delicate shoe materials like silk, mesh, or soft leather. If you find any rough spots, sand them down or cover them with protective felt pads.
Finally, if your chosen system requires drilling holes or mounting tracks to the interior panels of a built-in wardrobe, plan a stopping point. If you are unsure about the structural integrity of the wardrobe panels or how to avoid hidden wiring, consult the wardrobe manufacturer or a qualified professional installer before proceeding with any permanent modifications.
Frequently Asked Questions (FAQ)
Can I mix different shoe shelf stacker designs in the same wardrobe?
Yes, you can successfully mix different shoe shelf stacker designs in the same wardrobe, provided you maintain physical compatibility and structural safety. For example, you might place a tiered freestanding rack on the floor for your daily sneakers, while using enclosed drop-front boxes on the upper shelves for seasonal or delicate footwear. However, you must never place heavy freestanding racks or heavy shoes on top of lightweight, plastic stackable trays, as this can crush the lower units and cause the entire setup to collapse. Always place the heaviest, most rigid organizers at the bottom and lighter, modular units on top.
How do I prevent shoe shelf stackers from sliding on smooth wardrobe shelves?
To prevent shoe shelf stackers from shifting or sliding when you retrieve your shoes, you can use non-slip shelf liners or small adhesive rubber grip pads on the bottom of the organizers. These solutions provide excellent traction on smooth laminate or wood surfaces without causing any permanent damage. Avoid using strong permanent adhesives, double-sided mounting tape, or screws directly on the wardrobe shelves, as these can tear the laminate or leave unsightly residue if you decide to reconfigure your closet layout in the future.
Community discussion
Share your experience or ask a question. Comments are reviewed before publication.