
Installing a modular shelving system on your own is an excellent way to maximize vertical space, customize your storage, and bring order to any room. While drilling into your walls might seem daunting, mounting a wall bracket securely is a highly manageable DIY task when approached with the right preparation. By understanding your wall structure, selecting the correct hardware, and taking precise measurements, you can create a stable, reliable shelving unit that stands the test of time. This guide walks you through the entire process, from initial assessment to the final stability check, ensuring your DIY project is safe and successful.
Assess Your Wall Type and Shelving Load
Before reaching for any tools, you must determine the composition of the wall where you plan to mount your modular shelving. In many modern residential spaces, particularly high-density apartments or HDB flats in Singapore, you will encounter solid concrete structural walls, lightweight concrete partition walls, or hollow drywall. Each material behaves differently under stress and requires specific mounting techniques.
To identify your wall type, try the knock test: a hollow, echoing sound typically indicates drywall, while a dull, solid thud points to concrete, brick, or solid masonry. Once identified, consult the modular shelving manufacturer’s instructions to verify if your wall type is compatible with the system.
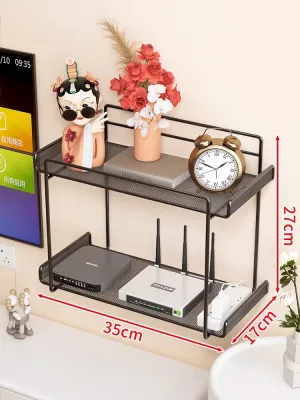
Products mentioned in this guide
![[SG] MATOOYA Floating Shelf Brackets Carbon Steel L Brackets Wall Mount Heavy Duty Shelf Support Furniture Accessories](https://img.lazcdn.com/g/p/dfbe05555ce2618b13e805fc50f40a62.jpg_400x400q80.jpg_.webp)
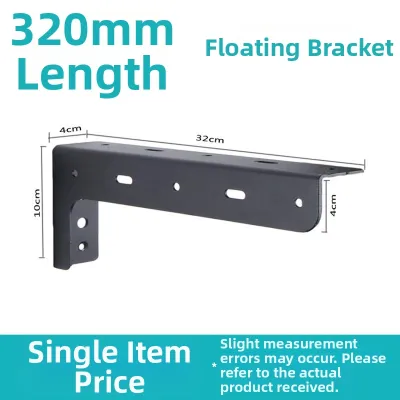
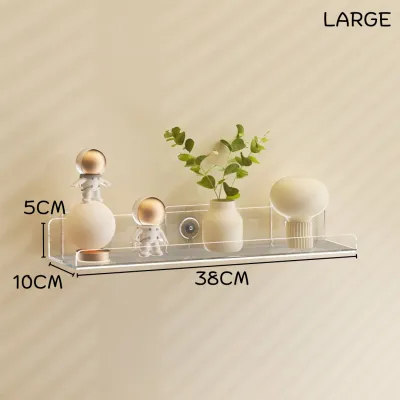
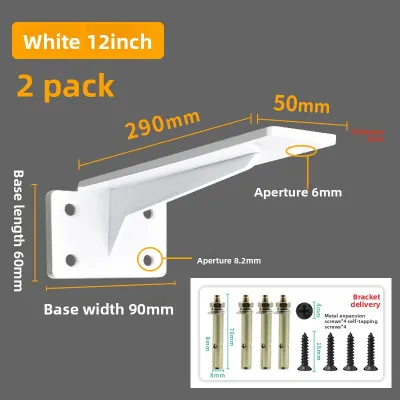
Prices are valid at publication and may change. Please refer to the product page for the latest price.
Next, calculate the total expected load the shelving unit will need to support. This calculation must include the weight of the shelves, the brackets, and the maximum weight of the items you plan to store, such as books, plants, or heavy storage boxes. Compare this total weight against the load capacity ratings provided by both the shelving and wall bracket manufacturers. Always choose brackets and wall anchors rated to support a capacity well exceeding your estimated total load to ensure a safe margin of error.
Finally, establish clear stop conditions before you begin drilling. Hidden hazards such as electrical wiring, water pipes, and gas lines often run behind residential walls. If your planned mounting location is directly behind a bathroom, kitchen sink, or electrical outlet panel, proceed with extreme caution. If you encounter unexpected resistance while drilling, or if your stud finder indicates a live wire or pipe, stop immediately and consult a qualified professional to avoid catastrophic damage.
Gather the Essential Tools and Hardware
Having the correct tools on hand before you start prevents interruptions and ensures your installation is precise and secure. For a standard wall bracket installation, you will need a reliable tape measure, a pencil, a spirit level, and a power drill. If you are working with concrete or brick walls, a hammer drill or rotary hammer is highly recommended, as standard rotary drills struggle to penetrate dense masonry.

Your choice of drill bits must match both your wall type and the size of your wall anchors. Use carbide-tipped masonry drill bits for concrete or brick, and standard wood or twist drill bits for wooden studs and drywall. A reliable stud finder is also essential if you are mounting brackets onto a drywall partition.
The mounting hardware itself must be carefully matched to your wall type. For drywall, use heavy-duty toggle bolts, threaded drywall anchors, or expansion anchors, and always attempt to align brackets with wooden studs where possible. For concrete or brick, select plastic expansion plugs or sleeve anchors designed specifically for masonry. Never reuse old plastic plugs or substitute random screws, as mismatched hardware is a primary cause of shelving failure.
Safety must always be your top priority during any DIY project. Drilling into concrete, brick, or drywall generates a significant amount of fine dust and flying debris. Always wear snug-fitting safety glasses to protect your eyes and a high-quality dust mask to prevent inhaling harmful particulates.
Measure and Mark Accurate Bracket Positions
Precision during the measuring and marking phase is what separates a professional-looking shelving installation from a crooked, unstable one. Begin by determining the desired height of your top shelf and use your tape measure to mark this point on the wall. From this initial mark, use your spirit level to draw a perfectly horizontal reference line across the wall where the top of your brackets or mounting rails will sit.
Refer to your modular shelving manual to find the recommended horizontal spacing between the wall brackets. Use your tape measure to mark the exact horizontal positions of each bracket along your horizontal reference line, ensuring they are perfectly spaced.
Once the general positions are marked, hold the first wall bracket up to the wall, aligning its top edge with your reference line. Use a pencil to mark the exact center of each screw hole directly onto the wall. Repeat this process for the remaining brackets, using your spirit level continuously to verify that the marked points remain perfectly level with one another.
If you are installing brackets on a drywall partition, use your stud finder to locate the wooden studs behind the wall within your desired shelving area. Mark the center of each stud clearly with a pencil. Whenever possible, adjust the horizontal positioning of your modular shelving slightly so that the main vertical brackets can be screwed directly into these studs. Anchoring directly into solid wood studs provides the strongest possible support and eliminates the need for hollow-wall anchors in those positions.
Drill Pilot Holes and Mount the Brackets
With your mounting points clearly marked and double-checked, you are ready to drill the pilot holes. Before drilling, verify the required hole diameter and depth specified on your wall anchor packaging. Wrap a piece of painter’s tape around your drill bit at the required depth to serve as a visual guide while drilling.
Hold your drill perfectly perpendicular to the wall surface to ensure the hole is straight. If you are drilling into concrete or brick, start at a slow speed to establish a starting point before engaging the hammer action and increasing pressure. Once the holes are drilled to the correct depth, clear out any remaining dust and debris from inside the holes using a hand pump, a vacuum, or a straw. Leftover dust can prevent wall anchors from seating properly or reduce their holding power.
Next, insert your wall anchors into the clean pilot holes. For plastic expansion plugs or drywall anchors, they should fit snugly and require a gentle tap with a hammer to sit completely flush with the wall surface. The anchor must fit tightly without spinning freely inside the hole.
Align your first wall bracket over the installed anchors and insert the mounting screws by hand to ensure they thread correctly. Use your screwdriver or power drill on a low torque setting to drive the screws in. Tighten the screws gradually, moving from the top hole to the bottom hole of the bracket. Avoid overtightening the screws, especially when using plastic anchors or working with drywall, as excessive force can strip the anchor’s internal threads or crack the surrounding wall material, rendering the mount useless.
Verify Bracket Stability Before Loading
Before you begin placing shelves or loading items onto your newly mounted brackets, you must perform a thorough stability check. Start with a visual inspection to ensure that each bracket sits completely flush against the wall surface with no visible gaps.
Next, perform a physical stability test. Grasp each bracket firmly and apply gradual, moderate downward and outward pressure to simulate the load of the shelves. The brackets should feel completely rigid and show absolutely no signs of wobbling, shifting, or flexing. If you notice any movement or hear cracking sounds from the wall, do not proceed with the installation; this indicates that the anchors are not holding securely or the wall material is failing.
Once the brackets pass the initial physical test, install the modular shelves according to the manufacturer’s instructions, ensuring they lock securely into the bracket slots or tabs. Avoid overloading any single section of the modular system, and always stay well within the manufacturer’s recommended weight limits.
Finally, remember that wall-mounted shelving requires ongoing maintenance to remain safe over time. Changes in humidity, temperature, and the vibrations from daily household activity can cause screws to loosen slightly over months or years. Make it a habit to inspect your shelving system periodically, checking that the brackets remain flush against the wall and gently tightening any screws that may have backed out over time.
Frequently Asked Questions (FAQ)
Can I install wall brackets on tiles or glass?
Drilling into fragile or exceptionally hard surfaces like ceramic tiles or glass requires specialized techniques and carries a high risk of damage. If you must mount brackets onto a tiled wall, such as in a kitchen or bathroom, you must use specialized diamond-tipped or carbide-tipped glass and tile drill bits. Run your drill at a very low speed without using the hammer action, and apply constant lubrication or water to keep the bit cool and prevent the tile from cracking. Drilling into glass, however, carries an extremely high risk of shattering and is not recommended as a DIY project; instead, consult a professional glazier or explore alternative non-drilling mounting solutions. Always check your shelving manufacturer’s guidelines and warranty conditions before attempting to drill into these delicate surfaces.
What should I do if my wall bracket feels loose after installation?
A loose wall bracket is a serious safety hazard that must be addressed immediately before any weight is placed on the shelves. Common causes of a loose mount include using an incorrect anchor size, drilling a pilot hole that is too large, or missing a wall stud during installation. To resolve this, remove the bracket and inspect the hole; if the hole is stripped or enlarged, you can replace the loose anchor with a larger, heavy-duty toggle bolt or expansion anchor that can grip the wider opening. Alternatively, you can fill the damaged hole with a high-strength structural wall filler, allow it to cure completely according to the manufacturer’s instructions, and then redrill a fresh pilot hole. If the wall material itself is crumbling, soft, or structurally compromised, stop immediately and seek professional assistance to evaluate the wall’s integrity.
Do I need to anchor every shelf in a modular unit to the wall?
Whether you need to anchor every individual shelf or just the main vertical standards depends entirely on the design of your modular shelving system and the manufacturer’s specific guidelines. For wall-mounted standards (the vertical metal rails), every single rail must be securely anchored to the wall at multiple points to distribute the load evenly. For freestanding modular units that stack upward, you must secure the unit to the wall using the provided anti-tip kits or brackets, especially for tall or top-heavy configurations. Tipping hazards pose a significant safety risk in homes, so always follow the manufacturer’s instructions regarding lateral stability and ensure that the top-most sections are anchored securely.
Community discussion
Share your experience or ask a question. Comments are reviewed before publication.