
Installing chair wheel covers is a highly practical way to protect your floors, minimize rolling noise, and extend the lifespan of your office or gaming chair casters. These simple accessories slip directly over your existing wheels, creating a soft, protective barrier between hard plastic or metal treads and your flooring. By following a careful, step-by-step process, you can easily fit new silicone, felt, or rubber covers onto your chair without scratching the wheels or damaging the caster forks.
To achieve a secure fit that does not slip, bind, or peel off during daily use, you must first measure your wheels accurately, clean the surfaces thoroughly, and apply the covers using the correct technique for their specific material. Taking a few minutes to prepare your workspace and inspect your current casters ensures a smooth installation that keeps your chair rolling quietly and safely. Whether you are working on hardwood, tile, laminate, or low-pile carpet, the right covers can transform your seating experience while preserving your floor’s finish.
Gather the Right Tools and Materials
Before starting the installation, gathering a few basic household items will make the process much easier and prevent accidental damage to your chair’s wheels or base. Having everything within arm’s reach allows you to work efficiently and safely without needing to pause mid-task to search for tools.
Products mentioned in this guide

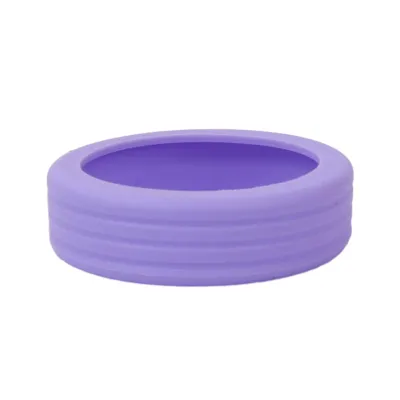
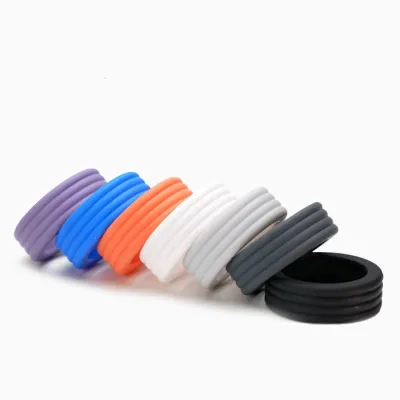
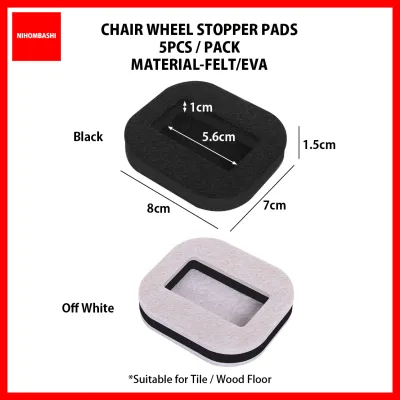
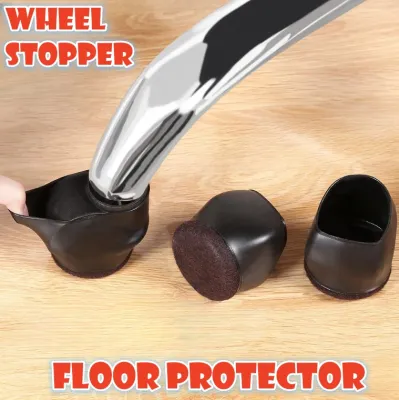
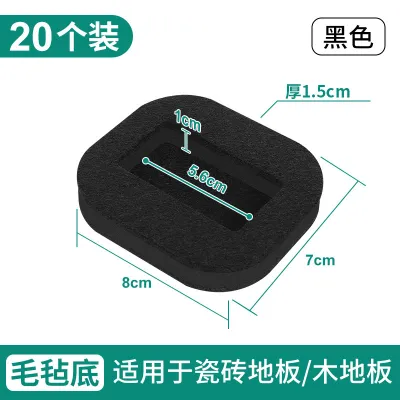
Prices are valid at publication and may change. Please refer to the product page for the latest price.
For removing old, stubborn, or dirty covers, a flathead screwdriver or a non-marring plastic prying tool is highly useful. A pair of pliers can also help grip worn-out covers that have become stiff, brittle, or sticky over time. To clean the wheels before installing the new covers, keep a microfiber cloth and a mild, non-abrasive cleaning solution nearby.
You should also have your new chair wheel covers ready for installation. These covers typically come in materials like flexible silicone, soft felt, or durable rubber, each offering different levels of grip, floor protection, and durability. Depending on the condition of your old wheels, you might want to wear a pair of lightweight work gloves to protect your hands from accumulated dirt, grease, or sharp edges on worn plastic.
Measure Your Caster Wheels for the Correct Cover Size
A proper fit is essential for ensuring that your new wheel covers do not slip off during use or restrict the natural swiveling motion of your chair. If a cover is too loose, it will slide off the wheel tread as you roll; if it is too tight, it may rub against the caster fork, causing friction and making the chair difficult to move.

To find the correct size, use a standard ruler or a flexible tape measure to determine the outer diameter of your caster wheels. Measure straight across the center of one wheel from edge to edge. Next, measure the width of the wheel tread, which is the flat surface that makes contact with the floor. Most standard office chair wheels have a diameter of 50mm or 60mm, but verifying your specific dimensions is crucial before purchasing replacements.
If physical measurement is difficult due to the wheel’s shape or accumulated debris, check the manufacturer’s label on the underside of the chair base. You can also refer to the original product packaging or the chair’s user manual for the exact caster specifications. When purchasing new covers, compare your physical measurements to the product’s inner dimensions to ensure there is adequate clearance inside the caster housing.
Remove Old Caster Covers Safely
If your chair already has worn-out covers or protective sleeves installed, you must remove them carefully to avoid scratching the underlying wheel structure or bending the caster axles. Rushing this step can lead to cracked plastic housings, which may require you to replace the entire caster assembly.
Begin by preparing a stable workspace. Gently tilt or flip your office chair upside down so that the base is facing upward, resting securely on a soft surface like a rug, towel, or cardboard sheet to protect the seat and armrests from scratches. This position gives you stable, ergonomic access to all five casters without needing to hold the chair steady while you work.
To remove old snap-on or stretchy covers, slide a flat, non-marring tool under the edge of the cover. Gently pry upward, working your way around the circumference of the wheel to release the tension evenly. If the old covers are made of hardened rubber or plastic, use pliers to grip the edge and pull them away from the wheel tread, taking care not to scrape the wheel itself.
While removing the old covers, take a moment to inspect the structural integrity of each caster. If you notice deep cracks in the wheel housing, severe rust on the metal stems, or significant wobbling in the axle, stop the installation. In these cases, the caster itself is structurally compromised, and you should consider replacing the entire caster assembly rather than applying new covers to a damaged wheel.
Clean and Prep the Wheels for Installation
Once the old covers are removed, you will likely find a buildup of dust, hair, carpet fibers, and floor wax on the wheel treads and inside the caster forks. Cleaning this debris away is a critical step, as any trapped dirt can prevent the new covers from gripping the wheels properly and may cause them to slip during use.
Use a dry microfiber cloth or a small brush to sweep away loose dust and hair from the wheel treads, axles, and the inner areas of the caster forks. For stubborn grime or sticky residue, dampen the cloth with a mild, non-abrasive soap and water solution. Wipe down the entire outer surface of each wheel, ensuring you remove all oily residues that could compromise the grip of silicone or rubber covers.
After cleaning, allow the wheels to dry completely before proceeding with the installation. Moisture trapped under a tight-fitting silicone or rubber cover can lead to mold growth or cause metal axle components to rust over time. Avoid using harsh chemical solvents, alcohol, or acetone, as these substances can degrade the original plastic or nylon material of your chair wheels.
Fit the New Chair Wheel Covers Securely
With clean, dry wheels, you are ready to install the new covers. The exact application method depends on the material and design of the covers you have chosen, but the goal is always to achieve a snug, centered fit without pinching the material.
For flexible silicone or rubber covers, start by aligning the cover with the top of the wheel tread. Use your thumbs to stretch the cover outward and slide it over the edges of the wheel, working your way down to the bottom. Ensure the cover stretches evenly across the entire width of the tread and does not bunch up on one side. Avoid pulling too hard on a single point to prevent tearing the material.
If you are using felt pads or hard-shell snap-on covers, align the cover precisely with the wheel’s circumference. Press firmly on the center of the cover to snap it into place or activate the adhesive backing. Check that there are no gaps, loose edges, or misaligned sections that could catch on the floor or rub against the caster housing.
Once the covers are in place, spin each wheel manually to verify that it rotates freely. Look closely at the clearance between the newly covered wheel and the caster fork or axle. The cover must not rub against any part of the plastic housing or interfere with any built-in brake mechanisms, as this friction will restrict movement and quickly wear out the cover.
Test and Maintain the Newly Covered Casters
After successfully installing all the covers, return the chair to its upright position. Before sitting down, perform a quick rolling test to ensure the covers are functioning as intended and do not pose any safety risks.
Slowly roll the chair back and forth on your typical office flooring. Listen closely for any unusual squeaking, rubbing, or clicking sounds, which could indicate that a cover is misaligned or rubbing against the caster fork. Watch the wheels to confirm that they swivel and roll smoothly without sliding, skidding, or slipping off the treads.
To keep your newly covered casters in optimal condition, perform periodic visual inspections every few months. Check for accumulated hair or dust trapped under the edges of the covers, and wipe them down with a damp cloth if they accumulate dirt. Over time, look for signs of material breakdown, such as tearing in silicone, flattening of felt pads, or loss of floor grip. Replacing the covers promptly when they show significant wear ensures your floors remain protected from scratches.
Frequently Asked Questions (FAQ)
Can I use chair wheel covers on locking casters?
Yes, you can use chair wheel covers on locking casters, but you must take extra care during selection and installation. Because locking casters feature a physical lever or pedal that presses against the wheel tread to stop movement, the added thickness of a cover can sometimes interfere with this mechanism. Before purchasing, check that the cover material is thin enough to allow the lock to engage fully. After installation, test the locking function immediately to ensure the lever still holds the wheel securely and releases smoothly without catching on the cover.
Do I need to remove the entire caster from the chair to install covers?
In most cases, you do not need to remove the entire caster from the chair base to install wheel covers. Standard silicone, rubber, and snap-on covers are designed to be flexible enough to slip over the wheels while they remain attached to the chair. However, if you are dealing with extremely tight-fitting covers, complex caster designs, or stubborn old covers that require significant force to remove, pulling the caster stem out of its socket can provide much better leverage and visibility, making the job easier and safer.
Will silicone covers leave marks on hardwood floors?
High-quality silicone covers are generally designed to be safe for hardwood floors and should not leave marks or residue under normal conditions. However, the actual performance depends on the cleanliness of both the covers and your floor. If dust, grit, or small debris becomes trapped underneath the silicone cover or on the floor surface, the rolling action can grind these particles into the wood finish, causing fine scratches. To prevent this, check the product packaging for explicit floor-compatibility claims, clean your floors regularly, and test the chair in an inconspicuous area first to verify compatibility.

Community discussion
Share your experience or ask a question. Comments are reviewed before publication.