
Adding mobility to a bed frame makes cleaning, rearranging, and managing bedroom space significantly easier. To install castor wheels successfully, you must match the wheel mounting style to your specific bed frame legs, prepare the frame safely, and secure the hardware to prevent wobbling or structural damage. Whether your bed frame is made of timber or metal, taking a systematic approach ensures the frame remains stable and safe to sleep on.
The installation process varies depending on whether your bed frame legs accept stem castors or require flat mounting plates. By verifying your frame’s structural limits and using the correct tools, you can complete this upgrade in an afternoon. This guide walks you through the assessment, preparation, and step-by-step installation methods for both stem and plate-mounted castor wheels.
Assess Your Bed Frame and Choose the Right Castor Wheels
Before purchasing any hardware, you must closely examine the construction of your bed frame legs. Bed frames are typically constructed from solid timber, hollow metal tubes, or solid metal posts, and each material requires a specific attachment strategy. Look at the bottom of each leg to see if there are pre-existing holes, plastic inserts, or threaded glides already installed. If your bed frame has hollow metal legs, it will likely require specialized plastic or metal inserts that slip inside the tube to hold a stem castor. Solid wood legs, on the other hand, offer the flexibility of using either heavy-duty wood screws with plate-mounted castors or drilling a vertical channel for stem castors.
Products mentioned in this guide

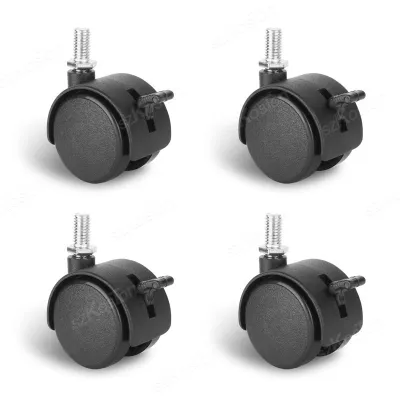
![[AdapTABLE] M8 Castor wheels](https://img.lazcdn.com/g/p/6cfa3fb780a13c5270ce90d72c337a52.jpg_400x400q80.jpg_.webp)

Prices are valid at publication and may change. Please refer to the product page for the latest price.
Matching the castor mounting type to your bed frame structure is critical for long-term stability. Stem castors feature a metal shaft that slides or screws directly into a pre-drilled hole or insert in the bed leg. These are excellent for streamlined legs where a wide mounting plate would overhang the edges. Plate-mounted castors feature a flat, square, or rectangular metal base with multiple screw holes, which must be fastened to a wide, flat surface. If your bed frame legs are narrow or tapered, a mounting plate may not fit entirely on the wood, which can lead to uneven weight distribution and eventual joint failure.
You must also verify the manufacturer specifications for both your bed frame and the new castor wheels. Look up the maximum weight capacity of the bed frame, remembering to calculate the combined weight of the frame, the mattress, the bedding, and the occupants. Divide this total weight by the number of legs to determine the minimum load capacity required for each individual castor wheel. Additionally, consider the clearance requirements under the bed; adding castors will raise the overall height of the bed, which can affect how your headboard aligns with the wall.
Gather Essential Tools and Prepare the Workspace
Having the correct tools on hand prevents interruptions and ensures you do not damage the bed frame during installation. For stem castors, you will generally need a power drill, a drill bit set matched to the stem diameter, a tape measure, and a rubber mallet or wrench depending on whether you are installing grip-ring or threaded stems. For plate-mounted castors, gather a power drill, a small drill bit for pilot holes, a screwdriver or driver bit, a pencil, and a tape measure. Keep a level nearby to check your work once the wheels are attached.

Before starting any physical work, clear a wide perimeter around the bed to give yourself ample room to maneuver. Remove the mattress, pillows, and all bedding to make the frame as light and manageable as possible. If your bed has a heavy headboard or footboard, it is highly recommended to detach them first to prevent strain on the connecting brackets. With the help of another person, carefully tilt the bed frame onto its side or upside down, placing a soft blanket or cardboard underneath to protect your flooring and the finish of the bed frame.
Once the frame is safely positioned, inspect the bottom of each leg and remove any existing glides, plastic caps, or worn-out wheels. You can often pry off plastic caps or nail-on glides using the claw end of a hammer or a flathead screwdriver. If the bed has threaded glides, unscrew them completely by hand or with an adjustable wrench. Clean the exposed surface with a dry cloth to remove any dust, rust, or adhesive residue, ensuring a clean, level, and stable foundation for the new castor hardware.
Install Stem Castor Wheels
Installing stem castor wheels requires precise measurements to ensure the metal shafts fit snugly inside the bed legs without shifting. Begin by measuring the diameter and length of the castor stem using a caliper or a precise ruler. If you are replacing old castors, compare the new stem dimensions directly with the old ones; even a millimeter of difference can cause the stem to wobble or fail to insert. If your bed frame has pre-installed plastic or metal inserts, test-fit one castor stem to see if it slides in securely or threads smoothly without forcing it.
If you need to drill new holes in solid wood legs, select a drill bit that matches the exact diameter of the castor socket or insert sleeve, not the stem itself. Wrap a piece of painter’s tape around the drill bit at a distance equal to the length of the socket to serve as a visual depth gauge. Hold the drill perfectly perpendicular to the flat bottom of the bed leg to ensure the hole is straight; an angled hole will cause the castor to sit crookedly, putting uneven stress on the leg. Drill slowly to the depth marked by the tape, then clear out any wood shavings from the hole.
For grip-ring stems, insert the plastic or metal sleeve into the drilled hole first, tapping it gently with a rubber mallet until the flange sits flush against the wood. Slide the castor stem into the sleeve until you hear or feel the grip ring click into place. For threaded stems, screw the stem directly into the threaded insert or secure it with the provided nuts and washers using a wrench. Avoid over-tightening threaded fasteners in wood or thin metal, as excessive force can strip the threads or crack the leg material, compromising the entire structure.
Install Plate-Mounted Castor Wheels
Plate-mounted castors are ideal for wide, solid wood bed legs because they distribute the bed’s weight across a larger surface area. Start by positioning the mounting plate centrally on the flat bottom of the bed leg. Centering the plate is crucial; if the plate is offset toward one edge, the weight of the bed will create a leverage effect that can split the wood or cause the bed to tip when rolled. Use a pencil to mark the exact center of each screw hole on the plate onto the bottom of the leg.
Remove the castor and use a small drill bit—typically slightly smaller than the inner core of your mounting screws—to drill pilot holes at each marked spot. Pre-drilling pilot holes is an essential step that prevents the wood from splitting as the screws are driven in, and it also guides the screws straight into the material. Be careful not to drill too deeply; check the length of your mounting screws against the thickness of the bed leg to ensure you do not drill through the side or top of the leg structure.
Align the mounting plate over the pilot holes and drive the screws in securely using a screwdriver or a power drill on a low torque setting. Ensure that all screws are tightened flush against the plate, but avoid over-tightening, which can strip the wood fibers and weaken the hold. Inspect the sides of the bed leg to confirm that no screw tips have broken through the exterior surface. If your bed frame has metal legs with mounting plates, use appropriate machine bolts and locking nuts instead of wood screws to secure the plates firmly.
Verify Stability and Test Mobility
Once all castor wheels are securely installed, carefully stand the bed frame back up on its new wheels with the help of another person. Place a level across the side rails and the head of the bed to verify that the frame sits perfectly level on the floor. Check that all four or six wheels make firm, even contact with the ground. If one wheel is hovering or not bearing weight, double-check your measurements, hole depths, or plate alignments to identify where the discrepancy lies before placing any weight on the bed.
Test the locking mechanisms on each castor wheel to ensure they function correctly. Engage the brakes and try to push the bed gently; the wheels should resist rolling and sliding on your floor surface. Next, disengage the brakes and slowly roll the bed frame across the room to test its mobility. Pay close attention to how the frame behaves on your specific flooring, whether it is hardwood, tile, or carpet. The movement should be smooth and quiet, without any twisting, flexing, or shifting in the bed frame joints.
During this test, watch out for immediate warning signs that indicate an installation issue or structural incompatibility. If you hear loud squeaking, notice any wobbling, or observe a bed leg bending or flexing under the empty frame’s weight, stop immediately. These symptoms suggest that the castor stems are loose, the mounting plates are misaligned, or the leg material itself is too weak to support mobile hardware. In such cases, remove the castors and consult a professional furniture repair specialist or the manufacturer to avoid a structural collapse.
Frequently Asked Questions (FAQ)
Can I add castor wheels to any bed frame?
Not every bed frame is suitable for castor wheels. Compatibility depends heavily on the leg material, thickness, and overall structural design of the frame. Thin metal legs, hollow plastic legs, or highly decorative, tapered wooden legs often lack the structural integrity to support the lateral forces exerted when rolling a heavy bed. Additionally, modifying your bed frame by drilling holes or attaching aftermarket hardware will often void the manufacturer’s warranty. Before proceeding, review your bed’s documentation, and if the legs appear fragile, hollow, or measure less than the width of a standard mounting plate, consult a professional or consider using non-mobile bed risers instead.
How do I stop my bed on castors from rolling away?
To keep your mobile bed securely in place, always choose castor wheels that feature built-in locking brakes on at least two, and preferably all, of the wheels. Ensure these brakes are fully engaged whenever the bed is in use. For extra security on smooth surfaces like hardwood, laminate, or polished tile, place non-slip rubber castor cups or small silicone mats directly under the wheels to increase friction and protect your floors from indentation. Avoid using makeshift wooden wedges, folded cardboard, or heavy objects pushed against the wheels, as these can slip out of place, damage your flooring, or warp the wheel mechanisms over time.
Community discussion
Share your experience or ask a question. Comments are reviewed before publication.