
Maximizing vertical wall space is one of the most effective strategies for maintaining an organized, clutter-free home in compact living environments. In Singapore, where modern HDB flats and condominiums require smart, space-saving design decisions, floor space is at an absolute premium. A magnetic board offers a highly customizable, modular solution to lift everyday items off your countertops and desks, turning blank walls into functional storage hubs.
Setting up a magnetic board involves more than simply hanging a metal sheet on the wall. To ensure the setup is safe, durable, and highly functional, you must carefully plan the layout, choose an installation method compatible with your wall type, and organize your accessories systematically. This guide walks you through the entire process, from initial spatial planning to step-by-step installation and efficient styling.
Planning Your Magnetic Board Layout for Compact Rooms
Before purchasing a magnetic board, you must assess the physical dimensions and layout of your room to ensure the board fits both functionally and visually. Start by identifying underutilized wall surfaces in high-traffic or high-clutter areas. Common spots in compact apartments include the narrow wall strip next to an entryway door, the space between kitchen cabinets, or the blank wall directly above a study desk. Measure the available wall area carefully, noting any nearby light switches, electrical outlets, or door swings that could obstruct the board or its attached accessories.
Products mentioned in this guide
![🇸🇬 [In Stock]Magnetic Board Clear Acrylic Calendar Board Fridge Magnet Dry Erase Board Planner Daily Weekly Monthly Schedule](https://img.lazcdn.com/g/p/9825d932826324a771fc1554bdd6e9ec.jpg_400x400q80.jpg_.webp)
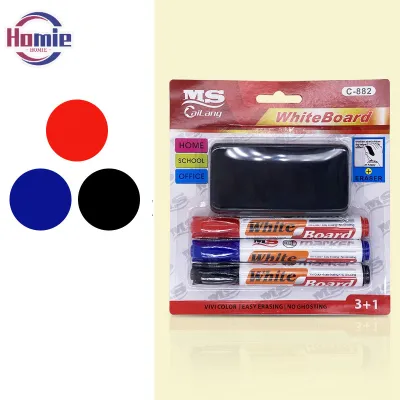
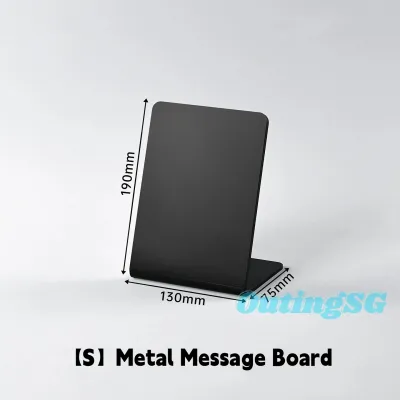
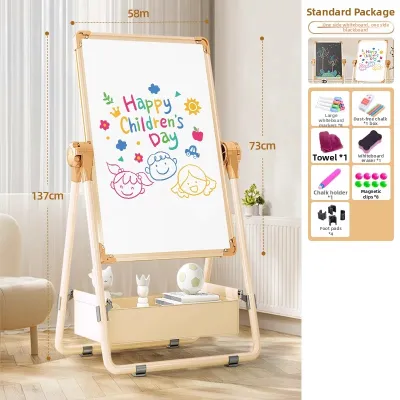
Prices are valid at publication and may change. Please refer to the product page for the latest price.
Matching the board’s dimensions to the scale of the wall is crucial for maintaining visual balance. A massive, dark metal board mounted in a tight, narrow corridor can feel visually heavy and make the space feel cramped. Conversely, a board that is too small will quickly become overcrowded and lose its organizational utility. Aim for a board size that leaves a comfortable margin of exposed wall around its perimeter, which helps frame the board and keeps the room looking organized rather than cluttered.
Your primary use case will dictate the surface area and depth clearance you need. If you plan to use the board in the kitchen for storing spice tins, cooking utensils, and recipe cards, you will need a sturdier setup with sufficient clearance from heat sources and cooking splatters. For an entryway hub holding keys, mail, and umbrellas, a medium-sized board with deep magnetic bins is ideal. If the board is meant for a home office to hold calendars, notes, and stationery, a wider, shallower board works best.
To maintain an open, airy feel in a small room, consider the visual weight of the board’s design. Frameless magnetic boards or those painted in lighter shades, such as off-white, soft gray, or pastel tones, tend to blend seamlessly into the wall. Brushed stainless steel finishes offer a clean, modern aesthetic that reflects light, helping to make a tight space feel slightly larger. Avoid heavy, dark wooden or thick plastic frames, which draw too much attention to the boundaries of the board and can make a small wall feel segmented.
Choosing the Right Installation Method for Your Wall Type
Selecting the correct mounting method is essential for safety and longevity, and this decision depends entirely on your wall’s construction material and your housing status. Singaporean homes typically feature a mix of wall types. Structural walls and boundary walls in HDB flats are almost always made of reinforced concrete, which is exceptionally hard. Internal partition walls in newer flats may consist of precast lightweight concrete panels, while renovated spaces or condominium units often utilize gypsum drywall partitions.

Drilled mounting is the most secure and reliable method, making it the preferred choice for heavy-duty setups or high-traffic areas. If you plan to store heavy items like steel tools, multiple full spice jars, or heavy reference books on magnetic shelves, drilling into the wall is highly recommended. Drilled anchors provide the mechanical shear and pull-out strength required to support substantial weight over time. However, before drilling into any wall, you must use a reliable stud finder or wall scanner to check for hidden electrical conduits and water pipes, particularly when mounting boards near kitchens, bathrooms, or main distribution boards.
For renters who face drilling restrictions, or for those planning to mount lightweight boards holding only papers, keys, and light stationery, non-destructive alternatives are available. High-quality adhesive mounting strips can secure lightweight boards to smooth, painted surfaces without the need for power tools. However, adhesives have strict limitations. They rely entirely on the bond strength of the wall’s paint layer; if the paint is old, chalky, or poorly primed, the adhesive may pull the paint right off the wall. Furthermore, Singapore’s high relative humidity can weaken adhesive bonds over time, making it critical to use moisture-resistant mounting tapes and to strictly respect the manufacturer’s weight limits.
Regardless of the method you choose, always consult the manufacturer’s specifications for both the magnetic board and the mounting hardware. Verify that the adhesive or anchors you plan to use are rated for your specific wall material. Never assume a generic drywall plug will hold securely in a concrete wall, or that standard double-sided tape can support a solid steel board. Matching the hardware to the wall type and the expected load is the single most important step in preventing mounting failures.
Step-by-Step Installation Guide
Once you have selected the perfect location and the appropriate mounting method, gather all your tools and materials before beginning. Having everything prepared ensures a smooth, precise installation process.
For a drilled installation, you will need:
- A power drill (preferably a hammer drill for concrete walls)
- Masonry drill bits (matched to the size of your wall plugs)
- Plastic wall plugs (anchors) and compatible screws
- A spirit level
- A measuring tape and pencil
- Masking tape
- Safety goggles and a dust mask
For an adhesive installation, you will need:
- Heavy-duty, double-sided mounting strips (rated for your board's weight)
- Isopropyl alcohol (rubbing alcohol) and a clean, lint-free cloth
- A spirit level
- A measuring tape and pencil
Drilling into Concrete or Masonry Walls
Start by holding the magnetic board against the wall at your desired height. Place a spirit level along the top edge of the board and adjust it until the bubble is perfectly centered. Using a pencil, mark the exact center of each mounting hole onto the wall. Double-check your measurements by measuring the distance between the pencil marks and comparing them to the mounting holes on the board itself.
Next, select a masonry drill bit that matches the diameter of your plastic wall plugs. To avoid drilling too deep, hold a wall plug against the drill bit and wrap a piece of masking tape around the bit to mark the plug’s length plus an extra 5 millimeters. Put on your safety goggles and dust mask. Hold the drill perfectly perpendicular to the wall, set it to hammer mode, and drill steadily into each marked point until you reach the tape marker.
Clean the concrete dust out of the drilled holes using a vacuum cleaner nozzle. Insert a plastic wall plug into each hole, pressing or gently tapping them with a hammer until they sit completely flush with the wall surface. Finally, align the magnetic board with the installed plugs, insert the screws, and tighten them securely. Avoid over-tightening the screws, as this can warp the board’s frame or crack plastic mounting washers.
Using Adhesive Mounts for Lightweight Boards
Proper surface preparation is the key to a successful adhesive mount. Clean the wall surface thoroughly where the board will be placed using a clean cloth dampened with isopropyl alcohol. Do not use household glass cleaners or multi-purpose sprays, as they often leave behind a microscopic, greasy residue that prevents the adhesive from bonding properly. Allow the wall to dry completely for at least ten minutes.
Apply the adhesive mounting strips to the back of the magnetic board according to the manufacturer’s instructions. Distribute the strips evenly, prioritizing the upper corners where the pulling force is greatest when removing items from the board. Avoid placing strips over uneven seams or joints on the back of the board.
Using a spirit level, lightly mark guide lines on the wall with a pencil. Peel the protective backing off the adhesive strips, align the board with your pencil guides, and press it firmly against the wall. Apply firm, even pressure over every strip location for at least 30 seconds to activate the pressure-sensitive adhesive. Crucially, do not hang any accessories or place any weight on the board for at least 24 hours to allow the adhesive bond to cure and reach its maximum strength.
Organizing and Accessorizing for Maximum Utility
With your magnetic board securely mounted, you can begin organizing it to maximize its utility. The key to a successful setup lies in selecting compatible, high-strength magnetic accessories. Standard decorative refrigerator magnets are rarely strong enough to hold anything beyond a single sheet of paper. Instead, opt for accessories equipped with high-strength neodymium magnets, which can easily support the weight of magnetic hooks, shallow shelves, pen cups, and heavy-duty paper clips.
To make the most of the limited surface area, implement a zoning system based on how frequently you use different items. Divide your board into three distinct horizontal zones:
- The Active Zone (Eye Level): Use this prime space for items you reach for multiple times a day, such as daily keys, active to-do lists, outgoing mail, or your current weekly schedule.
- The Reference Zone (Upper Section): Reserve the top portion of the board for long-term reference materials that you do not need to touch frequently, such as a monthly calendar, emergency contact numbers, or inspirational prints.
- The Storage Zone (Lower Section): Use the bottom of the board to mount deeper magnetic bins or cups to hold pens, scissors, sunglasses, or incoming mail that needs sorting.
Visual management is essential for keeping a small space looking tidy and intentional rather than chaotic. Group similar items together and use uniform containers where possible. For example, in a kitchen setup, use matching magnetic spice tins arranged in a neat grid. You can also use color-coded magnets to categorize tasks or family members, and add small, neat labels to bins so everyone in the household knows exactly where items belong.
Avoid the temptation to cover every square centimeter of the board. An overloaded board defeats its organizational purpose and contributes to visual clutter, which can make a small room feel chaotic. Establish a regular weekly auditing routine to maintain order. Take five minutes at the end of each week to discard expired coupons, file away processed mail, return stray pens to their cups, and remove any items that no longer serve a daily purpose.
Safety, Weight Limits, and Wall Protection
Maintaining safety and protecting your walls requires strict adherence to weight capacities. Every magnetic board and mounting system has a maximum weight limit specified by the manufacturer. This limit represents the total weight of the board itself plus all attached accessories and stored items. Never exceed this rating, and remember that the holding power of magnetic accessories is distinct from the load capacity of the board’s wall mounts.
Weight distribution plays a critical role in preventing structural damage or mounting failure. Distribute your accessories and stored items evenly across the entire surface of the board. Concentrating all heavy items, such as a heavy magnetic shelf filled with jars, on one side or along the top edge can cause the board to warp, sag, or pull unevenly on the wall anchors. Always place heavier items lower on the board to keep the center of gravity low and reduce leverage on the upper mounts.
Regularly inspect your installation for early warning signs of mounting failure. For drilled boards, look for any widening gaps between the top edge of the board and the wall, or check if the screws feel loose. For adhesive-mounted boards, watch for peeling paint edges around the tape, a slight tilting of the board, or any stickiness or sliding. If you hear cracking or creaking sounds from a drywall partition, it indicates the wall material is struggling to support the load.
Always establish clear stop conditions during installation. If you encounter unexpected structural resistance while drilling, such as hitting a hard steel rebar or a plastic conduit, stop drilling immediately. If you are unsure of your wall’s material, if the wall crumbles easily when drilled, or if the weight of your intended setup exceeds standard limits, do not proceed. In these situations, or if you are a tenant unsure of your lease terms, consult a qualified professional handyman or contact your landlord for guidance.
Frequently Asked Questions (FAQ)
Can I install a magnetic board on an HDB household shelter door?
HDB household shelters (bomb shelters) are critical safety structures designed to withstand extreme pressure and protect occupants. Under Singapore’s housing regulations, you are strictly prohibited from drilling, cutting, or making any structural modifications to the shelter’s steel door, frame, or surrounding concrete walls, as this compromises their fire-rating and airtight seal. However, because the household shelter door is made of solid steel, it is naturally magnetic. You can safely place lightweight magnetic hooks, pocket organizers, and spice tins directly onto the exterior surface of the door without any drilling or adhesives, provided these accessories do not obstruct the door handle or prevent the door from opening and closing smoothly.
Will adhesive mounts damage painted walls upon removal?
There is always a risk that heavy-duty adhesive mounts will peel away paint or tear the paper facing of drywall when removed, especially on walls that are older, damp, or were not properly primed before painting. To minimize the risk of damage during removal, do not pull the board straight off the wall. Instead, use a hairdryer to apply gentle heat to the adhesive strips for a few minutes to soften the glue. Then, take a long piece of dental floss or thin fishing line, slide it behind the board, and use a sawing motion to slice through the softened adhesive foam. Once the board is removed, gently roll away any remaining adhesive residue with your thumb, and always test adhesive products in a small, hidden area first.
How should I clean and maintain the magnetic surface?
To keep your magnetic board looking its best and prevent scratches, wipe the surface regularly with a soft, damp microfiber cloth and a drop of mild dish soap. Avoid using abrasive scrubbing pads, steel wool, or harsh chemical solvents like bleach, acetone, or window sprays, as these can strip away the protective powder-coated or painted finish. Once clean, dry the surface immediately with a dry towel to prevent moisture from sitting on the metal, which can lead to rust over time, particularly in Singapore’s humid climate.
Community discussion
Share your experience or ask a question. Comments are reviewed before publication.