
Installing an adjustable support system under your bed frame provides a stable, squeak-free sleeping platform while compensating for uneven floors. The process involves removing the old legs, aligning and securing the new adjustable hardware, setting a uniform baseline height, and using a spirit level to fine-tune each leg before locking it in place.
In Singapore’s humid climate, shifting structures or slightly uneven flooring (such as hand-laid tiles or aging parquet) can cause structural stress on a bed frame. An unlevel bed doesn’t just disrupt your sleep; it places uneven lateral stress on joints, eventually leading to squeaks, warped wooden slats, or bent metal brackets. By following a systematic installation path, you can protect your flooring, extend the lifespan of your mattress, and ensure the bed remains quiet and rock-solid.
Tools and Materials Needed for Installation
Preparation is key to a smooth installation. Before you begin, gather the necessary hand tools to prevent mid-project interruptions. You will need:
Products mentioned in this guide
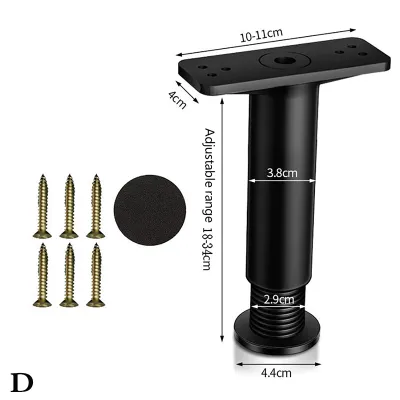


Prices are valid at publication and may change. Please refer to the product page for the latest price.
- Adjustable wrench or socket set: Essential for tightening hex bolts securely without stripping the heads.
- Screwdrivers and Allen keys: Most adjustable bed legs use standard Phillips-head screws or hex-socket bolts for mounting plates.
- Measuring tape: Crucial for verifying the initial height consistency across all four corners of the bed.
- Spirit level: A physical bubble level (or a highly accurate digital level app) is indispensable for identifying high and low spots across the frame.
- Work gloves: Heavy-duty gloves protect your hands from sharp metal edges, splinters on wooden frames, or old hardware threads.
- Penetrating oil: Helpful if you need to remove rusted or stubborn bolts from an older bed frame.
Unpack your new adjustable support kit and cross-reference the parts list with the provided hardware. Ensure you have all the bolts, nuts, flat washers, and spring washers required. Missing a single washer can lead to a loose connection over time, compromising the stability of the entire bed.
Pre-Installation Checks for Bed Frame and Floor
Before removing any existing hardware, perform a thorough inspection of your bed frame and the underlying floor. Check the structural integrity of the frame’s corner brackets and existing leg mounts. Look for signs of wood splitting, stripped screw holes, rust, or bent metal flanges. If the mounting area is severely compromised, you must repair the frame or install reinforcement plates before attaching new adjustable supports.

Verify the weight capacity of your chosen adjustable supports. The combined weight of the bed frame, the mattress (especially heavy pocket-spring or latex models common in Singapore), and the sleepers must not exceed the maximum load rating specified by the leg manufacturer. Standard residential configurations typically require legs that can collectively support at least 300 to 500 kilograms.
Assess your flooring type to determine what protective accessories are necessary. Singapore homes feature a variety of flooring materials, including glossy ceramic tiles, luxury vinyl tiles (LVT), and engineered wood or parquet. Hard, unyielding legs can easily scratch engineered wood or crack vinyl if the bed shifts. Plan to use heavy-duty felt pads for wood, or textured rubber grips for slick ceramic tiles to prevent sliding.
Prepare your workspace. Clear a wide perimeter around the bed, moving nightstands, rugs, and decorative items out of the way to ensure adequate space for lift and doorway access if you need to maneuver the frame. Ensure the room is well-lit so you can clearly see the mounting brackets under the frame. If possible, recruit a family member or friend to assist with lifting and holding the frame during the process.
Step-by-Step Guide to Installing Adjustable Supports
Important Safety Notice: Before proceeding, check your bed frame’s manufacturer instructions and the label on your new adjustable legs. If the installation instructions conflict, or if you are unsure of compatibility, stop and consult a professional installer. Unauthorized modifications can void your mattress or bed frame warranty.
Removing Existing Bed Legs
To begin, remove the mattress, bedding, and slats to reduce weight and expose the inner frame. Carefully lift one side of the bed frame. Do not attempt to hold the frame up with one hand while working underneath; instead, slide sturdy wooden blocks or heavy-duty support jacks under the frame to keep it elevated safely. Alternatively, have your helper hold the frame steady.
Locate the mounting hardware of the old legs. If the legs are screwed directly into threaded inserts, turn them counterclockwise to unscrew them. If they are held by bolts and nuts, use your wrench or socket set to loosen them.
If you encounter stubborn or rusted bolts, apply a small drop of penetrating oil to the threads and let it sit for five minutes. Avoid using excessive force or hammering the old hardware, as this can easily strip the frame’s internal threading, split wooden rails, or bend structural brackets.
Attaching the New Adjustable Supports
Position the mounting bracket of the new adjustable support leg over the pre-drilled holes or the existing mounting plate on the bed frame. If your new legs use a flange plate that requires new screw holes, align the plate carefully, mark the holes with a pencil, and pre-drill pilot holes using a drill bit slightly smaller than the mounting screws to prevent wood splitting.
Insert the mounting bolts. Always use flat washers between the bolt head and the frame or bracket. Washers are critical because they distribute the clamping pressure over a wider surface area, preventing the bolt head from sinking into wood or warping thin metal brackets. If provided, add a spring washer or lock washer to prevent the bolt from vibrating loose over time.
Tighten the hardware gradually in a crisscross pattern if using multi-bolt plates. Tighten them until they are snug, then apply a final quarter-turn. Avoid over-tightening; excessive force can strip the threads of metal frames or cause wooden frames to crack around the mounting site.
Adjusting the Initial Height
Most adjustable support legs utilize a heavy-duty threaded stem mechanism that extends or retracts when rotated. Before placing the bed back on the floor, you must set a uniform baseline height across all legs.
Use your measuring tape to measure the distance from the bottom of the mounting plate to the base of the leg foot. Rotate the threaded stem to extend each leg to a moderate, equal height. For example, if the leg has an adjustment range of 15 to 25 centimeters, set all legs to exactly 20 centimeters. This provides ample room to adjust both upward and downward during the leveling phase.
If your adjustable legs feature integrated locking nuts (often called jam nuts) on the threaded stem, keep them loose for now. Do not tighten them against the leg body until the final leveling process is complete.
Leveling the Bed and Verifying Stability
Once all legs are securely attached and set to the baseline height, carefully lower the bed frame back onto the floor. Place your spirit level flat on the top edge of the bed frame rail. Check the bubble alignment along the length of the bed (from head to foot) and across the width (from side to side).
Identify which corners are sitting too high or too low. To adjust, slightly lift the frame corner that needs modification to relieve pressure on the leg. Rotate the adjustable foot clockwise to shorten the leg or counterclockwise to extend it. Make small, incremental adjustments—no more than a half-turn at a time—and recheck with the spirit level after each adjustment.
Repeat this process across all four corners until the bubble in the spirit level rests perfectly centered in both horizontal and vertical directions. If your bed frame features a central support beam, adjust its center legs so they firmly touch the floor without lifting the outer frame off the ground.
Verify the stability of the frame by applying firm downward pressure on each corner and the center of the bed. Gently rock the frame from side to side. Listen closely for any squeaks, creaks, or clicking sounds, and watch for any shifting or wobbling. If you detect movement, identify which leg is not making firm contact with the floor and adjust it slightly.
Once the bed is perfectly level and stable, perform the crucial final step: tighten the locking nuts. Use your wrench to spin the jam nuts up the threaded stem until they press tightly against the underside of the mounting bracket or leg sleeve. This locks the threaded rod in place, preventing the legs from slowly unscrewing or shifting height under the dynamic loads of daily use.
Preventing Damage to Your Floor and Bed Frame
Protecting your floor and bed frame from long-term wear requires a combination of protective accessories and routine maintenance. Because beds support significant weight and experience subtle movements every time you get in or out, the contact points on the floor are subject to high friction.
Choose floor protectors designed specifically for your flooring material. For hard, smooth surfaces like ceramic tiles or vinyl, rubber-bottomed caster cups or textured non-slip pads prevent the bed from sliding and scratching the floor. For engineered wood, solid timber, or parquet floors, heavy-duty adhesive felt pads are ideal, as they allow minor shifts without scraping the delicate wood finish.
Keep in mind that an unlevel bed frame distributes weight unevenly. If one leg is slightly shorter than the others, the diagonal opposite leg and the frame joints must bear a disproportionate amount of weight. Over several months, this uneven distribution can warp metal frames, loosen dowels in wooden frames, and permanently damage your mattress’s internal spring structure.
Establish a simple periodic maintenance routine. Every three to six months, or whenever you rotate your mattress, take a moment to inspect the adjustable legs. Check that the locking nuts remain tight and that the mounting bolts have not vibrated loose. Ensure the floor protective pads are still centered and have not worn thin or accumulated abrasive dust.
Frequently Asked Questions (FAQ)
Can I install adjustable supports on a bed frame with a central support beam?
Yes, and it is highly recommended. Central support beams bear a significant portion of the mattress and sleeper weight. If you upgrade the outer legs of your bed frame, you must also install adjustable legs on the central beam to ensure the middle of the bed does not sag. Adjust these center legs so they make firm, flat contact with the floor, keeping the entire frame on a single level plane.
How often should I check the tightness of the adjustable bed legs?
You should inspect the mounting hardware and locking nuts every three to six months. Standard movements, such as tossing and turning, create minor vibrations that can slowly loosen threaded connections over time. If you notice any new squeaks, wobbles, or shifting when you get onto the bed, inspect and tighten the hardware immediately to prevent damage to the frame joints.
Community discussion
Share your experience or ask a question. Comments are reviewed before publication.