
Adhesive wheels, often referred to as stick-on caster wheels, provide a highly convenient, drill-free solution for adding mobility to lightweight household items. Whether you want to slide plastic storage bins out from under a bed, easily move a small bedside organizer, or slide a trash can out from a tight kitchen cabinet, these accessories eliminate the need for complex tools or drilling holes. They allow you to transform static organizers into rolling units in just a few minutes, making cleaning and organizing far more manageable.
However, the primary frustration with adhesive wheels is their tendency to peel off, slip, or fail entirely under load. This issue rarely stems from a defect in the wheels themselves; instead, it is almost always caused by improper surface preparation, incorrect alignment, or a rushed curing process. When the adhesive cannot establish a complete, microscopic bond with the furniture surface, the lateral forces of rolling will quickly tear the wheel away.
To ensure your adhesive wheels stay permanently attached, you must follow a methodical installation sequence. A secure, long-lasting bond requires choosing the right surface, cleaning it thoroughly to remove invisible oils, applying uniform pressure during mounting, and allowing the adhesive to cure fully. In humid climates, giving the adhesive extra time to stabilize is particularly critical to preventing premature peeling.
Products mentioned in this guide
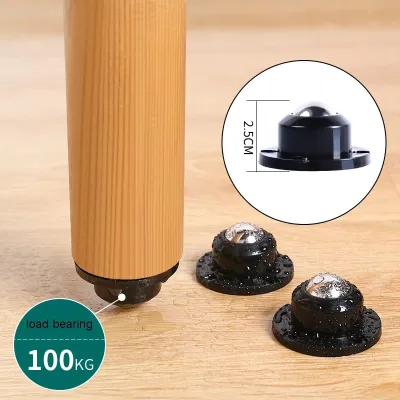
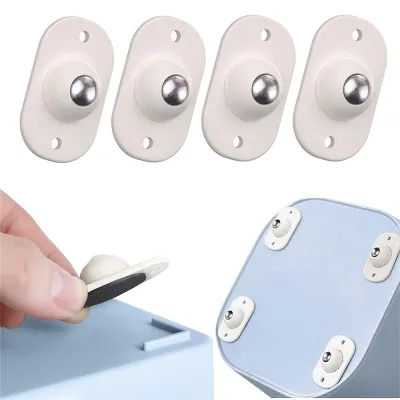
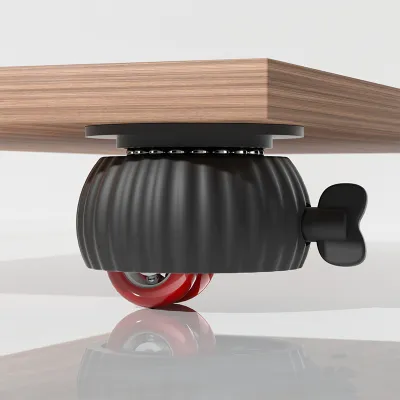
Prices are valid at publication and may change. Please refer to the product page for the latest price.
Assessing Surfaces and Gathering Tools for Installation
Before attempting to stick any wheels onto your furniture, you must gather a few simple tools to ensure the job is done precisely. You will need high-purity isopropyl alcohol (ideally 90% concentration or higher), a couple of clean, lint-free microfiber cloths, a measuring tape, and a pencil or fine-tipped marker. Having these items ready beforehand prevents you from rushing through the critical preparation steps or handling the adhesive with dirty hands.
The success of any pressure-sensitive adhesive depends entirely on the surface characteristics of your furniture. Adhesive wheels require a surface that is completely flat, smooth, and non-porous to achieve maximum contact area. Excellent candidate materials include sealed hardwood, smooth metal plates, rigid acrylic, laminate, and flat, high-density plastics. If the adhesive can touch every square millimeter of the wheel’s mounting plate, the bond will be exceptionally strong.
Conversely, you must avoid applying adhesive wheels to textured, unfinished, porous, or curved surfaces. Unfinished wood, textured plastics, powder-coated metals with a rough finish, and woven materials like rattan or wicker are highly unsuitable. These surfaces contain microscopic gaps, ridges, or fibers that prevent the adhesive pad from making full contact, which drastically reduces its holding power. Additionally, curved surfaces will cause the flat adhesive plate to pull away at the edges, leading to immediate failure.
Before proceeding, always take a moment to examine the finish of your furniture and consult the manufacturer’s care guidelines. Some delicate finishes, such as antique shellac, oil-rubbed wood, or cheap paper laminates, can be damaged by strong adhesives or cleaning alcohols. If the furniture is valuable or has a delicate surface, check if the manufacturer warns against using adhesive-backed accessories, as removing them later could strip away the paint, varnish, or veneer.
Step-by-Step Guide to Installing Adhesive Wheels
Achieving a professional-grade bond that resists shearing forces requires a structured approach. It is tempting to simply peel the backing paper off the wheel and slap it onto the bottom of a box, but this shortcut is the most common reason wheels fall off within days. By following a disciplined, step-by-step installation workflow, you allow the adhesive chemistry to work exactly as designed.

Cleaning and Degreasing the Surface
The first and most critical phase of installation is removing invisible surface contaminants. Even if your furniture looks spotless, it is likely coated in a thin layer of dust, skin oils, manufacturing residues, or household polish. These contaminants act as a barrier, preventing the adhesive from directly grabbing the structural material of the furniture. If you stick a wheel onto a dusty or oily surface, the adhesive will bond to the dust particles rather than the furniture itself, causing it to slide off under the slightest pressure.
To clean the mounting area properly, dampen a clean, lint-free microfiber cloth with isopropyl alcohol and rub the specific spots where the wheels will go. Avoid using standard household glass cleaners, multi-purpose sprays, or dish soaps; these products often contain silicones, fragrances, or moisturizing agents that leave behind a slick film, which actually harms adhesion. Isopropyl alcohol is the ideal cleaning agent because it effectively dissolves grease and oils without leaving any residue behind.
Once you have wiped the surface, allow the isopropyl alcohol to air-dry completely for at least five to ten minutes. Do not wipe it dry with a towel, as this can reintroduce lint or static dust. Trapped moisture or lingering alcohol beneath an airtight adhesive pad will degrade the chemical structure of the glue, leading to a weak bond that will peel off as soon as the furniture is loaded.
Applying and Aligning the Adhesive Wheels
With a clean and dry surface, you can now plan the physical layout of your wheels. Use your measuring tape to measure and mark the exact mounting points on the bottom of your furniture, ensuring each wheel is positioned symmetrically. Proper alignment is crucial for stability; if the wheels are not placed evenly, the weight of the furniture will be distributed unevenly, causing a wobble that puts excessive lateral stress on a single wheel and increases the risk of failure.
Lightly mark the outer edges of each wheel plate with a pencil or marker so you have a clear visual guide. When you are ready to apply a wheel, carefully peel the protective backing paper from the adhesive pad. It is vital that you do not touch the exposed adhesive with your fingers, as the natural oils on your skin will instantly contaminate the glue and ruin its bonding capability. Hold the wheel strictly by its plastic or metal housing.
Align the wheel plate with your pencil marks and press it firmly onto the surface. Once in position, apply heavy, uniform pressure across the entire mounting plate for at least 30 to 60 seconds. You can achieve this by pressing down with your palms, using a small hand roller, or carefully flipping the furniture over and using your body weight to compress the adhesive. This pressure is necessary to activate the pressure-sensitive adhesive, forcing it to “wet out” and flow into the microscopic valleys of the mounting surface.
Curing Time and Weight Restrictions
A common mistake is loading and moving the furniture immediately after sticking the wheels on. It is important to understand that “set time” is not the same as “cure time.” The initial stickiness you feel is only temporary tack; the adhesive requires a significant amount of time to undergo physical or chemical consolidation, allowing the polymer chains to fully lock onto the surface and reach their maximum rated holding strength.
Environmental conditions play a major role in how quickly an adhesive cures. In high-humidity climates like Singapore, where relative humidity levels frequently exceed 80%, the moisture in the air can slow down the evaporation of solvents or interfere with the chemical stabilization of certain mounting tapes. To compensate for this humid environment, it is highly recommended to extend the waiting period beyond the minimum times stated on the product packaging.
Keep the furniture completely empty, unloaded, and stationary during this entire curing window. While some product labels suggest a 24-hour cure time, waiting 48 to 72 hours in humid conditions provides an extra margin of safety, ensuring the adhesive reaches its absolute maximum bond strength. Do not tempt fate by placing items on the furniture or rolling it around early, as even a small amount of premature stress can permanently disrupt the bonding process.
Troubleshooting Peeling Wheels and Safe Removal
If you find that your adhesive wheels are peeling or slipping off, a systematic diagnosis can help you identify what went wrong. The most common culprit is inadequate surface cleaning, where residual oils or dust prevented a clean bond. Other frequent issues include mounting the wheels on slightly curved or textured surfaces, exceeding the rated weight capacity of the adhesive, or rolling the furniture over rough surfaces before the adhesive had time to cure fully.
When an adhesive wheel fails or needs to be replaced, you must remove it carefully to avoid damaging your furniture’s finish. Do not try to yank or pry the wheel off with brute force, as this can rip away wood grain, paint, or laminate. Instead, take a long piece of dental floss or a thin, flexible plastic putty knife. Gently slide the floss or plastic blade beneath the wheel’s plate and use a sawing motion to slice through the foam core of the adhesive pad, separating the wheel from the furniture safely.
Once the wheel is detached, you will likely be left with a sticky layer of residue on the furniture. To clean this up without scratching the surface, apply a mild, citrus-based adhesive remover or a soft cloth dampened with warm, soapy water. Avoid using harsh industrial solvents like acetone, paint thinner, or metal scrapers on varnished, painted, or veneered wood, as these can permanently dissolve the protective finish. Always test your cleaning method on a hidden, inconspicuous area first to ensure compatibility.
If you plan to reinstall the wheel, remember that you must never reuse a failed adhesive pad. Once an adhesive tape has been peeled off, its structural integrity is completely destroyed, and it will not hold weight a second time. You must scrape away all traces of the old adhesive from both the furniture and the wheel plate, clean both surfaces thoroughly with isopropyl alcohol, and apply a brand-new, high-quality double-sided mounting tape approved by the manufacturer.
Weight Limits and When to Choose Screw-In Alternatives
To prevent dangerous failures, you must calculate the load limits before putting your rolling furniture into service. Check the packaging of your adhesive wheels to find the manufacturer’s rated load capacity per wheel. To determine if they are safe for your project, calculate the combined weight of the empty furniture piece and the maximum weight of the items you plan to store inside it. Divide this total weight by the number of wheels installed (typically four) to find the load each wheel must bear. If this number is close to or exceeds the rated capacity of a single wheel, the adhesive will eventually fail.
It is also vital to distinguish between static load and dynamic load. A set of adhesive wheels might easily support a stationary cabinet resting on a flat floor (static load). However, when you push or pull that cabinet, the wheels encounter resistance from floor tile grout lines, door thresholds, or carpets. This movement generates severe lateral shear forces (dynamic load) that try to peel the adhesive plate sideways. If the furniture is moved frequently or over uneven surfaces, these dynamic forces will degrade the adhesive bond much faster than a static load.
For heavy furniture, items that will be moved constantly, or pieces made of weak, rough, or highly porous materials, adhesive wheels are not the right choice. In these scenarios, you should opt for mechanical fasteners, such as stem or plate-mount screw-in casters, which physically lock into the furniture frame. If you are unsure whether your furniture’s material can handle drilling—such as thin particle board or hollow-core doors—consult a professional carpenter or check the manufacturer’s structural details to avoid cracking or splitting the wood during installation.
Frequently Asked Questions (FAQ)
Can I use adhesive wheels on textured or uneven furniture legs?
No, adhesive wheels are not designed for textured, uneven, or highly tapered furniture legs. Adhesives require complete, flat surface contact to distribute weight evenly and hold securely. If you apply them to a textured or uneven surface, the gaps in contact will cause the adhesive to fail almost immediately under load.
If you must use them on wooden legs, you can sand the bottom of the legs flat and seal them with a smooth finish before application. Alternatively, you can screw a small, flat wooden adapter block to the bottom of the leg to create a smooth mounting surface, or simply choose screw-in casters which are much safer for irregular furniture legs.
How do I remove adhesive residue without damaging the wood finish?
To safely remove sticky residue from wood furniture, start with the gentlest methods to protect the underlying finish. Rubbing a few drops of vegetable oil or using a mild, citrus-based adhesive remover on a soft microfiber cloth will safely break down the adhesive polymers without stripping away paint, varnish, or wood stain.
Avoid using harsh chemical solvents such as acetone, nail polish remover, or lacquer thinner, and never use abrasive metal scrapers or steel wool. These harsh tools and chemicals can easily dissolve varnishes, scratch the wood, or leave permanent cloudy marks. Always test any cleaning solution on a small, hidden area of the furniture first to verify that it will not affect the finish.
Community discussion
Share your experience or ask a question. Comments are reviewed before publication.