
Installing adhesive shelf supports on existing furniture is a practical, drill-free way to customize your storage space without causing permanent structural damage. To ensure these supports remain secure and level over time, you must carefully assess the furniture material, prepare the surface, and allow the adhesive to cure fully before loading the shelf. While the process is straightforward, skipping essential preparation steps or overloading the shelf can lead to adhesive failure and potential damage to your belongings. By following a systematic installation method, you can achieve a stable, reliable shelving setup that maximizes your cabinet or bookcase utility.
Assess Furniture Surfaces and Weight Limits Before Installation
Before purchasing or installing adhesive shelf supports, you must evaluate the material and finish of your existing furniture. Smooth, non-porous, and sealed surfaces provide the ideal foundation for adhesive bonds. Materials such as melamine laminate, polished acrylic, sealed solid wood, and smooth metal allow the adhesive pad to make full, continuous contact. Conversely, porous, unfinished, or heavily textured surfaces are highly unreliable for adhesive applications. Raw particleboard, unsealed medium-density fibreboard (MDF), textured wallpaper, and rough, unfinished wood contain microscopic gaps and loose fibers that prevent the adhesive from establishing a secure grip, often leading to premature failure.
The weight capacity of your shelving setup depends heavily on the surface area of the adhesive support. Larger adhesive pads distribute weight more effectively across the furniture wall, reducing stress on any single point. When calculating the load, you must include the weight of the shelf board itself along with the items you plan to store. While manufacturers provide maximum weight ratings, these represent ideal conditions on perfectly smooth surfaces. To maintain a safe margin of error, plan for a total load well below the maximum rated capacity, especially for heavier items.
Products mentioned in this guide
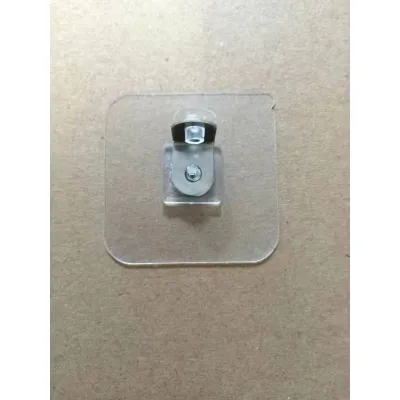
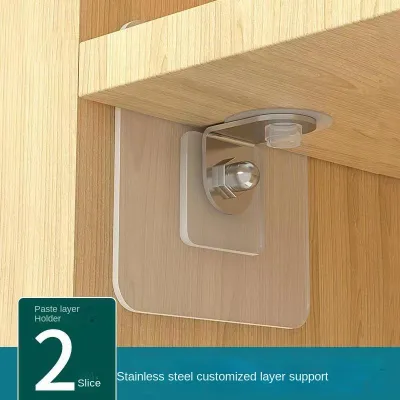
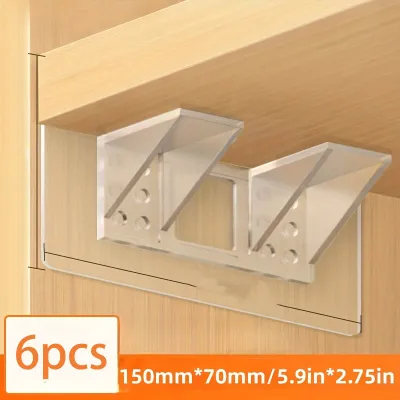
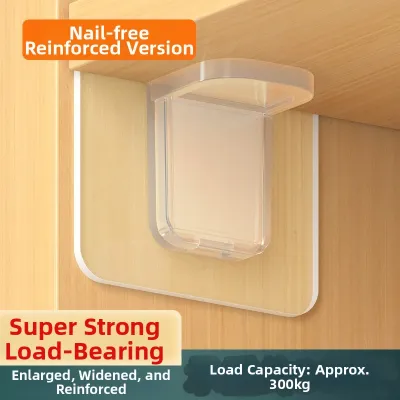
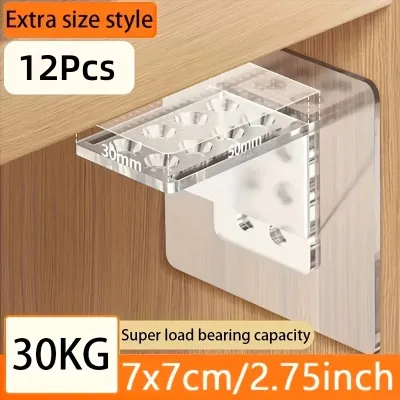
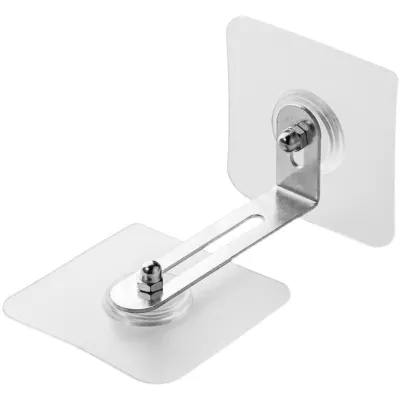
Prices are valid at publication and may change. Please refer to the product page for the latest price.
Environmental factors can also significantly impact the longevity of an adhesive bond. High humidity levels, common in tropical climates like Singapore, can gradually degrade the chemical structure of household adhesives over time. Similarly, placing furniture near heat sources like kitchen ovens or in direct, intense sunlight can soften the adhesive, causing it to slip or peel. Before proceeding, assess the room’s microclimate and ensure the furniture is positioned away from extreme temperature fluctuations and moisture sources to protect the bond.
Prepare the Surface and Gather Essential Tools
Achieving a long-lasting bond requires the right tools and a clean workspace. Before you begin, gather a spirit level, a measuring tape, high-quality painter’s tape, a mild surface cleaner, and several lint-free microfiber cloths. A pack of high-quality adhesive supports typically costs under S$15, making them an affordable solution. The spirit level is particularly important, as even a slight tilt in the shelf can cause items to slide, shifting the center of gravity and putting uneven, excessive stress on a single adhesive support. Using painter’s tape instead of a pencil allows you to mark your measurements clearly without leaving permanent marks or scratches on your furniture’s finish.

Thorough surface cleaning is the most critical step in the preparation process. Dust, grease, fingerprints, and furniture polish residue create a barrier that prevents the adhesive from bonding directly to the surface. Clean the target area thoroughly using a mild cleaner that leaves no residue, such as isopropyl alcohol. If your furniture has been treated with wax or silicone-based polishes, use a specialized wax remover to strip these layers from the specific spots where the supports will sit. After cleaning, wipe the area with a dry, lint-free cloth and allow it to air-dry completely.
The ambient conditions of the room during installation can also influence how well the adhesive initially sets. Extreme temperatures or high humidity can interfere with the chemical curing process, preventing the adhesive from reaching its full strength. If possible, perform the installation in a climate-controlled room with stable temperatures and moderate humidity. Avoid installing the supports on rainy days when indoor humidity is exceptionally high, or run an air conditioner or dehumidifier in the room to create an optimal environment.
Step-by-Step Guide to Positioning and Securing Supports
Precision is key when marking the placement of your shelf supports to ensure the shelf sits perfectly level. Begin by measuring the desired height of your shelf from the bottom of the cabinet or bookcase, making sure to measure from a flat, stable base. Place a strip of painter’s tape over the general area on the interior walls where the supports will go. Use your measuring tape to mark the exact height on the painter’s tape, then use a spirit level to project these marks across to the opposite wall. This method ensures that all four corners of your shelf will rest at the exact same height, preventing any rocking or instability.
Once your marks are verified, prepare to apply the adhesive supports. If your supports feature pre-applied adhesive backing, carefully peel away the protective liner, taking care not to touch the sticky surface with your fingers, as skin oils can instantly weaken the bond. If you are using a separate liquid adhesive or mounting tape, apply it evenly to the back of the support pad according to the manufacturer’s instructions. Align the support precisely with your marked guide on the painter’s tape, then press it firmly onto the surface in a single, decisive motion. Do not attempt to slide or reposition the support once it has touched the surface, as shifting it breaks the initial chemical bonds and drastically reduces its holding power.
To secure the bond, apply firm, even pressure across the entire surface of the support pad for at least thirty seconds. This pressure forces out any trapped air bubbles and ensures maximum contact between the adhesive and the furniture wall. For larger supports or those using heavy-duty foam tapes, apply a strip of painter’s tape over the support to hold it tightly against the wall, preventing any micro-movements or sagging while the adhesive begins to set. Leave these temporary tape guides in place during the initial setting phase to provide extra stability.
Manage Curing Time and Perform Safe Load Testing
Patience is essential during the curing phase, as premature loading is a primary cause of adhesive shelf support failure. It is important to distinguish between the initial “grab” of the adhesive and its full cure time. While the support may feel firmly attached immediately after installation, the chemical bond requires a significant period to reach its maximum load-bearing strength. Always refer to the manufacturer’s instructions for the specific curing duration, which typically ranges from 24 to 72 hours. Do not place the shelf board or any items on the supports during this waiting period, as even minor weight can disrupt the curing process and weaken the final bond.
After the recommended curing time has fully elapsed, proceed with a safe, gradual load test. Begin by placing the empty shelf board onto the supports, checking that it rests flat and does not wobble. Next, place a few light, non-fragile items, such as empty storage boxes or lightweight decorative pieces, near the corners of the shelf. Over the course of several hours, gradually add more weight to the shelf, monitoring how the supports behave under the load. This step-by-step approach allows you to verify the stability of the installation without risking damage to valuable or fragile belongings.
During the load testing phase, inspect the supports closely for any warning signs of failure. Look for peeling or lifting at the edges of the adhesive pads, visible gaps forming between the support and the furniture wall, or any sagging of the shelf board. If you notice the furniture’s surface finish, paint, or veneer beginning to lift or bubble around the support, remove the load immediately. These signs indicate that the surface material cannot support the weight, and continuing to use the adhesive supports in this manner will result in permanent damage to your furniture.
Remove Supports and Restore Furniture Surfaces Safely
When you need to rearrange your shelving or remove the adhesive supports, taking a careful, non-destructive approach is vital to preserve your furniture’s finish. Never attempt to pry or rip the supports off the wall with force, as this can easily tear away paint, wood veneer, or laminate layers. Instead, use a thin, strong line such as dental floss or high-test fishing line. Slide the line behind the adhesive pad and use a gentle, back-and-forth sawing motion to slice through the foam or tape layer, separating the support from the furniture wall safely.
After removing the support, a layer of sticky adhesive residue will likely remain on the furniture surface. The best method for removing this residue depends on your furniture’s specific finish. For durable surfaces like melamine laminate or metal, a mild adhesive remover or isopropyl alcohol applied to a microfiber cloth can dissolve the residue quickly. For finished solid wood or delicate veneers, use a very mild soapy water solution or a specialized wood-safe cleaner. Always test any cleaning agent on an inconspicuous area of the furniture first to ensure it does not dull, discolor, or strip the protective finish.
If you encounter exceptionally stubborn adhesive that does not yield to gentle mechanical slicing or mild solvents, do not resort to sharp metal scrapers, steel wool, or harsh chemicals like acetone on finished wood. These aggressive methods can easily gouge the wood, scratch the laminate, or dissolve the lacquer finish. If the adhesive remains bonded and you risk damaging the underlying material, stop the removal process immediately. In such cases, consulting a professional furniture restoration specialist is the safest way to restore your furniture’s surface without causing irreversible damage.
Frequently Asked Questions (FAQ)
Are Adhesive Supports Safe for Painted or Veneered Furniture?
Adhesive shelf supports carry a high risk of damage when used on painted or veneered furniture. The bond created by strong adhesives is often stronger than the bond holding the paint or thin wood veneer to the underlying wood or particleboard. Consequently, when weight is applied to the shelf, or when you attempt to remove the support, the adhesive can peel the paint or lift the veneer entirely, leaving unsightly bare patches. Before installing adhesive supports, check your furniture manufacturer’s care guides or labels for warnings regarding adhesives. If your furniture has a delicate, antique, or highly valuable finish, it is best to avoid adhesives entirely and opt for non-damaging alternatives, such as freestanding shelf inserts or adjustable tension shelving units.
How to Troubleshoot and Fix a Failed Adhesive Support?
A failed adhesive support is usually caused by inadequate surface cleaning, overloading beyond the adhesive’s capacity, or environmental factors like high humidity. To fix a failed support, you must first identify and address the root cause of the failure. Begin by thoroughly cleaning the area to remove all traces of the old adhesive from both the furniture wall and the bracket itself. If the failure was due to surface oils or dust, cleaning the area with isopropyl alcohol and re-applying the support with a fresh, high-quality adhesive pad may resolve the issue. However, if the failure was caused by overloading or an incompatible surface material, you should abandon the adhesive method and consider mechanical fasteners, such as screw-in pegs, or alternative storage solutions to ensure safety and stability.
Community discussion
Share your experience or ask a question. Comments are reviewed before publication.