
Installing a pegboard in your Housing & Development Board (HDB) flat is an excellent way to maximize vertical space, organize tools, or display decorative items. However, mounting anything on HDB walls requires a clear understanding of the underlying materials and local housing regulations. Whether you are a tenant trying to preserve your security deposit or a homeowner looking to avoid structural damage, choosing the correct mounting strategy is essential.
By identifying your wall type, matching your mounting hardware to the intended load, and following a systematic installation process, you can achieve a secure setup. This guide covers everything from damage-free non-drilling methods to secure mechanical anchoring, ensuring your walls remain intact.
Assess Your HDB Wall Type and Tenancy Rules
Before purchasing any mounting hardware or picking up a tool, you must determine what your wall is made of and what rules govern modifications to your flat. HDB flats utilize several wall construction methods, and treating them all the same can lead to failed installations or structural damage.
Products mentioned in this guide
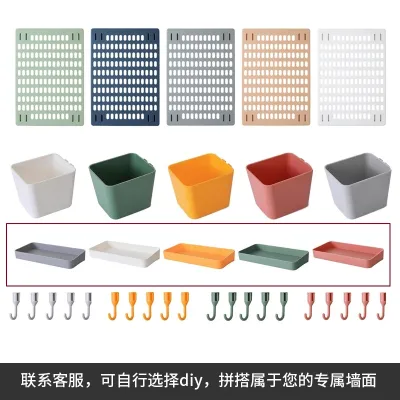
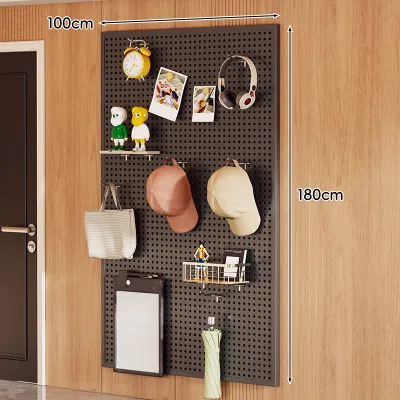
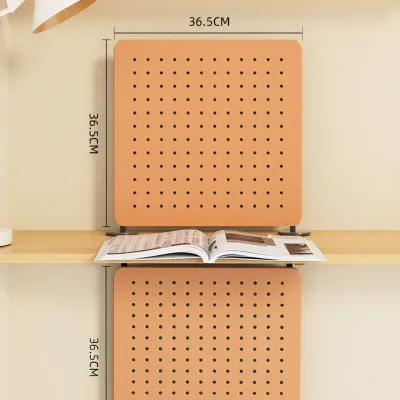
Prices are valid at publication and may change. Please refer to the product page for the latest price.
In Singapore, HDB walls generally fall into three categories:
- Solid Concrete Walls: These include structural columns, beams, and load-bearing walls, as well as precast concrete internal partition walls. They are extremely dense, sound solid when tapped, and require specialized tools to penetrate.
- Drywall or Partition Walls: Commonly found in newer BTO (Build-To-Order) flats, these are often used to separate bedrooms or create study areas. They sound hollow when tapped and consist of plasterboard sheets mounted over a lightweight metal or timber frame.
- Tiled Surfaces: Usually found in kitchens and bathrooms, these consist of ceramic, porcelain, or homogenous tiles laid over a concrete backing.
Tenancy agreements and renovation rules dictate how you can alter these surfaces. If you are renting your flat, read your tenancy agreement carefully. Most standard agreements in Singapore contain clauses requiring tenants to return the property in its original condition, which often means drilling holes is prohibited without written landlord consent. For flat owners, while minor drilling for shelving or pegboards does not require an HDB permit, you must never drill into structural columns or load-bearing shear walls without professional advice, as this can compromise structural integrity.
Safety must be your top priority before any installation. Always use a reliable stud and metal detector to check your planned mounting zone. HDB walls house hidden electrical conduits, especially near light switches and power sockets, as well as concealed water pipes near wet areas. Hitting an electrical cable can cause severe injury or power failure, while puncturing a water pipe can result in costly water damage that you will be liable to repair.
Accurately identifying your wall type and checking for hidden hazards is the only way to determine the correct mounting method. It ensures you select the right anchors or adhesives, preventing expensive cosmetic or structural repairs down the line.
Match the Mounting Method to Your Wall and Load
Once you know your wall type, you must evaluate the weight of the items you plan to hang. A pegboard holding lightweight crafting supplies requires a completely different mounting strategy than one holding heavy power tools or metal kitchen cookware.

When planning your setup, compare the primary mounting methods available:
- Removable Adhesive Strips and Tapes: These rely on chemical adhesion to grip the wall surface. They are completely non-invasive but have strict weight limitations and depend heavily on the quality of the wall paint.
- Tension Pole Systems: These floor-to-ceiling adjustable poles use vertical compression to stay in place. They bypass the wall entirely, making them highly secure and completely damage-free.
- Mechanical Anchors (Drilling): This method uses plastic wall plugs and screws driven into drilled holes. It provides the highest load capacity but leaves permanent holes that require patching later.
Weight capacity expectations must guide your choice. Non-drilling adhesive methods are strictly suited for lightweight items. If you plan to hang keys, scissors, plastic storage bins, or light stationery, high-quality mounting tape can suffice. However, if you intend to store heavy tools, cast-iron pans, or dense wooden shelves, you must use secure mechanical anchoring into concrete or a robust tension pole system. Attempting to support heavy loads with adhesive strips will eventually result in the pegboard falling, potentially damaging your floor, your belongings, and the wall itself.
Using standard adhesives on painted walls carries significant risk, especially in Singapore’s tropical climate. High humidity can cause emulsion paint to soften or lose its bond with the underlying plaster. When an adhesive strip is subjected to a constant downward pulling force (shear stress), it often pulls the paint and plaster skin right off the wall, leaving an unsightly patch of exposed plaster.
To make the right choice, use this simple decision framework:
- Renters / Light Loads: Opt for floor-to-ceiling tension poles or specialized removable adhesive strips. Tension poles are highly recommended if you want to hang heavier items without drilling.
- Owners / Heavy Loads: Use high-quality masonry anchors and screws drilled directly into solid concrete walls, or toggle bolts if mounting onto drywall.
Step-by-Step Installation Guide
Non-Drilling Setup for Renters and Drywall
If you are renting or mounting on drywall where drilling is restricted, you can achieve a successful installation by preparing the surface meticulously or using a vertical tension system.
Preparing the Wall for Adhesives To ensure adhesive mounting tape achieves its maximum possible bond, you must clean the wall surface thoroughly. Dust, grease, and fingerprint oils act as barriers that prevent the adhesive from making direct contact with the paint.
- Pour a small amount of isopropyl alcohol (rubbing alcohol) onto a clean microfiber cloth.
- Wipe the wall area where the pegboard will be mounted. Avoid using generic household spray cleaners, as many leave a thin, slippery residue that impairs adhesive performance.
- Allow the surface to dry completely for at least 10 minutes.
- Inspect the paint. If the paint is chalky, peeling, or bubbling, do not proceed with adhesives; the tape will simply peel the weak paint away.
Applying Removable Mounting Tape
- Select a heavy-duty, double-sided mounting tape specifically rated for removable applications. Check the manufacturer's packaging for weight limits and instructions.
- Apply the tape vertically to the back of the pegboard or its mounting brackets. Applying tape vertically helps distribute the downward shear force more evenly than horizontal strips.
- Press the tape firmly against the pegboard for at least 30 seconds to activate the pressure-sensitive adhesive.
- Peel off the protective backing, align the pegboard using a spirit level, and press it firmly against the cleaned wall. Hold it in place with firm, even pressure across all taped areas for at least 30 seconds.
- Crucial Step: Do not hang any items on the pegboard immediately. Most high-strength adhesives require a curing period of 24 to 72 hours to reach full bonding strength. Refer to the product label for the exact curing time.
Setting Up a Tension Pole System For renters who want to hang heavier items without drilling, a tension pole system is the ideal alternative.
- Unpack your floor-to-ceiling tension poles and assemble them according to the manufacturer's instructions.
- Position the poles vertically against the wall at a distance that matches the width of your pegboard.
- Extend the poles until the rubber feet make firm contact with both the floor and the ceiling.
- Tighten the tension mechanism (usually a threaded screw collar or a spring-loaded locking lever) until the poles are completely rigid. Test them by giving them a firm shake; they should not slide or wobble.
- Mount the pegboard to the crossbars or brackets provided with the tension pole kit. This setup keeps your pegboard completely suspended without touching or damaging the wall.
When to Stop If your HDB wall has a textured finish, is covered in wallpaper, or was painted within the last 30 days, do not use adhesive mounting methods. The adhesive will fail to bond properly, leading to a collapsed pegboard and damaged walls.
Secure Drilling for Concrete Walls
For flat owners or renters with permission to drill, mounting a pegboard directly into concrete provides the ultimate in stability and weight capacity.
Required Tools and Materials Before starting, gather the following tools:
- A rotary hammer drill (standard impact drills often struggle to penetrate tough HDB structural concrete).
- Carbide-tipped masonry drill bits matching the size of your wall plugs (typically 5mm or 6mm).
- High-quality plastic wall plugs (anchors) and matching screws.
- A spirit level and a pencil.
- Safety goggles and a dust mask.
- Pegboard spacers or standoffs.
Using Spacers and Standoffs Pegboards require a small gap (usually 1cm to 2cm) between the back of the board and the wall. Without this gap, the mounting hooks cannot slide through the holes and lock into place. Ensure your pegboard kit includes spacers (small plastic or metal cylinders) or a mounting frame. If it does not, you must purchase separate standoffs before beginning.
The Drilling and Mounting Process
- Hold the pegboard or its mounting brackets against the wall at your desired height. Use a spirit level to ensure it is perfectly horizontal.
- Mark the screw hole locations on the wall through the mounting holes using a pencil.
- Put on your safety goggles and dust mask. Set your rotary hammer drill to the "hammer" setting.
- Hold the drill perfectly perpendicular to the wall. Place the tip of the masonry bit on your pencil mark and drill a pilot hole.
- Drill to the exact depth of your plastic wall plug. Tip: Wrap a piece of masking tape around your drill bit at the correct depth to serve as a visual guide.
- Vacuum or blow out the concrete dust from the drilled holes. Dust left inside the hole will prevent the wall plug from gripping securely.
- Insert the plastic wall plugs into the holes. If they do not slide in easily, tap them gently with a hammer until they are completely flush with the wall surface.
- Align the pegboard over the holes, placing the spacers or standoffs behind the board's mounting holes.
- Insert the screws through the pegboard, through the spacers, and into the wall plugs. Tighten them securely using a manual screwdriver or a drill on a low torque setting. Avoid over-tightening, which can crack plastic pegboards or strip the plastic threads inside the wall plug.
Safety Stop-Condition If your drill suddenly stops advancing and makes a high-pitched metallic screeching sound, you have likely hit steel reinforcing bars (rebar) embedded in the concrete. If the drill suddenly plunges forward into a completely hollow space where solid concrete should be, you may have hit a utility conduit. Stop drilling immediately. Pull the bit out and move your mounting location at least 5cm away to avoid damaging your tools or the flat’s utility systems.
Safely Remove the Pegboard and Restore the Wall
When it is time to move out or rearrange your room, removing the pegboard safely is just as important as the installation. Proper removal techniques prevent cosmetic damage and make restoring the wall simple.
Removing Adhesive-Mounted Pegboards Never pull or rip an adhesive-mounted pegboard straight off the wall, as this will tear the paint and plaster.
- Plug in a hairdryer and set it to a medium-heat setting.
- Direct the warm air at the edges of the mounting tape for 2 to 3 minutes. The heat softens the acrylic adhesive, making it pliable.
- Take a long piece of dental floss or thin fishing line. Slip it behind the pegboard and, using a gentle sawing motion, slice through the foam core of the adhesive tape.
- Once the pegboard is free, slowly peel the remaining adhesive residue off the wall. Pull the tape parallel to the wall surface rather than pulling it outward, which minimizes paint damage.
Cleaning Adhesive Residue If any sticky residue remains on the wall, do not scrub it with abrasive pads, which will scratch the paint.
- Apply a small amount of isopropyl alcohol or a specialized, paint-safe adhesive remover to a clean microfiber cloth.
- Test the solvent on a small, hidden area of the wall first to ensure it does not dissolve or discolor your paint finish.
- Gently wipe the residue until it dissolves, then clean the area with a damp cloth.
Patching Drill Holes If you drilled into the wall, you must patch the holes to restore the wall’s appearance.
- Use needle-nosed pliers to pull the plastic wall plugs out of the wall. If they are stuck, use a utility knife to carefully slice off the plug's collar flush with the wall, or use a screwdriver to push the plug deeper into the hole.
- Scoop a small amount of ready-mixed spackle or wall filler onto a putty knife.
- Press the filler firmly into the hole, packing it tight. Leave a very slight mound of filler on top of the hole, as the material shrinks slightly as it dries.
- Allow the filler to dry completely according to the manufacturer's instructions.
- Sand the patched area flush with the surrounding wall using fine-grit sandpaper (such as 220-grit). Wipe away the sanding dust with a dry cloth.
- Apply a matching touch-up paint over the patched area using a small brush or foam roller, feathering the edges to blend it seamlessly with the rest of the wall.
When to Consult a Professional If you encounter large cracks in the plaster, exposed electrical wiring, or significant structural damage during the removal process, do not attempt a DIY fix. Consult a professional handyman or your landlord to assess the damage and perform safe, compliant repairs.
Frequently Asked Questions (FAQ)
Can I install a pegboard on HDB kitchen tiles?
Drilling into glazed ceramic or homogenous kitchen tiles carries a high risk of cracking or shattering the tile surface. If drilling is absolutely necessary, you must use a specialized diamond or carbide-tipped drill bit, keep the drill on a standard rotation setting (never use the hammer action), and cool the bit with water as you work. For lightweight kitchen organization, it is highly recommended to avoid drilling entirely. Instead, use heavy-duty suction mounts, specialized tile-safe adhesive hooks, or a tension pole system designed to fit between your kitchen countertop and upper cabinets.
How much weight can a non-drilled pegboard hold?
The weight capacity of a non-drilled pegboard depends entirely on the specific adhesive brand, the surface area of the tape used, the room’s humidity, and the quality of your wall’s paint. Always refer to the manufacturer’s specified weight rating on your mounting tape packaging. As a safe rule of thumb in Singapore’s humid climate, deduct a 30% to 50% safety margin from the manufacturer’s rating to account for moisture-induced paint degradation over time. Keep heavy items like power tools, heavy metal brackets, and dense wooden shelves off adhesive-mounted boards, reserving them strictly for lightweight items like keys, stationery, and light crafting supplies.
Community discussion
Share your experience or ask a question. Comments are reviewed before publication.