
Installing a headboard bracket is the most reliable way to secure a standalone headboard to your existing bed frame. This hardware acts as an essential bridge, allowing you to connect components that may not have been manufactured by the same brand or designed to fit together out of the box. By establishing a solid, bolted connection, you eliminate annoying wobbles, protect your bedroom walls from scuffs, and ensure your bed remains a stable and comfortable place to rest.
Before beginning, it is vital to understand that a successful installation depends on precise measurements, the correct choice of hardware, and a clear understanding of your bed frame’s structural limits. Attempting to force mismatched pieces together can damage your furniture, void manufacturer warranties, or create safety hazards in your sleeping area. Taking a systematic approach ensures a clean, professional result that will stand up to years of daily use.
Before You Start: Checking Compatibility and Gathering Tools
Before purchasing any hardware or picking up a wrench, you must determine whether your bed frame requires a bolt-on or a hook-on bracket system. Bolt-on brackets are the most common variety, utilizing standard nuts, bolts, and washers to clamp the headboard legs securely to the frame’s mounting plates. Hook-on brackets, on the other hand, feature hooks that slot directly into vertical slits on the bed frame legs, a design frequently seen on traditional wooden frames or specific metal platform beds. Look closely at the mounting plates on your bed frame to identify which system is compatible with your setup.
Products mentioned in this guide
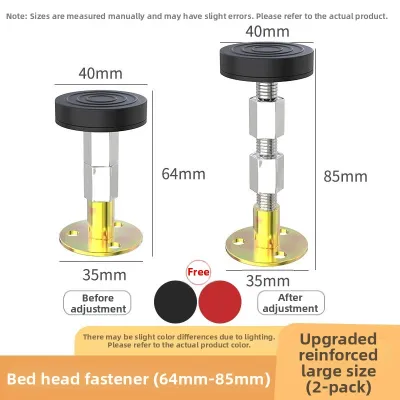
Prices are valid at publication and may change. Please refer to the product page for the latest price.
Next, inspect the headboard plate or the legs of your bed frame for pre-drilled holes. You will need to measure the horizontal distance between these holes, as well as the vertical spacing from center to center. Compare these measurements with the mounting slots on your headboard to verify if they align naturally or if you will need an adjustable adapter plate. If you are dealing with a wooden frame without pre-drilled holes, you must assess whether the wood is thick and sturdy enough to support drilling without splitting.
Material thickness is a critical safety factor that is often overlooked during DIY furniture assembly. Measure the depth of your bed frame’s mounting plates or legs to ensure that the bolts or screws you intend to use will not penetrate completely through the inner side. Screws or bolts that protrude too far inward can tear your mattress, snag your bedding, or even cause painful scratches when you change your sheets. If the provided hardware is too long, you must purchase shorter, high-tensile bolts or use spacer washers to take up the excess length.
To complete this installation efficiently, gather a set of essential tools before you begin. You will generally need an adjustable wrench or a socket set to tighten nuts, flathead and Phillips head screwdrivers, a reliable tape measure, and a spirit level to ensure everything sits perfectly straight. If your bed frame or headboard lacks pre-drilled holes and the manufacturer’s instructions permit modification, you may also need a power drill equipped with drill bits rated for either wood or metal, depending on your frame’s material.
Always consult the manufacturer’s assembly manuals for both your bed frame and your headboard before proceeding with any physical modifications. These documents contain vital information regarding weight limits, structural load capacities, and specific hardware requirements. Exceeding the recommended weight limit or using incompatible brackets can place undue stress on the frame’s joints, leading to structural failure. If the manufacturer’s instructions conflict with standard installation steps, always prioritize the official guidelines to preserve your warranty and safety.
Step-by-Step Guide to Mounting the Headboard Bracket
Step 1: Measure and Mark the Alignment
Achieving a perfectly centered and level headboard starts with precise planning and measurement. Begin by determining the ideal height for your headboard, which should typically sit high enough to support your pillows comfortably while remaining low enough that there is no large gap exposing the wall behind your mattress. Measure from the floor to the top of your mattress, and then position the headboard against the wall to visualize where the bottom edge should sit relative to the bed frame.

Once you have established the desired height, use your tape measure to find the exact center of both the bed frame and the headboard. Mark these center points lightly with a pencil or painter’s tape to establish a clear reference line. Next, hold the brackets against the bed frame legs or mounting plates, aligning them with the pre-drilled holes or your marked positions, and use a spirit level to verify that the brackets are perfectly vertical.
If your bed frame does not have pre-drilled holes, you must mark the exact drilling points through the bracket’s mounting slots. Double-check your measurements from the floor and the sides of the frame to guarantee absolute left-to-right symmetry before making any permanent marks. Taking an extra minute to verify these coordinates prevents the frustration of drilling misaligned holes that would cause the headboard to sit crookedly.
Step 2: Secure the Bracket to the Bed Frame
For a bolt-on bracket installation, the arrangement of your hardware is crucial for establishing a secure, long-lasting connection that will not loosen over time. The standard order of assembly should always be: insert the bolt through a flat washer, pass it through the bracket slot and the bed frame hole, place another flat washer on the protruding end, follow with a lock washer, and finally thread on the nut. This configuration distributes the clamping force evenly and prevents the metal hardware from gouging your bed frame.
Begin by threading all the bolts and nuts by hand, turning them until they are finger-tight. Hand-tightening first allows you to make minor adjustments to the bracket’s position and ensures that you do not accidentally cross-thread the fasteners. Once all hardware is loosely in place and the bracket is aligned correctly, use an adjustable wrench or socket wrench to tighten the nuts firmly, taking care not to over-tighten and strip the threads or crush the frame material.
For hook-on brackets, the process involves aligning the hooks with the corresponding slots on the bed frame legs and pressing down firmly until they click or seat deeply into place. Some hook-on systems feature safety pins or locking screws that must be tightened to prevent the hooks from accidentally lifting out of their slots. Ensure these safety mechanisms are fully engaged to maintain structural stability.
If you must drill new holes into a wooden bed frame, ensure that your drill bit size matches the minor diameter of your mounting screws exactly. Never use screws that are longer than the combined thickness of the bracket and the wooden frame leg, as this can split the wood or create hazardous protrusions. If you are working with a metal frame, verify that the manufacturer permits drilling, and use a center punch to prevent your drill bit from slipping and scratching the metal finish.
Step 3: Attach the Headboard and Finalize
Because headboards can be heavy, awkward to handle, and prone to tipping, it is highly recommended to have a second person assist you during the final mounting phase. Have your helper lift and hold the headboard in place while you align its mounting legs with the newly installed brackets. This prevents physical strain and protects your bedroom floor, walls, and the headboard itself from accidental drops or scratches.
Gently guide the headboard’s mounting slots over the bracket bolts or hooks, ensuring that both sides slide down evenly. If you are using a bolt-on system, insert the mounting bolts through the headboard legs and the brackets, repeating the washer-and-nut sequence used in the previous step. Keep these fasteners slightly loose at first so you can perform a final alignment check.
Place your spirit level across the top edge of the headboard to confirm that it sits perfectly level. If one side is slightly lower, have your helper lift that side gently while you adjust the bracket’s position within its slotted mounting holes. Once the headboard is perfectly level and centered, use your tools to fully tighten all the nuts and bolts, working back and forth between the left and right sides to ensure even tension.
Conclude the installation by performing a thorough visual and physical inspection of the entire assembly. Gently shake the headboard from front to back and side to side to check for any play or movement in the joints. There should be no visible gaps between the brackets, the bed frame, and the headboard legs, and the entire structure should feel solid and integrated.
Troubleshooting Misalignment and Wobbling Issues
Even with careful installation, you may occasionally encounter stability issues, such as a headboard that wobbles or squeaks when you move in bed. If your headboard feels unstable, the first step is to check all the nuts and bolts to ensure they have not worked loose during the final mounting steps. If the hardware is tight but the wobble persists, consider adding lock washers or nylon-insert lock nuts, which are designed to resist loosening caused by natural vibrations.
For persistent squeaks or minor gaps between metal components, placing thin felt pads or rubber washers between the headboard legs and the brackets can work wonders. These pads act as a buffer, absorbing micro-movements and eliminating annoying metal-on-metal friction. Additionally, check that the bottom feet of your headboard legs are making firm, even contact with the floor, as suspended legs can act as a lever, putting immense strain on the brackets and causing the headboard to lean.
Hole misalignment is another common hurdle, particularly when pairing headboards and frames from different manufacturers. If the mounting holes do not line up, do not attempt to force the bolts in at an angle, as this will strip the threads and weaken the connection. Instead, look into purchasing universal adapter plates, which feature a grid of multiple slots designed to bridge the gap between mismatched hole patterns. For wooden frames, you can also carefully elongate the existing holes using a wood rasp or a drill, provided you do not compromise the structural integrity of the wood.
In compact Singapore bedrooms, beds are often pushed tightly against concrete or plaster walls, which can lead to irritating knocking noises and wall damage. To prevent this, apply self-adhesive rubber bumpers or thick felt pads to the back corners of your headboard where it is closest to the wall. These bumpers cushion any movement, protecting your wall paint or wallpaper from unsightly scuffs and ensuring a quiet, peaceful sleeping environment.
Long-Term Maintenance and Safety Checks
To maintain the structural integrity of your bed setup over time, it is essential to perform routine maintenance checks at least once every six months, or whenever you move your bed to clean or rearrange your room. The natural vibrations from getting in and out of bed, tossing and turning, and changing your bedding can gradually loosen even the most securely tightened fasteners. Take a few minutes to inspect the brackets and tighten any bolts that have backed out.
Additionally, protect your investment by avoiding actions that place excessive downward or outward leverage on the headboard. Sitting heavily against the very top of a tall headboard, pulling on it to adjust your position, or allowing children to climb on it can put immense stress on the bracket joints. This leverage can bend metal brackets, strip screw holes in wooden frames, or even crack the headboard legs.
During your bi-annual checks, pay close attention to the condition of wooden bed frames, as wood is a natural material that expands and contracts with changes in humidity. Look for signs of stripped, enlarged, or cracked screw holes around the mounting brackets. If you discover that a screw has lost its grip, remove the hardware, pack the hole with high-quality wood filler or glue-soaked wooden dowels, let it cure completely, and then re-drill a fresh pilot hole for your mounting hardware.
Frequently Asked Questions (FAQ)
Can I attach a headboard to a bed frame that lacks pre-drilled holes?
Yes, it is generally possible to attach a headboard to a plain bed frame, but the method depends entirely on the frame’s material. For wooden bed frames, you can carefully drill new mounting holes through the legs or frame plates, provided the wood is thick enough to support the hardware without splitting. Always use a drill bit that matches your bolt size and check the manufacturer’s guidelines first. For metal bed frames without pre-drilled holes, drilling is highly discouraged as it can weaken the structural steel and void your warranty; instead, look for universal clamp-on brackets or consider a freestanding headboard.
How do I fix a headboard that leans forward or wobbles?
To fix a leaning or wobbling headboard, first verify that the bottom of the headboard legs are resting firmly on the floor or the base of the bed frame rather than hanging in the air. Tighten all bracket hardware, ensuring that you have used flat washers and lock washers to maintain tension. If the headboard continues to lean forward, you can install anti-rattle pads between the bracket and the headboard legs to correct the angle, or use anti-tip furniture straps to anchor the headboard securely to the wall behind your bed.
Community discussion
Share your experience or ask a question. Comments are reviewed before publication.